Workflow Description
The video above shows the complete process of creating, modifying and executing a pipeline for tracking on a single dataset. Let's break down the various steps.
Opening the Analysis panel
All segmentation operations, and the operations needed to enhance or otherwise modify the segmentation, can be built into a pipeline within the analysis panel. When we first open the analysis panel we can create new pipelines from scratch or use existing sample pipelines.
Adding pipeline operations
Pipelines are built from basic building blocks called operations. The operations are sorted into categories:
- Image processing operations allow you to modify the pixel values to facilitate the segmentation of structures of interest. To understand more about image filtering, please check our other articles on the topic.
- Segmentation is the process of creating objects from the pixel values in the image. We can extract Features from these objects to quantify differences between objects in an image and between different samples.
- Use objects: because the segmentation on its own is rarely enough to extract all the information that we want from our images, and segmentation is rarely 100% accurate, it is often necessary to take segmented objects and modify them somehow. These operations can include:
- Labelling positive or negative objects.
- Tracking objects through time.
- Identifying inter-object relationships such as parent-child relationships or distance measurements.
- ...
- Export operations allow us to generate information that can be used in other packages, including numerical results of our analysis for data analytics, masks of segmentation results for analysis in 3rd party software, and 3D surfaces of the segmented objects
Adding operations to the pipeline is as easy as clicking the + Add operations... button, searching for the operation we need, and then placing it into our pipeline by either: double-clicking the operation we need, dragging-&-dropping the operation to correct position in our pipeline, or simply typing in the Enter key for the highlighted operation.
In our pipeline above, we use a range of these operations.
Input ROI
The first operation in our pipeline is the Input ROI. This operation is included by default in every pipeline and allows us to limit the portion of the dataset to be analysed. The main effect of restricting the Input ROI is to speed up pipeline execution. This is particularly useful during the pipeline building process as we might go back and forth through the pipeline trying to optimise the parameters, but can also be used to facilitate the segmentation of very large objects (objects typically larger then 1000 pixels across), and to avoid wasting time processing portions of the image that are not of interest without the need to crop the data.
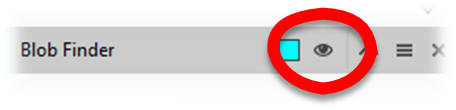
Blob Finder (Segmentation)
The Blob Finder is a popular segmentation operation that is available in arivis. It is a fairly powerful operation because it is quite robust in dealing with noise and uneven backgrounds without the need for additional image pre-processing. The exact details of how this operation works is covered in the help files which we can access by pressing the F1 key on our keyboard.
The first parameter that needs to be set in any segmentation operation is the channel from which the segmentation extracts objects. Most operation only use one channel for segmentation, but some, including the Machine Learning and Deep Learning segmenters can use multiple channel inputs.
When setting up any segmentation operation, we usually have a couple of parameters to set, and we can use the preview to help us set the correct values.
The exact values we used in this case aren't particularly important, by using the preview we can adjust the parameters until the segmentation seems optimal. If we use this pipeline with multiple images it is of course also important to use the same settings for all our images and therefore to also test on a variety of images.
Every segment operation, whether it creates de novo objects or modifies existing ones, uses tags to help us select the objects in downstream pipeline operations. The default tag is the name of the operation, which is fine as a 1st default value but likely not ideal if our pipeline contains several segmentations or object processing operations of the same type, and it is therefore recommended to change the tag to something more appropriate.
Useful tip with regards to naming: start with names that describe the process then narrow down the naming to specific object types. For example, we might start with a tag "DAPI Seg" and then use the tag "Nucleus" once all false positives have been removed.
Tracking (Using segmented objects)
The tracking operation is a typical case of an operation that uses existing objects to extract additional information. Tracking is covered more fully as a specific topic here, but for now let's look at how an operation like this works.
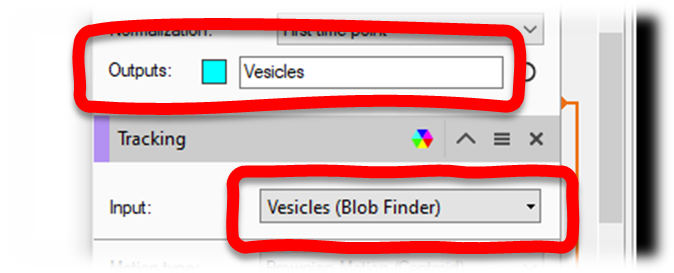
The first parameter in all these operations that use existing objects is the tag for the objects to be modified. This tag must belong to objects that were created or imported into the pipeline. So, for example, our Blob Finder operation created objects and tagged them "Vesicles" and so we can select this tag as an input for the objects we want to track:
Like the Segmentation operation that created the object applies a tag to every object it created, these Use Objects operations also apply a tag to every object they modify. In the case of tracking in particular, it applies two different to the segmented objects that it tracked, and the track type object that it creates from each group of tracked objects.
Export Object Features
Whenever we create or modify objects, the purpose is usually to extract some useful numerical value pertaining to these objects. In arivis we call these Features of the objects, and these can include values like:
- Morphological information (volume, surface area, length, sphericity...)
- Intensity values (mean, max, min etc, for any channel in the image)
- Object specific features (e.g. number of children for groups, average speed for track, number of branches for traces)
The complete list of available features is covered in the help files (User Interface>Additional Windows> View Objects> Object Features), and additional features can be created by using Custom Features. Custom Features can be used to:
- Create group statistics (feature statistics for all or just some of the children in the group)
- Create object counts for groups that include multiple children types (e.g. cells with two different labeled vesicles)
- Compute new features from existing features (e.g. ratio of intensities between 2 channels, number of children per unit volume, and many more)
The Export Object Features operation, allows us to create an excel spreadsheet containing the numerical information generated by the pipeline. In our example we exported a spreadsheet containing both the information pertaining to tracks and the tracked objects.
Store Objects
Finally, we have the Store Object feature.
As we create a pipeline we might create objects that need to be filtered out, objects that we modify into other objects, and in the end we may not need to save all of these objects. For example, we might start with a Blob Finder to segment the nuclei, but we may only want to keep the segmented objects that are large and/or round enough to be reliably identified as nuclei in the end. The Store Objects operation allows us to select which of the segmented objects we want to keep permanently beyond the scope of the pipeline.