Performing contrast limited adaptive histogram equalization (CLAHE)»
This guide explains how to apply the contrast limited adaptive histogram equalization (CLAHE) algorithm. The CLAHE algorithm partitions the images into contextual regions and applies the histogram equalization to each one. This evens out the distribution of used grey values and thus makes hidden features of the image more visible. The full grey spectrum is used to express the image. CLAHE is an improved version of AHE, or Adaptive Histogram Equalization. Both overcome the limitations of standard histogram equalization.
Opening the working dataset
- Select Open... from the file menu.

- Select the dataset from the file browser.
The dataset is a multi dimensional, discrete, representation of your real sample volume. It can be structured as a Z series of planes (Optical sectioning) of multiple channels (dyes) in a temporal sequence of time points (located in several spatial positions).
Usually, the dataset shows a single experimental situation (a complete experiment can be composed by several datasets). The datasets are available as graphic files saved in plenty of file formats (standard formats as well as proprietary formats).
Note: The dataset is visualized according to the current rendering setting parameters. Refer to the arivis Vision4D Help for more details.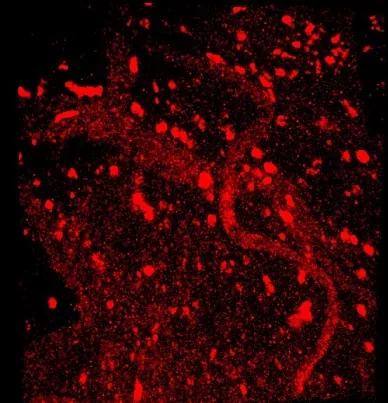
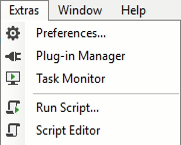
Loading the Python script
- Open Python Script Editor. From the Extra menu, select Script Editor.
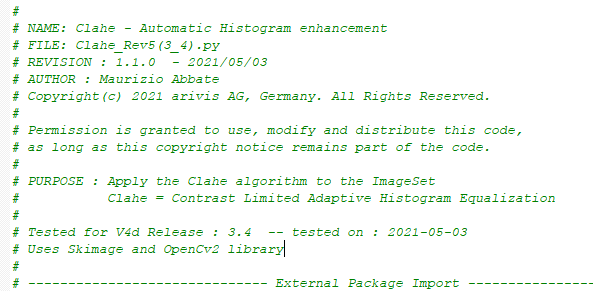
- Load the Clahe_Rev5 (3_4).py Python Script.
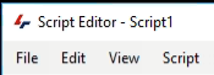
- Browse the folder on which the file has been saved.

Python script code usage rights:The user has the permission to use, modify and distribute this code, as long as this copyright notice remains part of the code itself: Copyright(c) 2021 arivis AG, Germany. All Rights Reserved.
Setting the script features
Some Clahe algorithm options can be set to optimize the results:
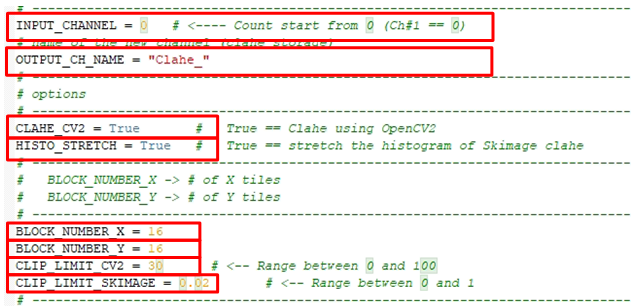
INPUT_CHANNEL: Set the source channel to be equalized. NOTE: Only one channel can be processed.OUTPUT_CH_CHANNEL: Set the output channel name.
The size used to compute the Clahe can be freely set.
CLAHE_CV2 = True: Set the OpenCV2 algorithm –Falsethe Skimage one.HISTO_STRETCH: With theCLAHE_CV2 = Falsesets the result stretching.BLOCK_NUMBER_X: Sets the number of horizontal patches (tiles) used to compute the local equlization.BLOCK_NUMBER_Y: Sets the number of vertical patches (tiles) used to compute the local equalization.CLIP_LIMIT_CV2: Sets the clipping limit, normalized between 0 and 100 (higher values give more contrast). It is applied to the OpenCv2 algorithm.CLIP_LIMIT_SKIMAGE: Sets the clipping limit, normalized between 0 and 1 (higher values give more contrast). It is applied to the Skimage algorithm.ACTIVE_FRAME: If True, the Clahe is applied only to the active time point.ACTIVE_PLANE: If True, the Clahe is applied only to the active Z plane.

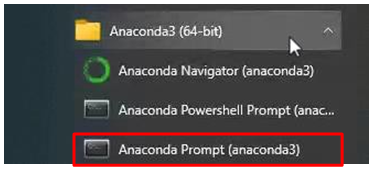
Installing the Anaconda3 package and the OpenCV module
The Anaconda3 Package and the OpenCV module are required to run the script. Please refer to the Application Note #20 for more details.
- Once the Anaconda3 package has been correctly installed, the OpenCV module can be installed too.
- From the Window menu, select the Anaconda Prompt.

- Type
pip install opencv-pythonand press return.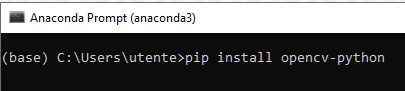
- A message confirms the correct OpenCv installation.
