Installing Docker Engine on AWS
Overview
Guidance on installing a standalone Docker Engine for Instance segmentation in the Amazon Cloud environment.
arivis Pro instance segmentation is typically performed on a local workstation using Docker Desktop. This process is discussed in the KB article here:
Installing Docker for AI Instance Segmentation
Docker Desktop is not licensed or intended for multi-session use. On a server environment, the Docker Engine must be used.
Introduction
The Docker Engine can be installed as a standalone instance, to be shared remotely as a service.
From arivis Cloud, the segmentation container is Linux based, so for both reduced costs and ease of implementation, we would recommend a Linux based distribution to host the Docker Engine.
Here is an overview of the required steps when creating the virtual machine on AWS.
Selecting size and image
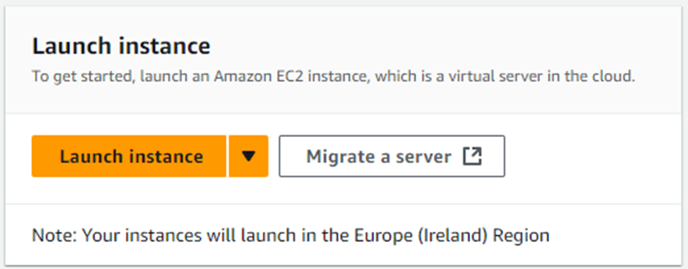
- From the EC2 Dashboard, open the Launch instance dialog.
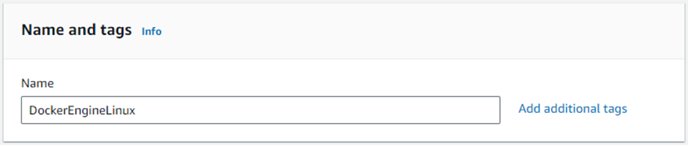
- Label the instance as wished.
- Select an OS, for example Ubuntu.
- Select an AMI with nVidia drivers contained. Here the Deep Learning Base image is selected as it contains nVidia drivers and toolkit:
https://docs.aws.amazon.com/dlami/latest/devguide/gpu.html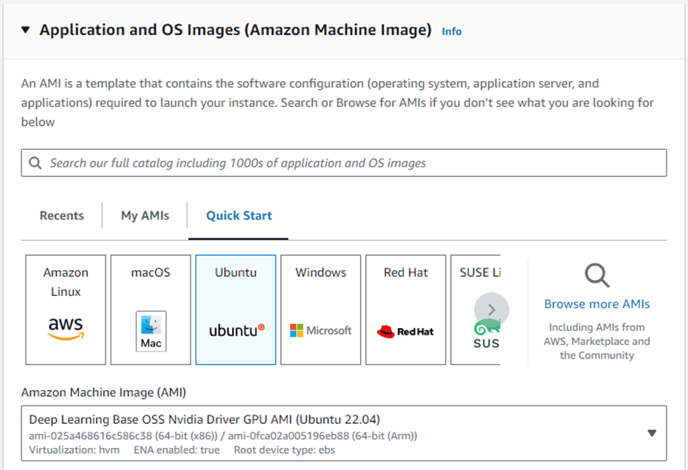
- Select an Instance type. Only certain AWS instance types have GPU. A recommended list can be found on the website:
https://docs.aws.amazon.com/dlami/latest/devguide/gpu.html
For this example, we will use a g4dn instance type: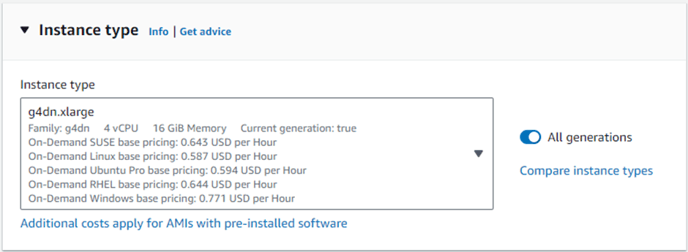
- Create your Key pair to access the instance.
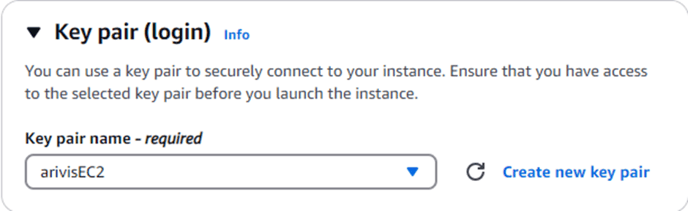
- Download the .pem file in your browser and save it as you will need it to connect to the instance.
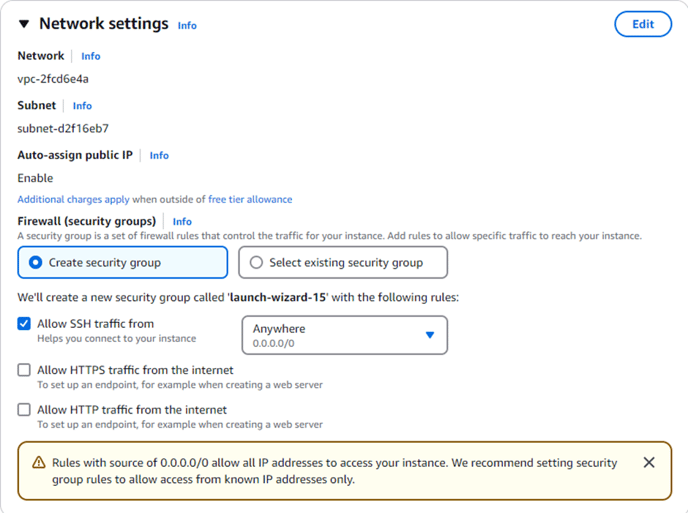
- Create your network. You may want to switch SSH traffic from Anywhere to your specific IP. Extra inbound rules can be added to the security group later if needed.
- Configure your storage. Be aware that most image models are at least 5GB in size.
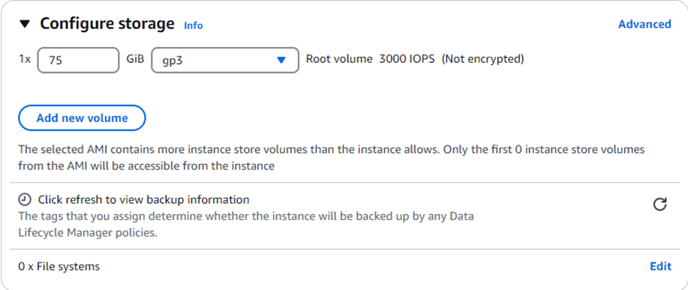
By adding the nVidia OSS image there is an extra volume.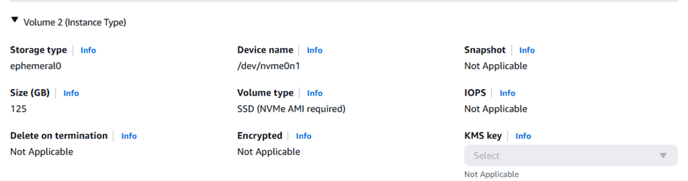
- Launch the instance.
- When started, use the key pair .pem and the default user ssh inside the instance. Use it's public IP address: ssh -i arivisEC2.pem ubuntu@<ip address>
Installing Docker Engine
Set up Docker's apt repository:
# Add Docker's official GPG key:

    sudo apt-get update

    sudo apt-get install ca-certificates curl

    sudo install -m 0755 -d /etc/apt/keyrings

    sudo curl -fsSL https://download.docker.com/linux/ubuntu/gpg -o /etc/apt/keyrings/docker.asc

    sudo chmod a+r /etc/apt/keyrings/docker.asc


    # Add the repository to Apt sources:

    echo \

    "deb [arch=$(dpkg --print-architecture) signed-by=/etc/apt/keyrings/docker.asc] https://download.docker.com/linux/ubuntu \

    $(. /etc/os-release && echo "$VERSION_CODENAME") stable" | \

    sudo tee /etc/apt/sources.list.d/docker.list > /dev/null

    sudo apt-get update
Install the Docker packages:
sudo apt-get install docker-ce docker-ce-cli containerd.io docker-buildx-plugin docker-compose-plugin
Enabling Docker Remote access
Configure remote access for Docker daemon | Docker Docs
Please note opening TCP to the Docker Engine is a security risk.
Connection to the containers can provide root access. Ensure that necessary firewall restrictions are in place to allow only expected clients. Within a Cloud environment external access is typically blocked by default but access from other machines within the virtual network need to be considered.
Edit the systemctl service override:
sudo systemctl edit docker.service
The Docker instructions specify using 127.0.0.1, which will only bind to the localhost interface. To permit external connections, 0.0.0.0 will listen on all interfaces, you can modify this to a specific interface IP as required.
Add these lines between the top comments:
[Service]

    ExecStart=

    ExecStart=/usr/bin/dockerd -H fd:// -H tcp://0.0.0.0:2375
Save the file (CTRL+X) and reload the systemctl configuration.
sudo systemctl daemon-reload
Restart Docker
sudo systemctl restart docker.service
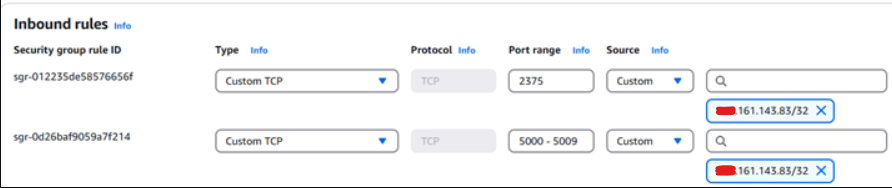
Within AWS the VM Security Group settings must receive a new port rule to allow 2375 from any specific clients that need to connect. Also a port range for the containers is required (if 10 containers may run in parallel, use 5000-5009):
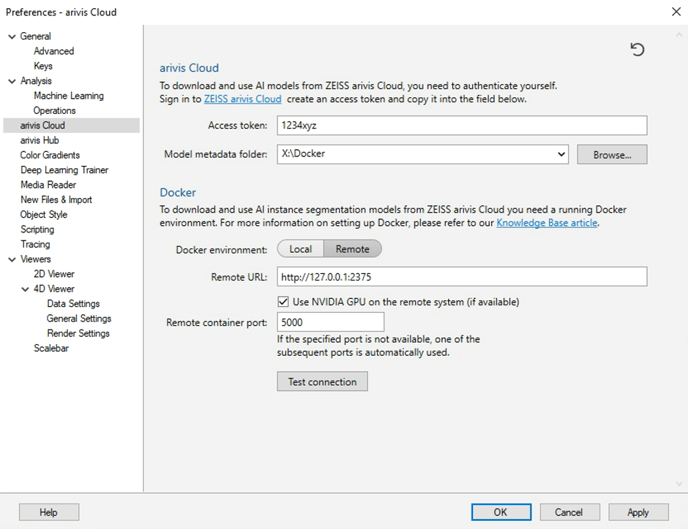
Configuring arivis Pro to use Remote Docker Engine
- Create an access token in arivis Cloud.
- Copy the access token and paste it into the Access token field.
- Inside the Remote URL field, select your server IP.
- Click Apply to end the configuration.
Last updated: 2025.02.18
Code snippets were used from the links provided at the time of writing. Check the contained links for updates to any presented commands.