Tracking in Vision4D
Background and integration of tracking systems in arivis Vision4D.
See also
Introduction
Object tracking is the process of identifying objects and features and measuring changes in these objects over time. It is different from looking at a simple before/after, 2-timepoint dataset and measuring macro changes. Instead, tracking focuses on dynamic changes of specific objects through a series of consecutive time points to better understand dynamic processes affecting the changes that can be seen from start to finish.
Tracking systems take a series of images taken over multiple time points, and then try to identify the same specific objects or features from one time-point to the next so that we can measure and monitor specific changes.
Examples of tracking applications include:
- Calcium ratio experiments - We monitor fluorescence intensity changes between cells
- Contact analysis - We track specific cells and try to identify the frequency and duration of contact events with other structures in the image, like blood vessels or other cell types
- Lineage tracking - Monitor where embryonic cells are, how often they divide and where the children of these divisions go
- Wound healing - Measure the speed at which cells migrate to close a gap between to separate cell tissues
And many others besides. But what all these applications have in common is that we are monitoring how a specific feature (wound area, velocity, intensity, etc) changes over a time series.
The process of track creation can generally be considered as two separate processes:
- Identifying and marking specific objects or features
- Correlating these objects over the course of the time series to create a special group we call a track.
Both of these tasks can be carried out in a variety of ways depending on the specific application.
For example, object recognition can be done through automatic segmentation of an image, or it could be done by creating a simple region of interest and duplicating that region over all the available time points. Tracking can be done manually by a user making interpretations of the image data, or algorithmically by identifying segmented objects from one time-point to the next.
With this in mind, the tracking accuracy is highly dependent both on the ability to recognize the same object accurately from one time-point to the next, and the ability to recognize the objects in each time point individually in the first place. Both of these are highly dependent on the quality of the image data and the sampling frequency.
Image quality
Because tracking is dependent on the ability to recognize objects over time, it is first, and foremost, dependent on the ability to recognize objects. This means that the image quality must be good enough for segmentation algorithms to work, or at the very least for manual identification of objects by the user.
Segmentation itself is the process of identifying which pixels in an image are part of objects, and also of identifying which pixels belong to which object so that touching objects can be separated. The simplest form of image segmentation is known as thresholding. This is where we set a rule that all pixels with an intensity either above or below a specific threshold are classified into the Objects pixel class, and the rest are classed into the Background class. Then we can just say that contiguous groups of pixels are individual objects.
Several aspects of images can make this process more or less difficult. For example, a noisy image will have a lot more punctual variation that could end up with a lot of single-pixel objects or very rough object outlines. Also, some modalities can be particularly better or worse suited for segmentation. Fluorescence images are generally easier to segment compared to phase contrast or DIC images.
This image, for example, is quite challenging for segmentation using thresholds. There are variations of intensity inside what might be considered objects that could cause the head and tail to be separated. The objects themselves are out of focus so their boundaries are imprecise which could lead to difficulties in separating objects in close proximity, and there are big variations in the background intensity which could make a simple threshold difficult with some pre-processing.
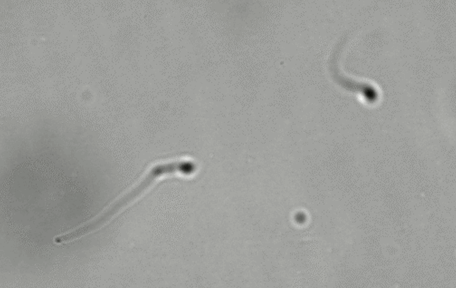
The same sample images under different conditions (e.g. darkfield illumination) could make the segmentation comparatively much easier.
Sampling resolution
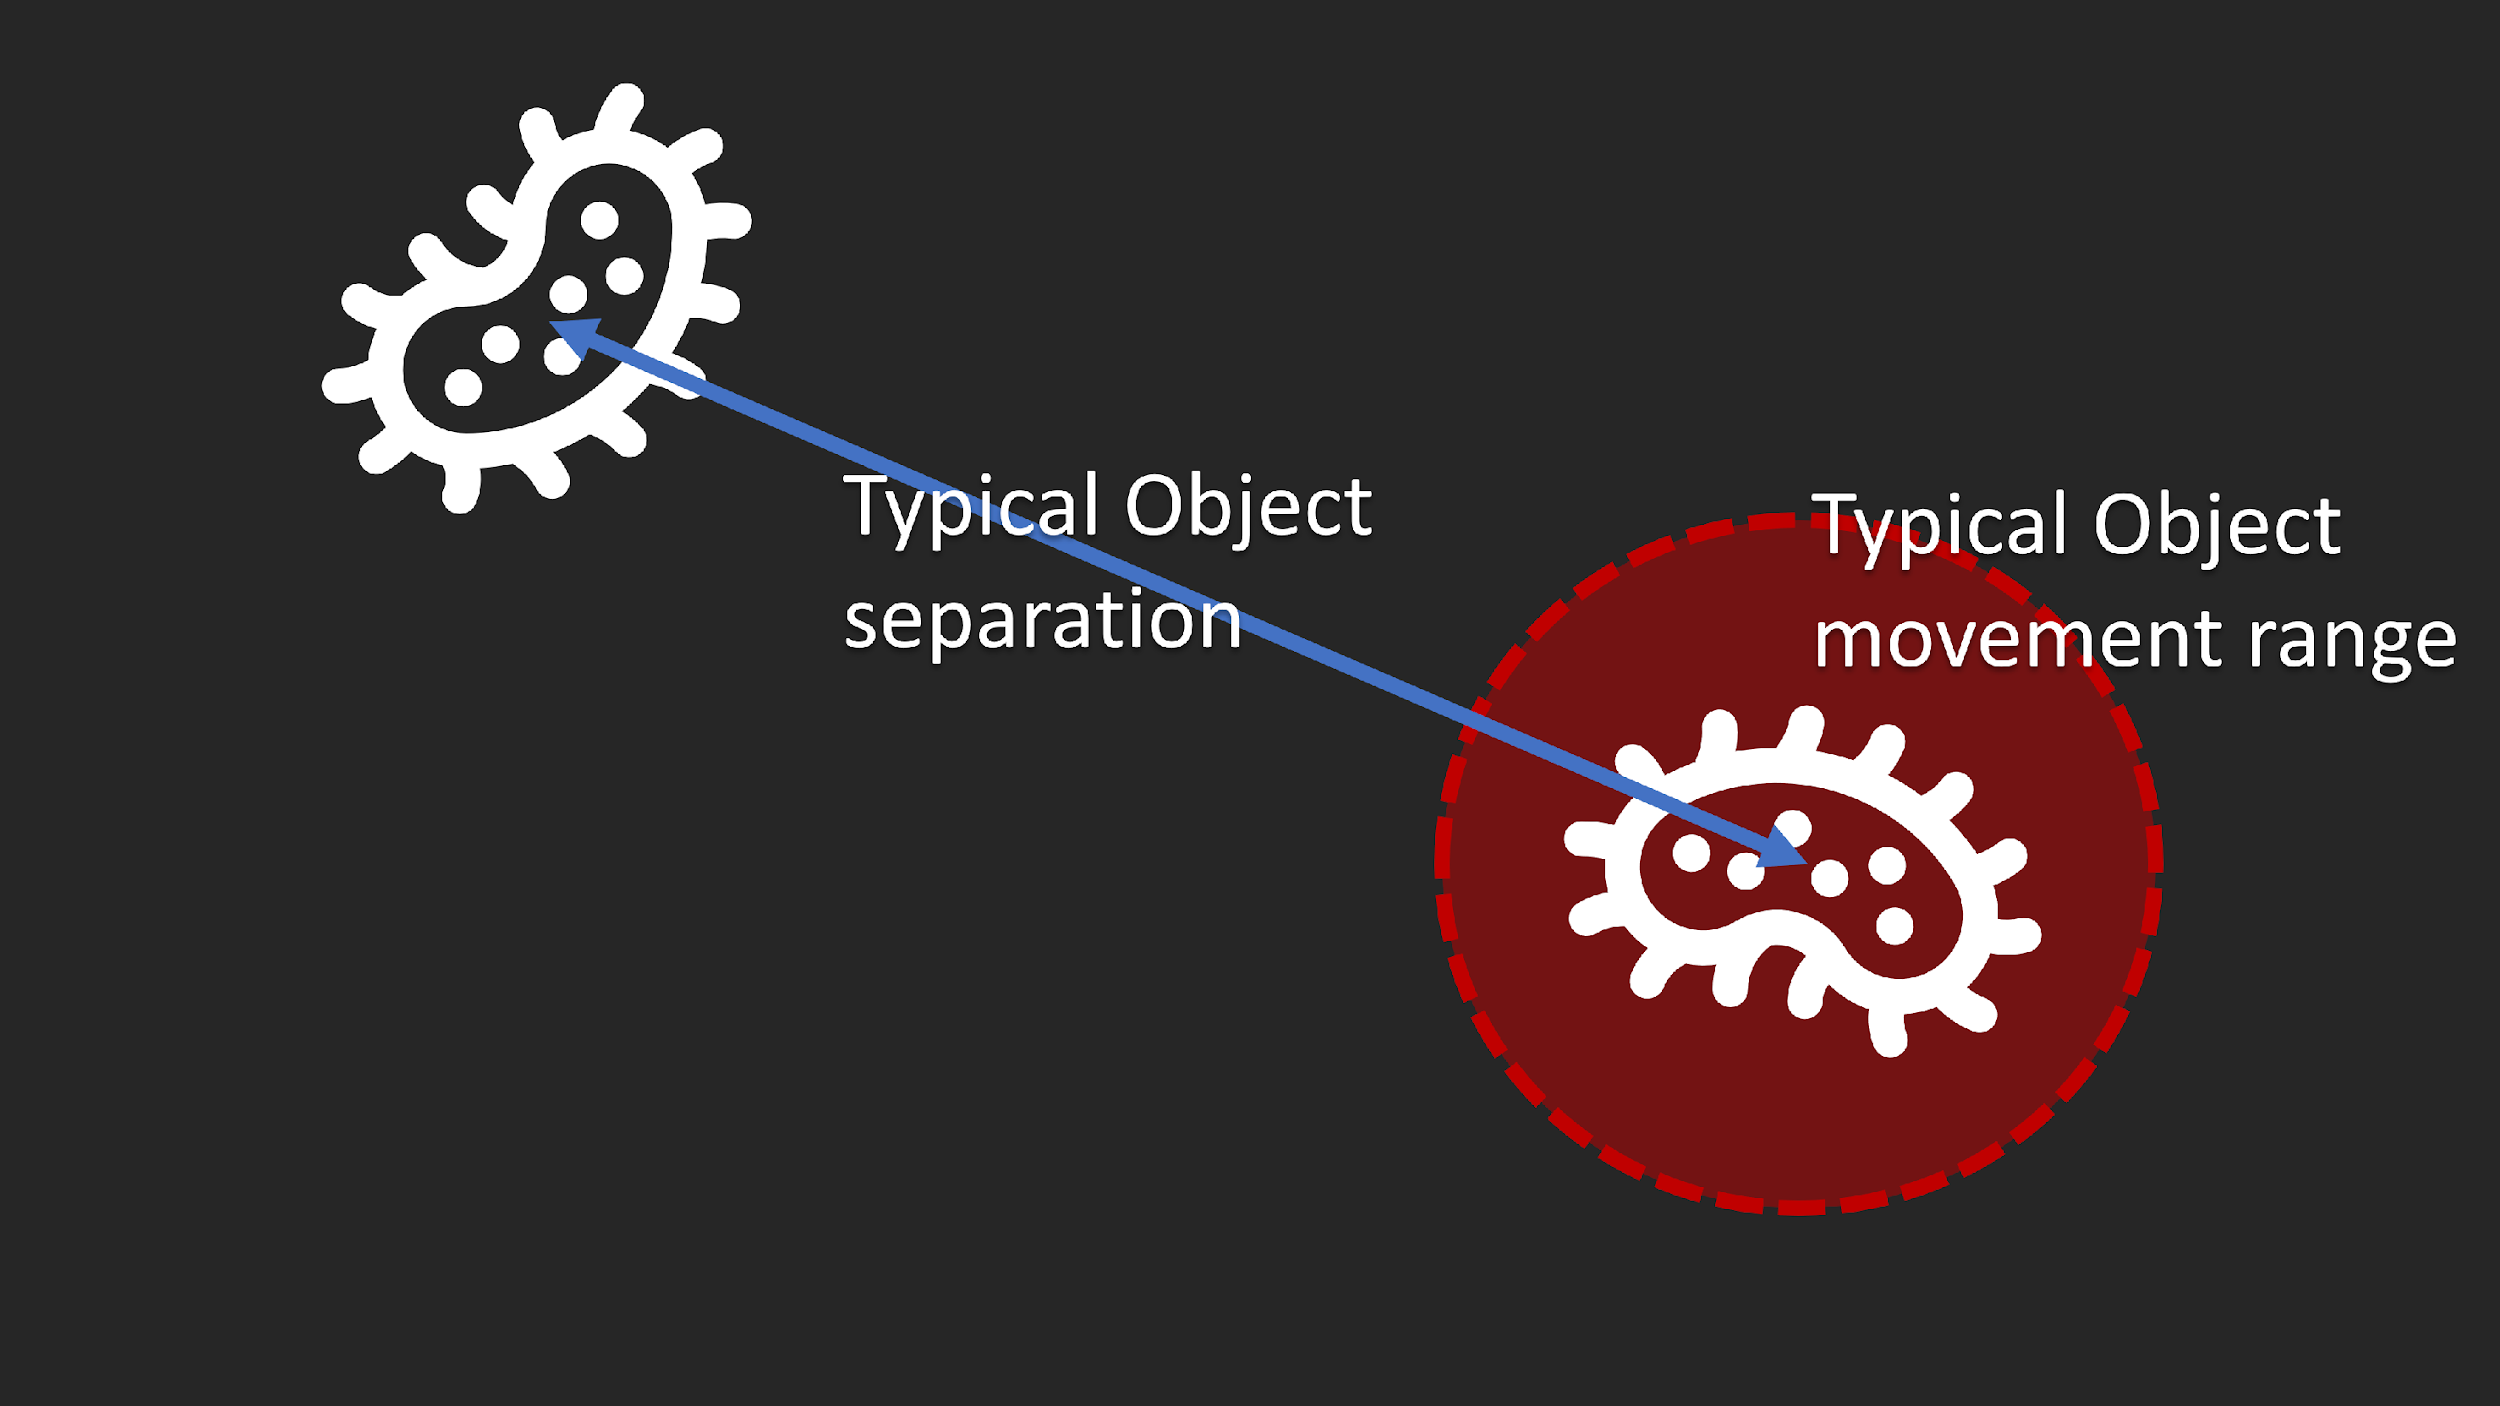
Along with image quality being a very significant factor in segmentation, sampling resolution is also critical for correct tracking. If the movement is too great compared to the typical object separation, correct identification of movement can be challenging or even impossible.
If, however, we can increase the acquisition frequency so that the movement from one time-point to the next the confidence in the correct identification of tracks improves significantly.

As a rule of thumb, it is generally preferable to take images frequently enough that the typical movement of objects from one time-point to the next is no more than 20% of the typical distance between neighboring objects.
Similarly, in cases where we are looking to monitor intensity changes, it's important to take images frequently enough to measure those changes accurately. If those changes are rhythmical or affected by rhythms in the sample (e.g. heartbeats), the acquisition frequency for each time-point should be at least 4 times higher than the frequency of changes in the sample.
All this taken together means that in many cases tracking will not be possible and looking at macro before/after changes may be the most suitable type of analysis. Also, in many cases, the sampling frequency needs, coupled with the exposure time needed to capture images of sufficient quality may restrict the acquisitions to single planes thereby limiting the ability to measure changes in 4D.
Reviewing Tracking results
Once the tracking parameters have been set as needed the operation can be run and the segmented images will be analysed to create tracks. The outputs are:
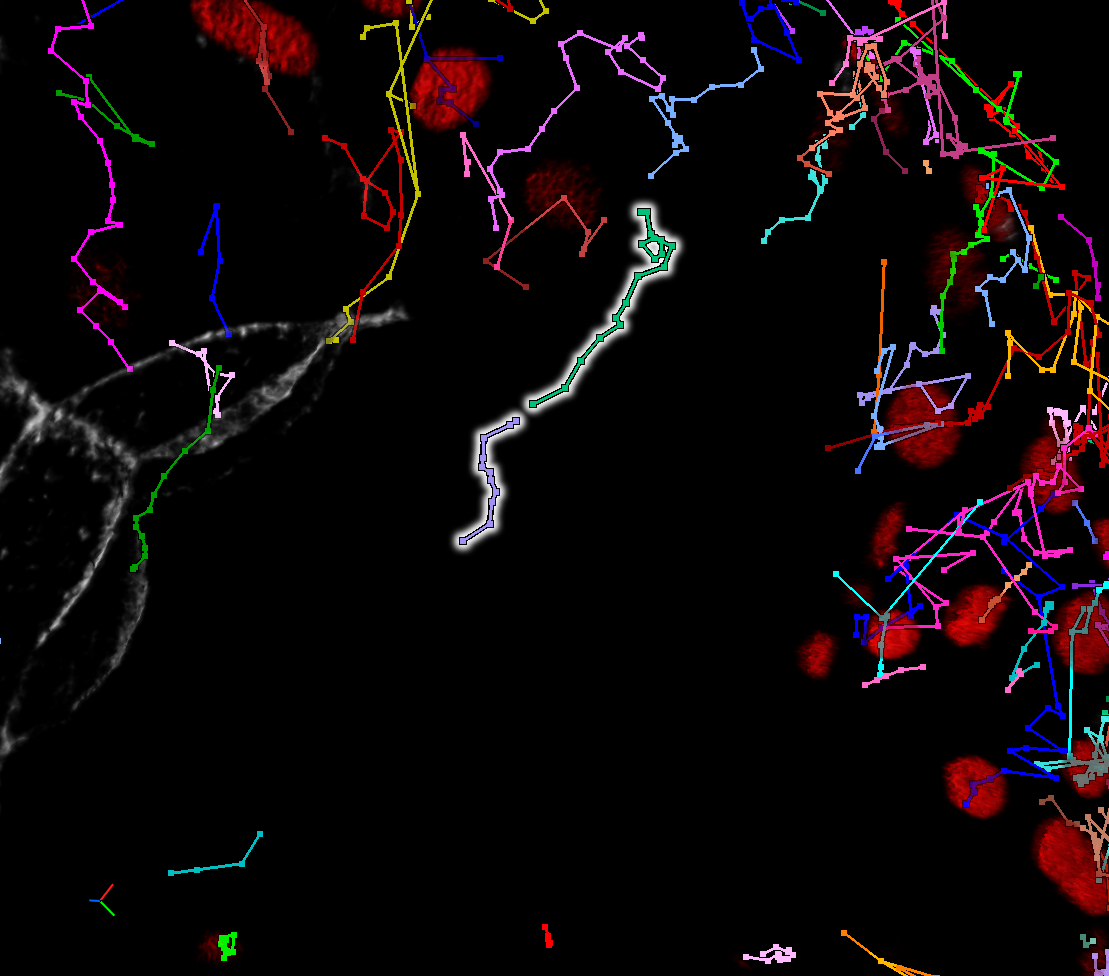
- A visual representation of the tracks on the image that allows the users to evaluate visually whether the results are correct
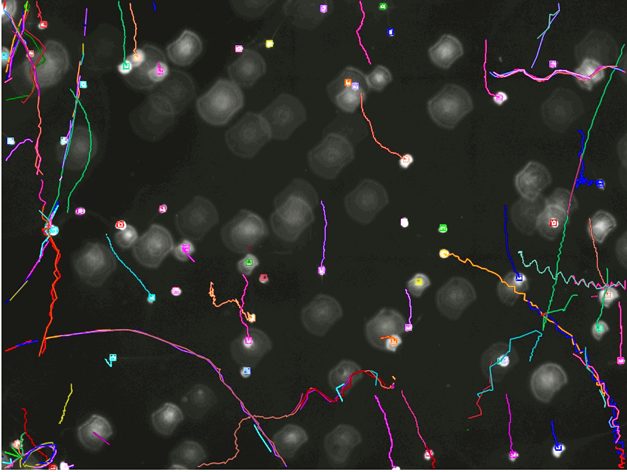
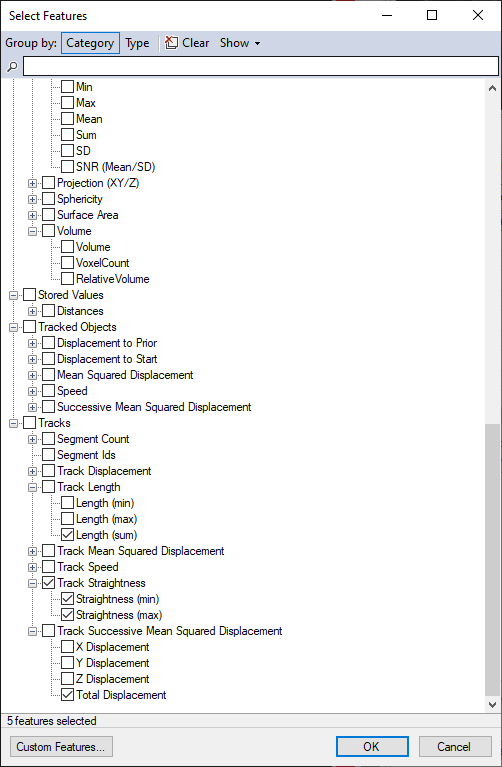
- Entries for each track in the Objects table where the users can review specific features of the tracks, including features of the tracks (displacement, duration, number of segments in the track, etc), and features of the segments in the tracks sorted by the track they belong to.
This enables the user to do a few things.
First, if the tracks appear wrong we can revert the tracking operation, change the parameters so as to try and improve the results, and run the operation again. If no good tracking parameters exist because the image doesn't provide good automatic tracking conditions, manual correction of the tracks is also possible.
Secondly, the objects table can be configured to display features of the tracks and their segments. Since the tracks are essentially groups of objects it is often best to switch the Objects table display to the Master/Detail view, which shows the tracks in the upper table and the segmented objects in those tracks in the lower table.
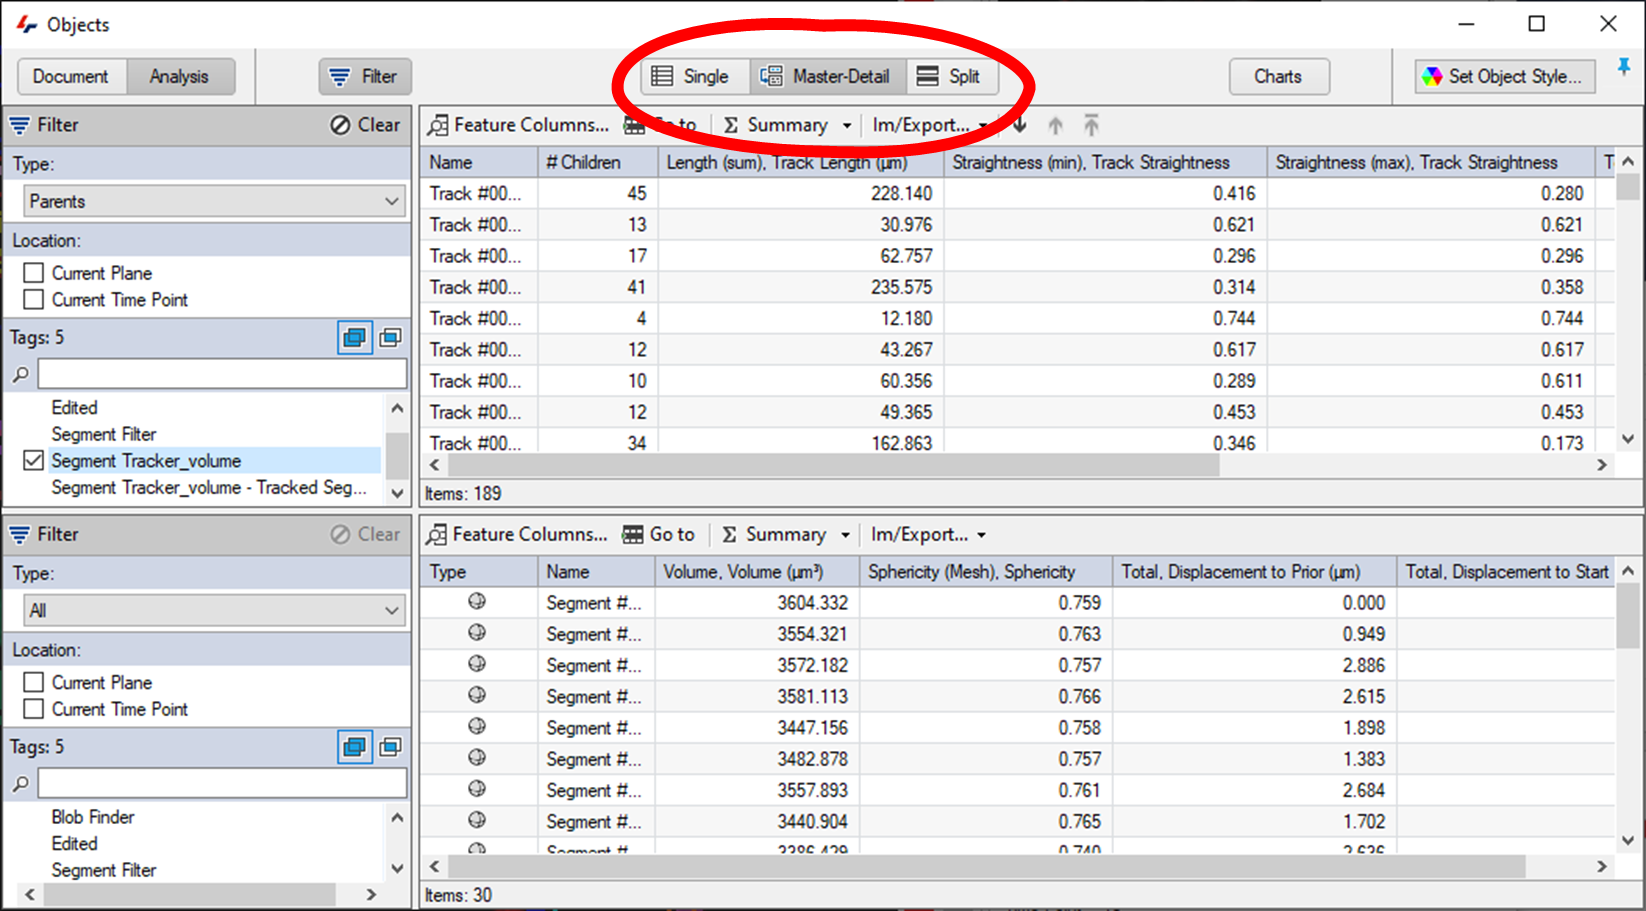
Each table can then be configured individually to show pertinent information for both tracks, and the segments in those tracks.
Finally, the results can be exported, either as a pipeline operation, or from the Object window's Im/Export... menu.
Editing tracks
The tracking tools in arivis Vision4D are very good, but tracking results are unlikely to be perfect. A range of options are available if the results of the tracking operation are unsatisfactory:
- The first preferred option should be to try and improve either the segment detection parameters or the tracking parameters. Improving the results for the automated tracking reduces the time required to do the analysis and reduces the need for manual interaction.
- If neither the segmentation nor the tracking can be improved any further it may be that improving the acquisition to facilitate the analysis may be the next best option.
- Of course, acquiring new data is often not practical, and in any case, the acquisition results may be the best that are technically achievable, and in that case, manually editing the tracks is also a possibility.
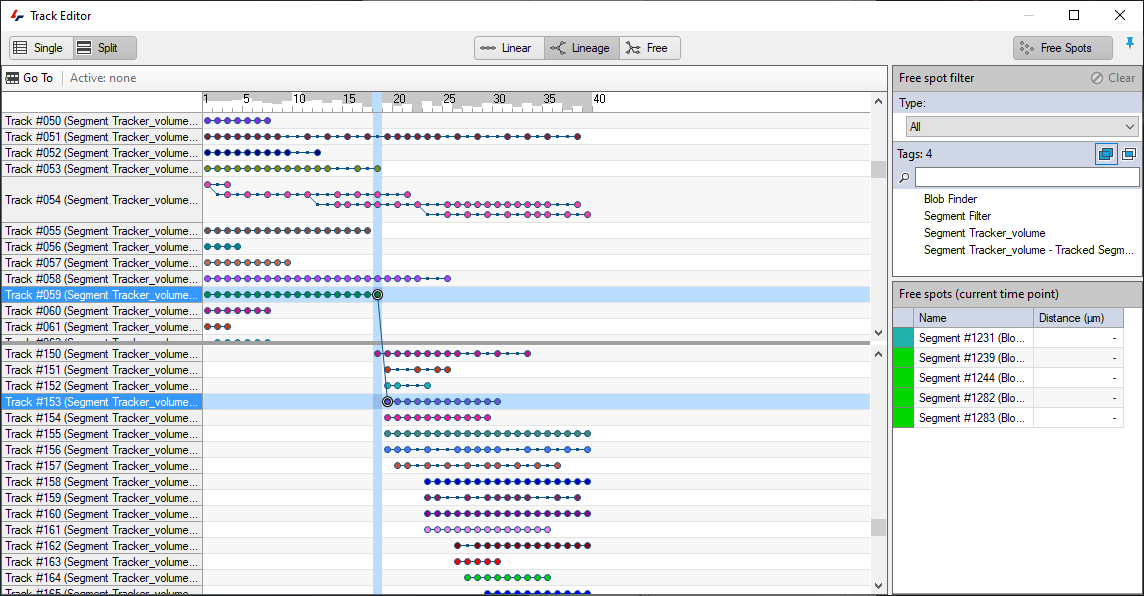
The Track Editor can be found in the Objects menu.
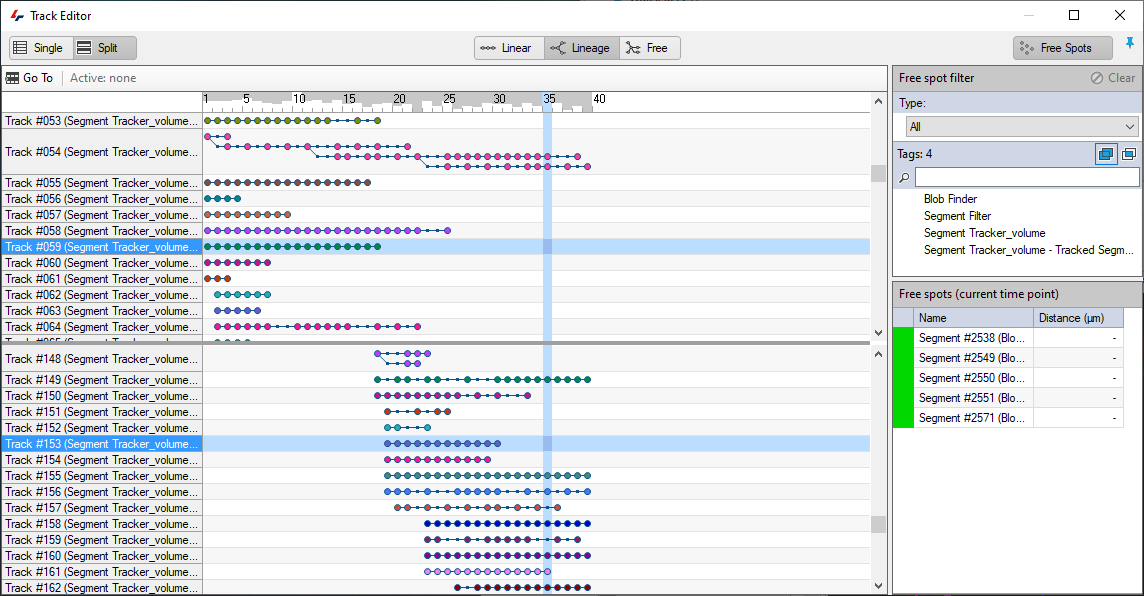
In the Track editor, users can link, split, and merge tracks, as well as assign segments to tracks if they were missed, or manually remove individual segments incorrectly assigned to a track.
In this example, we have two tracks that appear like they should be connected but are not:
In such cases, the first thing to do is double check that they are indeed tracks that should be connected as it could be that they only appear so due to the current visualisation parameters. Tracks could appear to be connected but shouldn't be because:
- The perspective suggests a continuation but a different angle would reveal otherwise.
- The two track segments may be temporally divergent and playing back through time to reveal the segments might reveal that they are not in fact connected.
Once the connection is confirmed, editing the tracks is as simple as drawing a line between the last time point where the track was correct, and the next time point.

Further details on track editing are available in the help files.
Summary
- Optimize your segmentation as much as possible. Tracking is dependent on segmentation results and the better these are, the more accurate the tracking will be.
- Try different parameters to see which work best for your data, especially with regards to the motion types.
- Only use what you need:
- Reduce the search radius to avoid big jumps in the tracks.
- Only use weighing if the segments don't change shape/intensity much over time.
- Don't allow fusions or divisions unless this is necessary.
- Avoid manual editing tracks to reduce the time required to do the analysis and reduce user biases.
- Consider using VR for manual track editing and creation is automated 4D tracking doesn't work for your images.