Settings and Image Acquisition with the Light Microscope
Before acquiring an image with the light microscope and using it for correlative microscopy, it is necessary to make general settings e.g. stage calibration, camera orientation, calibrating objectives and setting the correct scaling. Please notice that we do not describe all these topics within this guide as we focus on the Shuttle & Find workflow only.
Furthermore we will not describe basic functionality of the software in this guide, like program layout or general image acquisition topics.
See also
Mounting the Sample Holder to the LM
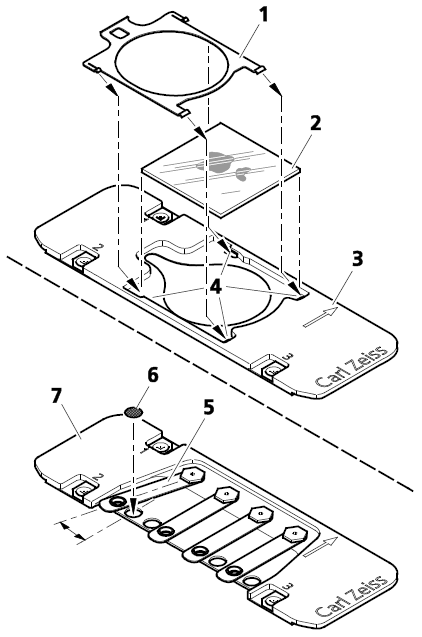
- Place the cover glass (2) in the suitable sample holder and fix it.
- In case of using the holder Life Science Cover Glass 22x22:
- Remove the clamping frame (1) using tweezers.
- Insert the cover glass (2) in the sample holder (3).
- Slide in the clamping frame into the sample holder until the clamps are clicking into place (4).
- In case of using the holder Life Science for TEM grids:
- Lift the spring of the appropriate position and turn it sidewards (5).
- Insert the TEM grid (6) into the provided holding spot of the holder and fix it with the spring (7).
-
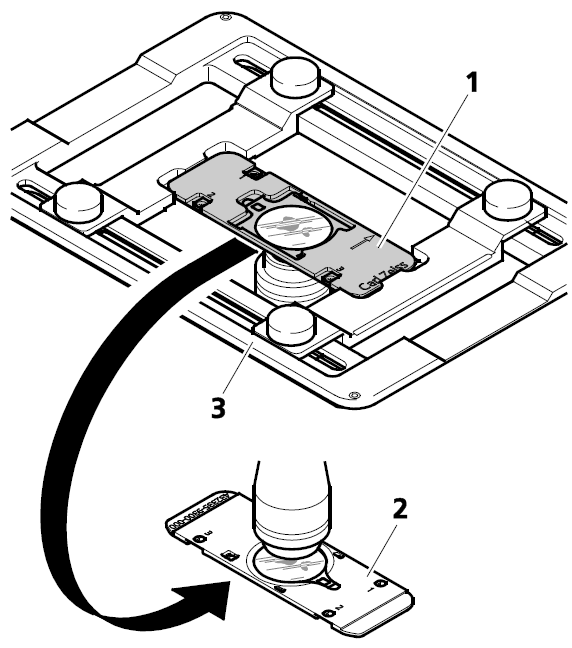
- Insert the sample holder (1) into the mounting frame of the microscope stage in the following way:
- For inverted stands, see (3).
- For upright stands, see (2).
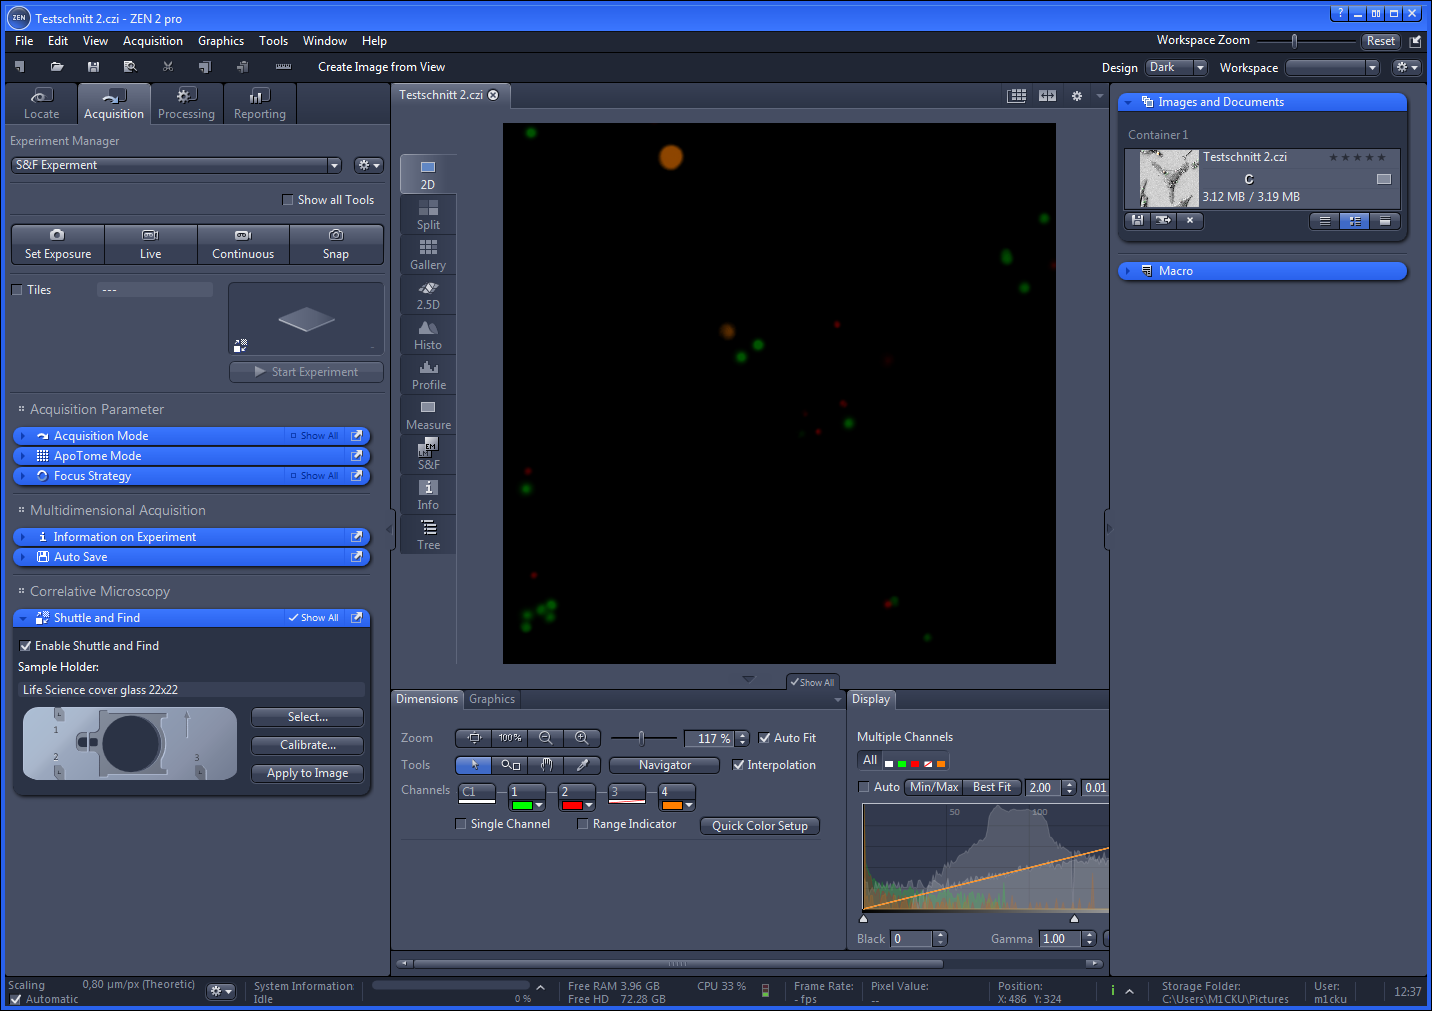
Starting the LM Software
For correlative microscopy with light microscopes ZEN software has to be installed. In addition you need to licence the Connect toolkit.
- To start the software double click on the ZEN program icon on your desktop.
- The software starts now.
- In the Left Tool Area switch to the Acquisition tab and activate Shuttle & Find.
- Open the Shuttle & Find tool.
- You have successfully started the software. Now you can start working with the Shuttle & Find module.
Selecting the Sample Holder
- You have activated Shuttle & Find in the Experiment Manager.
- You are in the Shuttle & Find tool.
- Click on the Select… button to open the Select Template dialog and to choose the correlative holder you want to use. Different types of correlative holders are available, see Appendix Correlative Sample Holders
- In the Select Template dialog select the correlative holder you want to work with. If you want use your own sample holders, click on the Add button
 below the list and follow the instructions in the chapter Defining a new sample holder template.
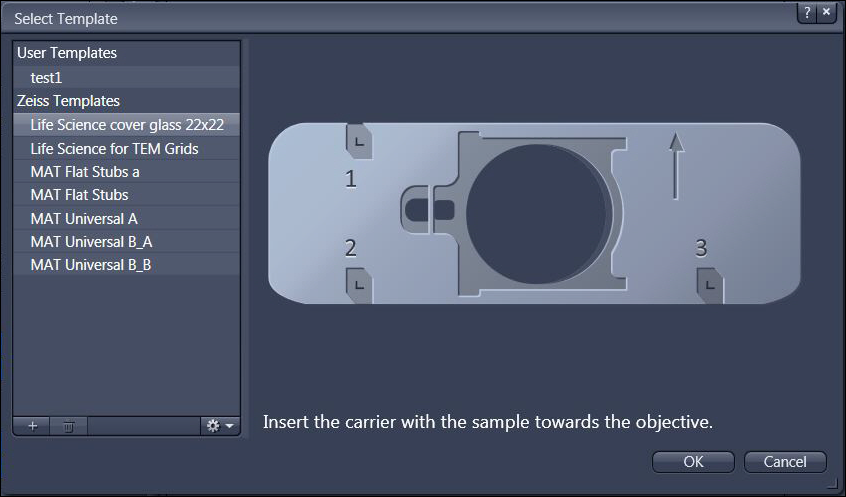
- Click on the Ok button to close the dialog.
- You can now continue with the calibration of the sample holder, like it is shown in the chapter Calibrating the sample holder. The calibration of the sample holder is mandatory to acquire images.
Defining a New Sample Holder Template
With this dialog you can define new correlative holders in addition to the existing holder templates. It is not mandatory to use correlative holders from ZEISS. User-defined correlative holders with 3 fiducial markers can be used as well.
- To open the dialog click on Add in the Select Template dialog. This dialog can be opened via the Shuttle & Find tool.
- The New Template dialog opens.

- Type in a name for the new holder or sample carrier. An image of the new holder can be loaded as well.
- Insert the distances (in millimeters) between the first and the second marker and between the second and third marker.
- The distances can be determined using the Stage Control dialog accessible via the Light Path tool in Right Tool Area tab. We recommend doing this before starting the New template dialog. Write down the distances to be prepared to enter them within the New Template dialog.
- Activate the live view in the Center Screen Area by clicking on the Live button in the Locate tab.
- Navigate the stage manually to the calibration marker on the sample holder by means of the joystick and note the x/y-coordinates of the marker.
- Repeat this procedure for all three markers and calculate the distances between marker 1 and marker 2 and between marker 2 and marker 3, respectively.
Acquiring the LM Image
Basically image acquisition is performed as you are used to do it within ZEN software. The file format for Shuttle & Find data is the common *.czi file format. Saved images can be loaded in ZEN via the menu File > Open.
After image acquisition the next step in the correlative workflow is to define/draw in ROIs/POIs in your image. Therefore you can use the Region tools on the S&F tab, see Regions, Find and Dimensions.