Installation & Setup
Compatible Cameras
The table below displays which cameras are compatible to the software.
Compatible ZEISS Axiocams
|
Camera |
Connection |
|---|---|
|
Axiocam 105 color |
USB 3.0 |
|
Axiocam 202 mono |
USB 3.0 |
|
Axiocam 203 mono |
USB 3.0 |
|
Axiocam 208 color |
USB 3.0 |
|
Axiocam 212 color |
USB 3.0 |
|
Axiocam 305 color / mono |
USB 3.0 |
|
Axiocam 503 color / mono |
USB 3.0 |
|
Axiocam 506 color / mono |
USB 3.0 |
|
Axiocam 512 color / mono |
USB 3.0 |
|
Axiocam 702 mono |
USB 3.0 |
|
Axiocam 705 color / mono |
USB 3.0 |
|
Axiocam 712 color / mono |
USB 3.0 |
|
Axiocam 807 color / mono |
2x USB 3.0 |
|
Axiocam 820 color / mono |
2x USB 3.0 |
Other, compatible cameras
|
Camera |
Notice |
|---|---|
|
PrimoStar HD |
USB only, not via network connection |
|
Primovert HDcam |
USB only, not via network connection |
|
Hamamatsu: Orca Flash 4.0 V3 CL/USB3.0, Orca Flash LT USB3.0, Orca Fusion, Orca Fusion BT |
|
|
Roper Photometrics: Prime 95 B, 95B 22mm, Prime BSI, Prime BSI Express |
|
|
PCO: edge 5.5 CL, edge 4.2 CHLS USB3.0, edge 4.2 bi, edge 4.2 CL, edge 4.2 LT |
Changes to the Operating System
NOTICE

Installation of software, hardware drivers, changes to operating system settings or other system interference beyond the actions needed to operate the software are always in the responsibility of the customer, because the potential impact cannot be estimated.
The following modifications have, in our experience, no effects on the functionality of the PC system:
- Network integration
- Installation of security software/antivirus software (highly recommend if your PC is attached to a network)
- Logon as Domain Users in an Active Directory environment (possibly with local administrator privileges if user needs to install software)
- Installation of standard software (e.g. Microsoft Office)
- Installation of printers
- Windows automatic updates and third-party software updates (Windows Service Packs are to be considered different)
- Information about allowed Windows service packs can be found in the corresponding system requirements for Windows.
Effects of following modifications cannot be estimated:
- Modifications in the Windows operating system
- Implementation of group policies and scripts
- Installation of third-party software with hardware support
- Installation of third-party software for generating large data rates (such as backup software) due to possible performance problems of the simultaneous operation of Fast Acquisition Systems
- Storage of data on network drives by redirecting folder structures (e.g. there can occur performance problems in case of Fast Acquisition systems or limitation of the available data storage capacity (disk quota))
If problems occur, the system can be restored to the state of delivery by a ZEISS service technician.
Installing ZEN
NOTICE
- The installation of ZEN and other components is performed using the ZEISS Microscopy Installer. Download the ZEISS Microscopy Installer in the ZEISS Portal from the Download Center under https://portal.zeiss.com/download-center/softwares/mic.
- Do not install an older ZEN version over a newer ZEN version.
- If ZEN is already installed on your PC, during installation the current version will be uninstalled first.
- Depending on your PC configuration, the system requests an optional restart at the beginning of the installation.
- The system requests a restart at the end of the installation. This restart is required for the successful camera driver installation. You can postpone the restart until all components selected in the ZEISS Microscopy Installer are installed. After restart of the computer, reopen the ZEISS Microscopy Installer to install remaining components.
- In case of installing ZEN on a SEM system, make sure that SmartSEM is not running when installing ZEN.
- You have read the chapter Configuration of Security Software attentively.
- Your system is connected to the Internet.
- You have opened the ZEISS Microscopy Installer with admin rights and you are logged in.
- You have selected (default setting) the online installation, see ZEISS Microscopy Installer manual.
- Open the Install tab.
- The available products are displayed.
- On the left, select ZEN with the respective version number.
- The available components and tools for installation are displayed on the right side.
- On the right side, activate all components you want to install.
- If the 3rd party Python Tools are not installed, the machine learning functionalities of Intellesis Object Classification will not work. This also includes the use in other parts of the software.
- If Docker Desktop is not installed, you cannot use containerized features. If you want to use functionality with systemwide Docker containers, you also need to activate the respective entry to install the containers.
- Activate I agree to the Terms and Conditions of the selected software and click Install.
- The selected components are downloaded and installed. The status is displayed in the ZEISS Microscopy Installer.
- After successful installation, close the ZEISS Microscopy Installer and restart your PC to complete the installation.
- After the restart of your computer the installation was successful. Start the software by clicking on the ZEN icon on your desktop.
- If you install ZEN on a computer for a SEM system, continue with Installing Remote API Client (for SEM systems).
Installing Docker Desktop with ZEISS Microscopy Installer
Installation Not Possible for Existing .exe Versions of Docker
If you want to install Docker Desktop with the ZEISS Microscopy Installer but already have a Docker Desktop version that was installed with an .exe file, for example from Docker directly, the installation is not possible.
- You first have to uninstall the version manually. Note that this uninstallation deletes existing Docker images!
The ZEISS Microscopy Installer allows you to install Docker Desktop for your software application. Docker Desktop is needed when you want to use containerized features like AI models for instance segmentation. For additional information and possible requirements, see Requirements for Docker Desktop. The ZEISS Microscopy Installer installs Docker Desktop for WSL2.
- Your system is connected to the Internet.
- You have opened the ZEISS Microscopy Installer with admin rights and you are logged in.
- You have selected (default setting) the online installation, see ZEISS Microscopy Installer manual.
- Open the Install tab.
- The available products are displayed.
- On the left, select ZEN with your respective version number.
- The available components and tools for installation are displayed on the right side.
- On the right side, activate Docker Desktop.
- The component is selected for installation.
- Activate I agree to the Terms and Conditions of the selected software and click Install.
- The selected components are downloaded and installed. The status is displayed in the ZEISS Microscopy Installer.
- After successful installation, close the ZEISS Microscopy Installer and restart your PC to complete the installation.
- After the restart of your computer the installation was successful.
Installing Remote API Client (for SEM systems)
To enable communication between SmartSEM and ZEN, the RRemote Client has to be installed on the SEM system as well. After the ZEN software is installed, install the RRemote Client.
- You have read the chapter Configuration of Security Software attentively.
- Your system is connected to the Internet.
- You have opened the ZEISS Microscopy Installer with admin rights and you are logged in.
- You have selected (default setting) the online installation, see ZEISS Microscopy Installer manual.
- You have closed SmartSEM and EM Server.
- Open the Install tab.
- On the left, activate ZEN with the respective version number.
- The available components and tools for installation are displayed on the right side.
- On the right side, activate SmartSEM Remote API.
- Activate I agree to the Terms and Conditions of the selected software.
- Click Install.
- The download starts. The progress is displayed in the installer.
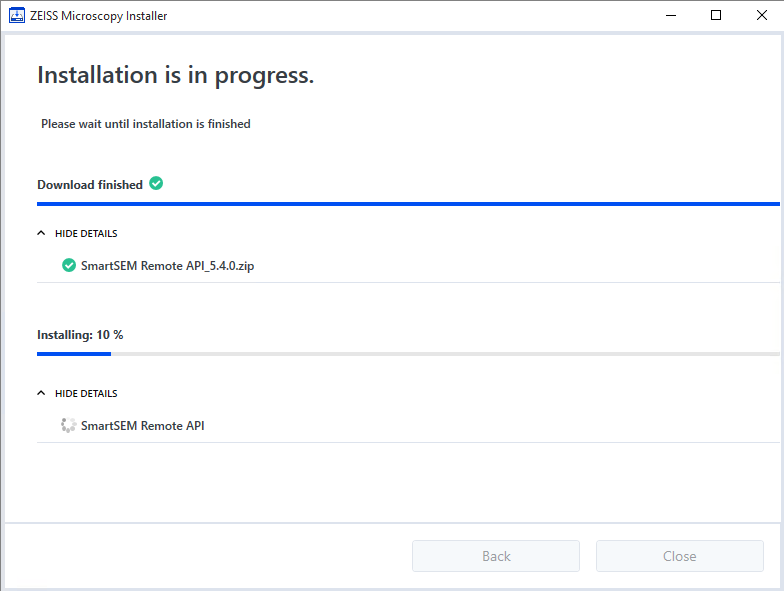
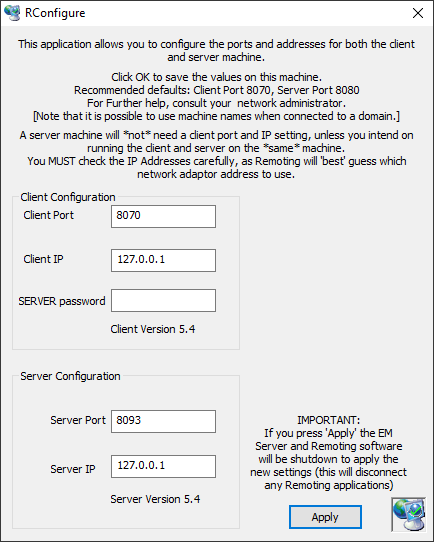
- After the download, the installation starts. Several installation dialogs are displayed, but no action is required. Wait until the different windows have disappeared. After the installation procedure you can check the configuration with the tool RConfigure (open from Windows Start menu).
- You have successfully installed the Remote Client on your SEM system. You can test the program with the Desktop-App SmartSEM API Test.
Installing MATLAB for Correlative Array Tomography
If you have bought the CAT Module (Correlative Array Tomography) the installation of MATLAB Runtime is mandatory on both computers (SEM and LM system). Proceed as follows:
- You have read the chapter Configuration of Security Software attentively.
- Your system is connected to the Internet.
- You have opened the ZEISS Microscopy Installer with admin rights and you are logged in.
- You have selected (default setting) the online installation, see ZEISS Microscopy Installer manual.
- Open the Install tab.
- On the left, activate ZEN with the respective version number.
- The available components and tools for installation are displayed on the right side.
- On the right side under Third Party Tools, activate MATLAB Runtime with version number 2015b 9.0.
- Activate I agree to the Terms and Conditions of the selected software and click Install.
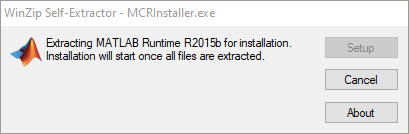
- The download of the necessary files starts.
- After the download, a WinZip Self-Extractor window opens and the files are extracted.
- After the extraction, MATLAB Compiler Runtime Installer opens.
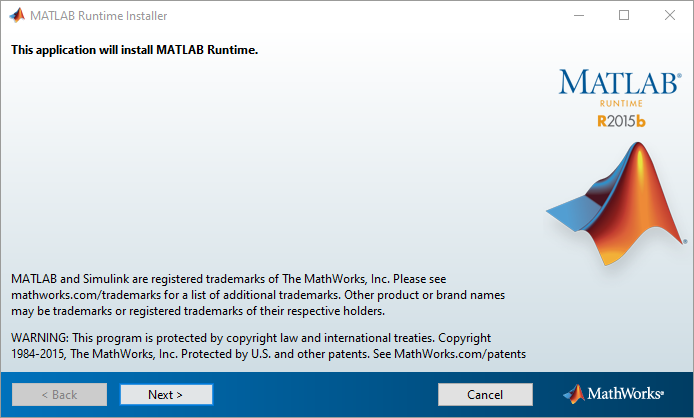
- Click Next.
- The License Agreement dialog is displayed.
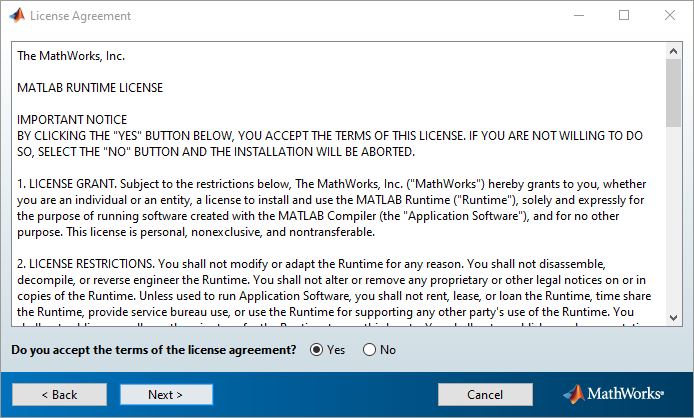
- Accept the License Agreement by activating Yes, then click Next.
- The Folder Selection dialog is displayed.
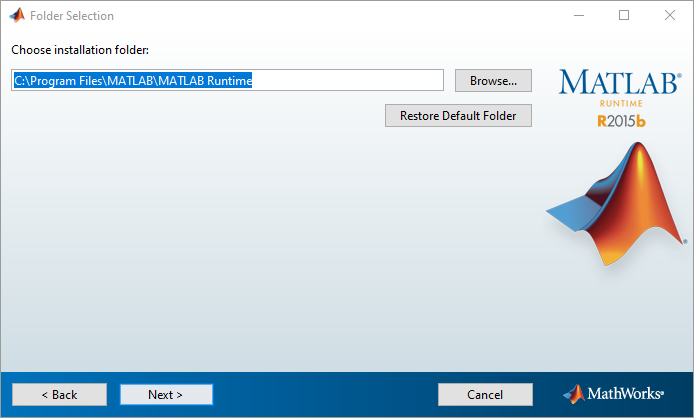
- Click Next to install to the default folder.
- The Confirmation dialog is displayed.
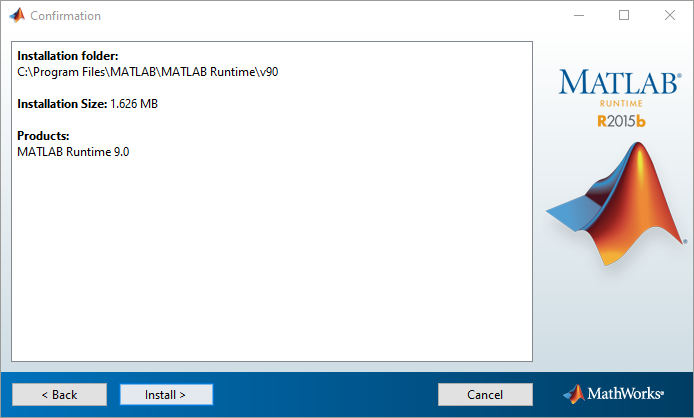
- Click Install.
- The software is installed and the progress is displayed in the installation dialog.
- After installation the Installation Complete dialog is displayed.
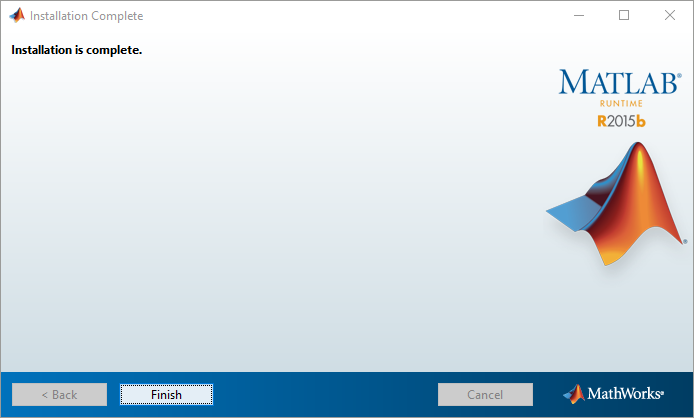
- Click Finish.
- You have successfully installed the MATLAB Runtime that is necessary for the working with the CAT module.
- After successful installation of all components, the ZEISS Microscopy Installer displays the respective status. You can now also close the ZEISS Microscopy Installer, or click Back if you want to install other software.
Backing Up and Restoring Settings
NOTICE
Risk of Data Loss
The Manage ZEN Settings tool allows you to delete the settings of your application, even if you have not backed them up before, which results in data loss.
- Back up your settings before deleting to prevent data loss. Alternatively, contact your local Zeiss service representative before using this tool.
Limitation for Data Backup, Deletion and Restoration
Note that only the data for the current windows user will be saved or deleted. If you have a system with several users you have to do this for every windows user!
Although they are backed up, license and MTB files will not be restored automatically with this software tool.
You can manage (backup, restore and delete) application settings with the Manage ZEN Settings tool. This includes application data, user profiles, user documents (like calibration files), license and MTB data, as well as logging data.
- Use the ZEISS Microscopy Installer to install the Manage ZEN Settings tool. It is available in the Tools and accessories section of your application installation. For general information, also refer to the ZEISS Microscopy Installer manual.
- The tool is available on your PC.
- Open a file explorer and go to C:\Program Files\Carl Zeiss\ZEN Tools\ManageZENSettings.
- The folder displays the .exe file for the application.
- Double click ManageZENSettings.exe.
- You might be prompted execute the tool with administrative privileges. If so, confirm.
- The Manage ZEN Settings tool opens.
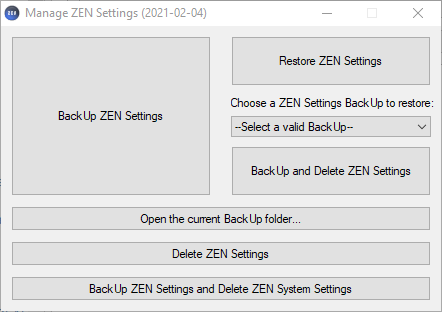
- Click Back Up ZEN Settings.
- The backup is created and placed in the defined/default folder.
- To restore settings, open the dropdown below Choose a ZEN Settings Back Up to restore and select the entry of the backup. Afterwards, click Restore ZEN Settings.
- The settings are restored.
- If you want to back up and/or delete settings, click on the respective buttons in the application window.
- To open the current folder for backups, click Open the current Back Up folder.
- A file explorer opens at the location, where backups are currently saved.
- To change the folder, open the dropdown below Choose a ZEN Settings Back Up to restore and select Change Back Up folder.
- A file browser opens.
- Select the folder for the backups and click Select Folder.
- The file explorer closes and the folder is changed.
Creating a Desktop Shortcut to Start a Specific ZEN Profile
If you want to have the possibility to start ZEN directly with a certain profile, you can create a specific desktop shortcut.
- You have installed ZEN.
- Open the Windows file explorer and navigate to the folder where ZEN is installed. The default is C:\Program Files\Carl Zeiss\ZEN 2\ZEN 2 (blue edition).
- Find and right click ZEN.exe and drag and drop it to the desktop with pressed right mouse click.
- A context menu is displayed.
- Select Create shortcuts here.
- A shortcut is created on the desktop.
- Right click on the shortcut and select Properties from the context menu.
- The properties window is displayed.
- On the Shortcut tab, go to Target.
- The path of the exe file is displayed, e.g. C:\Program Files\Carl Zeiss\ZEN 2\ZEN 2 (blue edition)\ZEN.exe
- Change this path by adding a space, /ProfileId= and the respective ID of the profile. For information, see the table below.
- The path is changed, e.g. to C:\Program Files\Carl Zeiss\ZEN 2\ZEN 2 (blue edition)\ZEN.exe /ProfileId=ZenBlue.LM.Lite.
- Click OK.
- The properties window closes and the changes are saved.
- You have created a shortcut for a specific profile of ZEN. Starting the software by clicking this shortcut directly starts the respective profile.
Profile IDs for ZEN
|
Profile |
Profile ID |
|---|---|
|
ZEN celldiscoverer |
ZenBlue.LM.CellDiscoverer |
|
ZEN Desk |
ZenBlue.LM.Desk |
|
ZEN Image Processing |
ZenBlue.LM.ImageProcessing |
|
ZEN lite |
ZenBlue.LM.Lite |
|
ZEN lattice lightsheet |
ZenBlue.LM.muSpim |
|
ZEN pro |
ZenBlue.LM.Pro |
|
ZEN SEM |
ZenBlue.LM.SEM |
|
ZEN slidescan |
ZenBlue.LM.SlideScan |
|
ZEN system |
ZenBlue.LM.System |
ON THIS PAGE
- Installation & Setup
- Compatible Cameras
- Changes to the Operating System
- Installing ZEN
- Installing Docker Desktop with ZEISS Microscopy Installer
- Installing Remote API Client (for SEM systems)
- Installing MATLAB for Correlative Array Tomography
- Backing Up and Restoring Settings
- Creating a Desktop Shortcut to Start a Specific ZEN Profile