Panorama
This module enables you to create overview images of large areas of your sample.
Prerequisites
For the interactive panorama acquisition following prerequisites are necessary:
- All available microscope components in the MTB (MicroToolBox) have to be defined correctly.
- You have licensed this functionality and activated it under Tools > Toolkit Manager.
Prerequisites
- You are on the Locate tab.
- In the Lightpath tool set the components that you want to use for the acquisition.
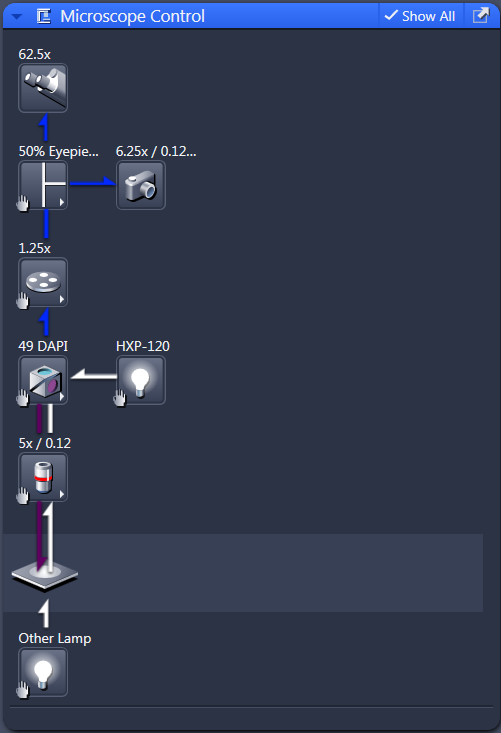
- All these settings will be stored as metadata of the image.
- Additionally the optical components will be used to automatically determine the pixel size for the scaling.
- Click on the Live button.
- Now you see the cameras live image of your sample in the Center Screen Area.
- Click on the Set Exposure button.
- The exposure time will be calculated automatically.
- Alternatively you can set the camera parameters manually in the Camera tool.
- Focus on your sample now.
- You have completed the prerequisites for a panorama experiment.
Acquiring a Reference Image
Before starting the experiment itself, we recommend tthat you first take a reference image for the shading correction. This image will be used later for processing the panorama image.
- Move the sample to an empty field.
-
Ensure that the field of view is absolutely free of any structures (dirt); as this would cause errors in the images acquired later. If necessary, slightly de-focus the sample to suppress these structures.
- Click on the Snap button to acquire this position as reference image.
- Save the image and let it open in the background.
- You have successfully acquired a reference image for the shading correction.
Settings for a Panorama Experiment
- You are on the Acquisition tab.
- You have started the live mode via the Live button.
- Activate the Panorama checkbox.
- Move the sample to the desired start field of the panorama image to be acquired.
- Check the defined exposure time again if necessary.
- In the Display tab you can adjust the Display curve to avoid over-exposures in your images.
- In the Imaging Setup tool, you can check the settings before/after the experiment.
![Imaging Setup Advanced tab showing entries Before Experiment [DAPI], Before DAPI, After DAPI and camera icons Test Camera](https://ariviskbdevwe.blob.core.windows.net/cdn/downloads/blobs/9387ff9d1392c0f9d378cffc61c8a9d0.webp)
- The Advanced Imaging Setup is only displayed if you have activated the Enable Advanced Imaging Setup checkbox under Tools > Options > Acquisition > Acquisition Tab > Enable Imaging Setup.
- In the Acquisition Mode tool, click the Get button to transfer the active camera settings into the experiment.
As an alternative you can define your experiment settings here as well. - In the Panorama tool you can adjust several options for automatic or manual stitching if desired.
- Finally save your experiment with a suitable name in the Experiment Manager.
Acquiring a Panorama Image
- After the image acquisition you can adapt the size of image and surrounding area with the zoom keys F7 and F8 to your needs.
- Keep a sufficient overlap area of the live image with the stored image.
- Click on the Start Experiment button to start the Panorama acquisition.
- You will see the reduced display of the start image in the Center Screen Area.
- The displayed image is a live image. You can still change position and focus.
- Click on the Acquire Tile Image button in the Center Screen Area to acquire the first tile image.
- The image will be acquired and stored. The live image is still active as an overlay to the stored image.
- Move the blue frame with the active live image in the desired direction aside the stored image by using the mouse.
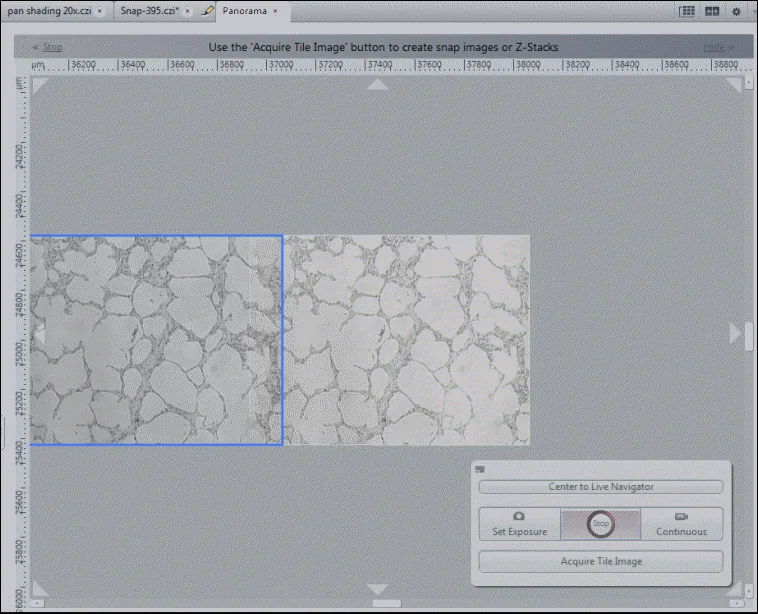
- Now move the sample to the corresponding neighbor position using the microscope stage.
- Try to position the structures in the overlap region as good as possible.
- Click again on the Acquire Tile Image button to acquire this tile to the image.
- Move the blue frame to the next position.
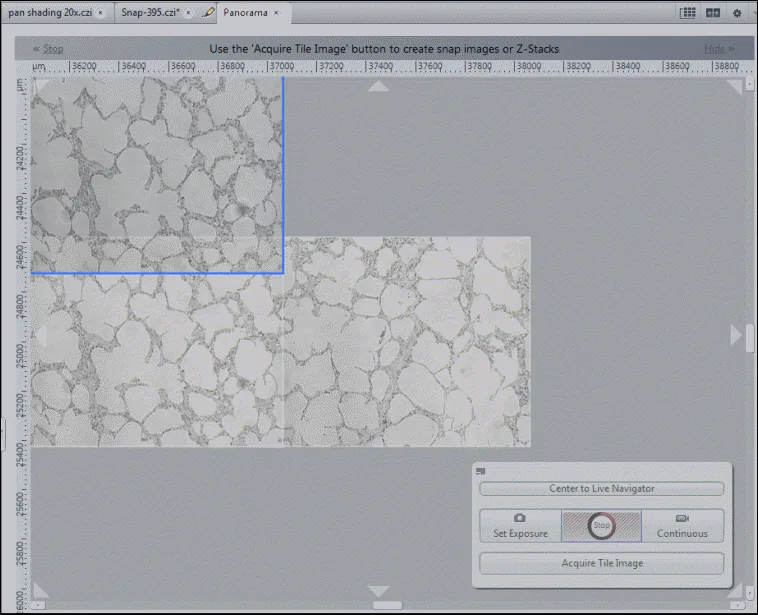
- Continue these steps until you acquired the desired panorama image of your sample.
- After acquiring the last tile image click on the Stop button to close the live mode.
- Finally end the experiment via the Stop button on the Acquisition tab.
- As a result you now see the recorded panorama image in a new image container.
- Save the image as a raw image (*.czi).
- You have successfully acquired and stored a panorama image.
Acquiring a Panorama Image Automatically
The field of view of your microscope might be too small for the sample area you wish to acquire. You can automatically visualize panorama images from a sample area which is larger than the camera sensor can cover by means of a single snap.
With the Live Panorama tool, you can move the stage while the software automatically acquires individual images, stitches them together and creates a panorama image.
Note that Live Panorama works for un-coded and un-motorized stages as well as motorized stages.
- You have set-up and configured your microscope system correctly.
- You work with brightfield or widefield illumination.
- Your image has sufficient contrast. Lower magnification objectives typically give better results.
- A sample is on the stage and stays in focus. Note that you can adjust the focus during the Live panorama.
- You have started the software and selected the Locate tab. If you work with an LSM, activate camera mode.
- On the Locate tab, click the Live button to get a live image from the microscope camera. Adjust the camera and microscope settings to see a well illuminated and sharp live image.
- Navigate to a specific area on your sample you want to image.
- Move the stage gently and not too fast!
- Select the Live Panorama tool, and click the Start Live Panorama button.
- After a short moment, the camera rectangle changes to green and you can move the stage. The panorama acquisition starts. You see the live image of the sensor area.
- Note that the color of the rectangle changes to orange or red, when the software loses the stitching algorithm. This might happen if the stage is moved too quickly. Then you have to manually go back to the last known or successfully synchronized position. If you wish to image a continuous area of the sample without any gaps, we recommend using a zig-zag pattern to move over your sample to slowly build up the image.
- Move the stage slowly in the desired direction.
- During the stage movement the software automatically acquires the panorama image.
- To finish the acquisition, click Live Panorama tool > Stop button.
- A message is displayed, prompting you to decide if you want to generate an image pyramid to optimize the later display of your image.
- Click Yes.
- The panorama image is added to the Documents tab > Images and Documents tool.
- Stitching artifacts can be corrected by making sure the camera rotation has been corrected. You can make use of the stitching image processing function to correct them.
- You can save the image to your file system.
See also
Panorama Tool
Here you can adjust settings for the panorama acquisition.
After you have acquired the single tile images simply activate the Perform stitching after the experiment checkbox. If you want to stitch the images manually, click on the Perform Stitching button, after you have finished the experiment.
The panorama acquisition itself is performed interactively via in the Panorama view. If you click on Start Experiment' the Panorama view opens and you can start to acquire the single tile images.
See also
Live Panorama Tool
With this tool you can acquire a panorama image exceeding the size of a single image.
|
Parameter |
Description |
|---|---|
|
Start Live Panorama |
Starts the acquisition. The button disappears. The animated Stop button appears in the window above the button. For more information, see Acquiring a Panorama Image Automatically. |