ImageJ
This extension offers following possibilities:
- Easy exchange of images, from simple two-dimensional images, to more complex, multidimensional entities, like Z-stacks, time series and so on. The exchange can go both ways, from ZEN to ImageJ, as well as from ImageJ to ZEN.
- Execute functions in ImageJ, without having to leave the ZEN environment.
- Combine the two benefits, introduced above: sending a ZEN image to ImageJ, having it processed there, and then returning the resulting image back to ZEN in one single step.
Note that different versions and variants of ImageJ and Fiji exist. This document is based on the ImageJ/Fiji version 1.46. See notes for specifics of other versions and variants. For the sake of simplicity, Fiji is implied also, wherever ImageJ is mentioned in the following text.
Preparations
Note that the extension for ImageJ is not available in ZEN lite.
- Install ImageJ on your computer. Make sure that you use the latest version (check for online updates after installation).
- Download loci_tools.jar and drop it into in the ImageJ/plugins folder.
- Note the name of the folder with your preferred alternative. While you can switch freely among them all, it makes sense to stick to one and the same environment, once you have started to add your own programs and macros.
- The ImageJ/Fiji folder you will eventually decide on, can either belong to you alone or be shared among other users of the system. It is up to you decide, what you prefer: if you are the only user, nobody will meddle with its contents (images, macros etc), but then, you will need to copy and distribute the contents, if they are of interest to others as well.
- You have successfully fulfilled all prerequisites. You can now continue with setting up ImageJ within ZEN software.
Activate ImageJ Extension
The extension is automatically included in the ZEN installation. To set it up, start the software and then proceed as follows:
- Go to Tools > Options > ImageJ.
- In the ImageJ Executable dropdown list, select your preferred ImageJ.exe.
- If you prefer another executable or your preferred executable is not in the list, click on the last entry ... to search for it.
- You have successfully set up ImageJ extension within the software. Now you can start working with the extension.
Sending and Retrieving Images
- In the Left Tool Area, click on the Extensions tab.
- The tool group ImageJ will appear containing the Apply tool.
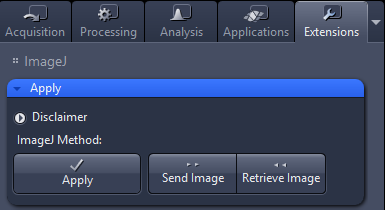
- To send an image from ZEN to ImageJ select the image in ZEN.
- In the Apply tool, click on the Send Image button.
- The image will be sent to ImageJ and opened within a new image frame. You can now edit the image within the ImageJ application.
- To retrieve an image from ImageJ to ZEN select the image in ImageJ.
- Click on the Retrieve Image button.
- The image will be opened in ZEN.
- You have successfully exchanged images between ZEN and ImageJ.
Use ImageJ Methods
The extension offers the possibility of sending images to ImageJ to get processed, to retrieve the result of the operation or both. The following instruction will show the basic steps which are necessary to apply ImageJ methods on any images.
- You are on the Extensions tab in the ImageJ group.
- In the Methods tool select the command or method to be executed, e.g. an ImageJ macro.

- In the Parameters tool, specify if the method selected will need an input image and/or provide a resulting image.
- In the Apply tool, click on the Apply button to execute the command.
- You have successfully applied an method to an image.
Image Type Send/Retrieve Conventions
ZEN to ImageJ
|
Image Type |
Received as… |
Comments |
|---|---|---|
|
.tif, .jpg, .bmp, .png, .gif |
Original |
|
|
.ome.tif |
Original |
|
|
2D image B/W .czi |
32-bit (RGB) |
Convert the image in ImageJ to the required pixel type using Image > Type command |
|
2D image 24/48 bit color .czi |
32-bit (RGB) |
|
|
2D image 36/42 bit color .czi |
- |
Convert the CZI image to 24/48 bits before sending it or using it in a method |
|
Multi-channel x Z-Stack x T-series |
MD image |
If necessary, reassign the dimensions using Image > Hyperstacks for instance. Channel colors may be different from those set in ZEN |
|
Tiled images |
- |
Only the first tile gets loaded. |
|
12bit B/W images |
Error in ImageJ |
Workaround: convert the pixel type of the image to 16 bits in ZEN |
ImageJ to ZEN
|
Image Type |
Received as… |
Comments |
|---|---|---|
|
.tif, .jpg, .bmp, .png, .gif |
Original |
|
|
.ome.tif |
Original |
|
|
2-D images, B/W and RGB |
B/W, RGB TIF |
|
|
Multi-channel x Z-Stack x T-series |
MD image |
Hint: select RGB in Quick Color Setup to get the same colors for channels as in ImageJ |
|
Tiled images |
- |
Only the first tile gets loaded. |