ZEISS Microscopy Knowledge Base
Help
ZEISS Microscopy Knowledge Base
Search
Calibrating the Sample Holder
Correlative sample holders have three fiducial markers enabling a three point calibration (signed with the numbers 1-2-3) The calibration markers consist of one small (length 50 µm) and a large L-shape marker (length 1 mm). The bigger marker is used for coarse orientation, whereas the smaller marker is used for the calibration.
Preparing Calibration
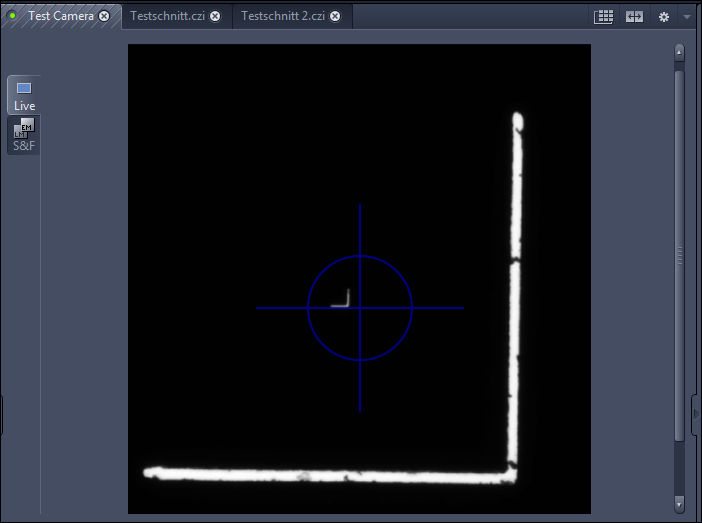
- Click on Live in the Acquisition tab to activate the live view in the Center Screen Area.
- Navigate the stage manually to the first calibration marker on the sample holder (marked with No. 1) by means of the joystick. It is enough if you move the stage to the larger L-shaped calibration marker. The smaller marker will be detected automatically within the Sample Holder Calibration Wizard. To locate the marker positions we recommend using a dry objective with low magnification (5x – 20x).
- Open the Shuttle & Find tool.
- Click on Calibrate… to open the Sample Holder Calibration Wizard
Setting Calibration Options
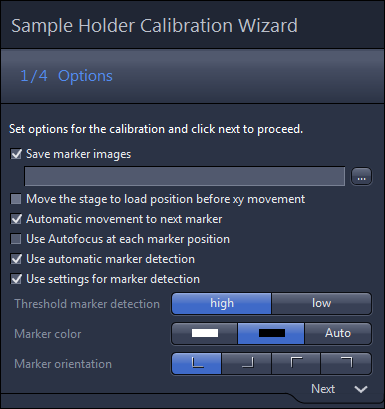
In step 1 of the wizard, the following options should be activated to follow our recommended workflow:
- Check if the Automatic movement to next marker checkbox is activated.
- This will automatically move the stage to the next marker position after you have confirmed the position of the marker and clicked on Next.
- Check if the Use automatic marker detection checkbox is activated.
- The software will try to find the correct positions of each marker automatically.
- If you need to change the marker color, or check if the marker orientation is set correctly, activate the Use settings for marker detection checkbox to access these functions.
- Click on Next to move to the next wizard step.
Performing Calibration
- Click on Set to detect the first marker position.
- An automatic stage calibration will be performed. After the stage calibration, the system will try to detect the marker position of the small marker automatically.
- A message appears which asks if the marker was detected correctly.
- Click on Yes to confirm the message.
-
If the marker was not detected correctly, you have the possibility to set the marker position manually. Therefore simply left-click on the intersection of the L marker in the image and the position will be adapted. Pay attention that you select always the same calibration point on each L-marker.
- Click on Next to move to the next step of the wizard.
- The stage will automatically move to the next (coarse) marker position. If the stage moves into the wrong direction, you can use the invert X/invert Y buttons to correct the movement direction.
- Repeat the previous steps and set marker position 2 and 3 accordingly.
- After setting marker position 3 you will find a green check mark icon which shows that the calibration was successful.
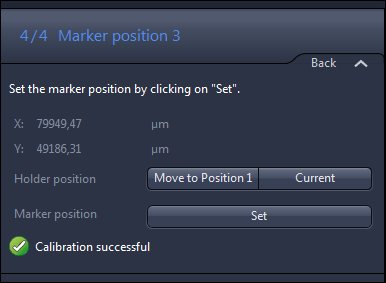
- Click on Finish to save the calibration and close the wizard.
- To check if the calibration was successful acquire an image and open the Tree view in the Center Screen Area. There you should see the correlative calibration data in the list. If the Tree view is not visible, go to Tools > Options > Documents and activate the Enable Tree View checkbox.