Sample Holder Calibration Wizard
With the Sample Holder Calibration Wizard you calibrate your selected correlative sample holder. The wizard is opened via the Shuttle and Find tool. Make sure that you have activated the Shuttle and Find tool and selected a sample holder, see Selecting the Sample Holder.
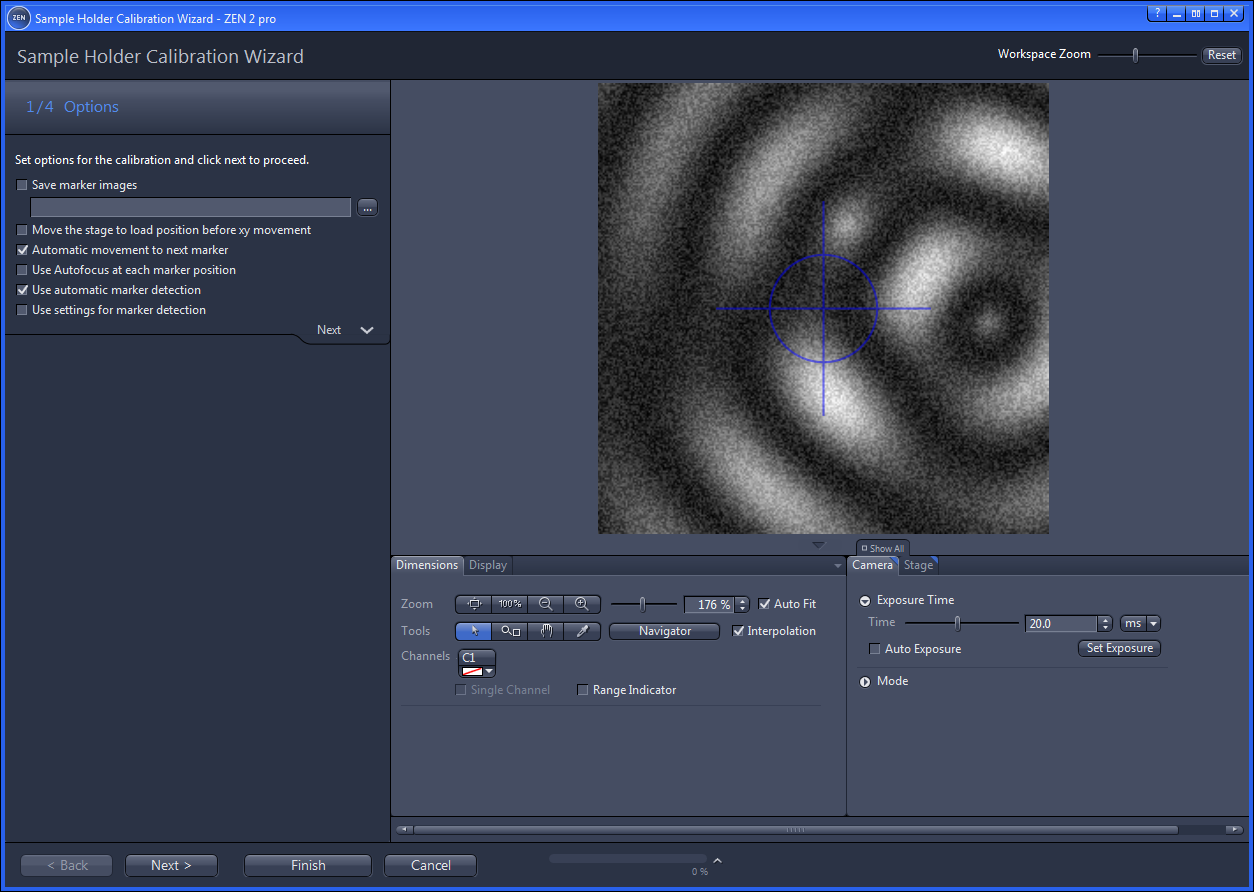
Step 1: Options
|
Option |
Description |
|---|---|
|
Save marker images |
Activated: the marker images are saved during the calibration. The images can be used to check the calibration afterwards. Click on the Select Folder (...) button to select a storage folder. |
|
Move the stage to load position before x/y movement |
Activated: the stage will move to load position before moving to the next correlative calibration marker. In case of using an AxioObserver, the objective revolver moves to load position. |
|
Automatic movement to next marker |
Activated: By clicking on the Next button within the wizard the stage moves automatically to the next calibration marker. |
|
Use Autofocus at each marker position |
This option is active only if the Automatic movement to next marker position checkbox is activated. Activated: the focus is adjusted automatically after moving to the next marker position. |
|
Use automatic marker detection |
Activated: The software will try to detect the small calibration marker automatically. |
|
Use settings for marker detection |
This option is active only if the Use automatic marker detection checkbox is activated. Activated: shows settings for marker detection (see description below). Here you select the properties of the calibration markers. |
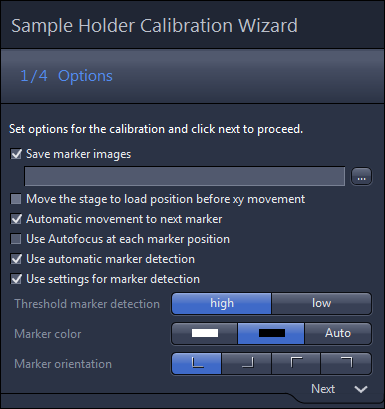
Settings for marker detection
Only visible if the Use settings for marker detection checkbox is activated.
|
Option |
Description |
|---|---|
|
Threshold marker detection: high – low |
A low threshold for marker detection is used when the dimensions of the correlative L markers cannot be recognized precisely, e.g. when the sample holder is slightly filthy. |
|
Marker color |
Here you select the color of the markers displayed in the live image. White: the marker is displayed white on a dark background. Black: the marker is displayed dark on light background. Auto: the marker color is set automatically. |
|
Marker orientation |
Here you need to set the orientation of the L-markers on your sample holder. Click on the corresponding button to select the orientation of the calibration marker which you can see in the live image |
If you click on the Next button you will move to the next step of the wizard.
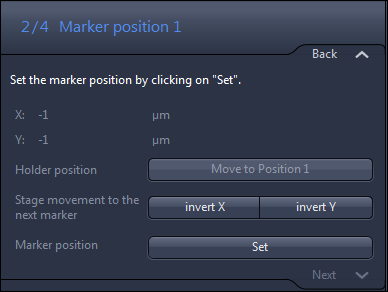
Step 2-4: Calibration
In steps 2-4 of the wizard you will be guided through the calibration procedure.
|
Option |
Function |
|---|---|
|
Holder position |
Move to Position 1 button Moves the stage to marker position 1. This is possible only if the first position was set before and x/y coordinates are given. Current button Only visible for marker position 2 and 3. Moves the stage to the current marker position. This is possible only if the current position was set before and x/y coordinates are given. |
|
Stage movement to the next marker |
Here you can change the movement of the stage in x or y direction. This is necessary if during calibration the stage moves in the wrong direction. |
|
Marker position |
By clicking on the Set button, the actual marker position will be confirmed. |