Intellesis Object Classification
This module offers the functionality to classify objects based on measured parameters of an analyzed image using machine-learning algorithms and to create and to train such a model for object classification. Since the input for the object classification is an analyzed image containing a result table, the functionality of the Image Analysis module is also required for the complete workflow.
Licensing and Functionalities of Intellesis Object Classification
Some functionality of Intellesis Object Classification is generally available in ZEN, but the full functionality requires the AI Toolkit license.
Basic functionality
The general available functionality includes:
- Importing and exporting models.
- Managing the models, including renaming and deleting.
- Running a model with the Object Classification function on the Processing tab or in OAD (if you have licensed the Developer Toolkit).
Licensed functionality
If you have licensed this functionality and activated it under Tools > Toolkit Manager, the following additional functionality is available:
- Creating and training a new model.
- Retraining an existing model.
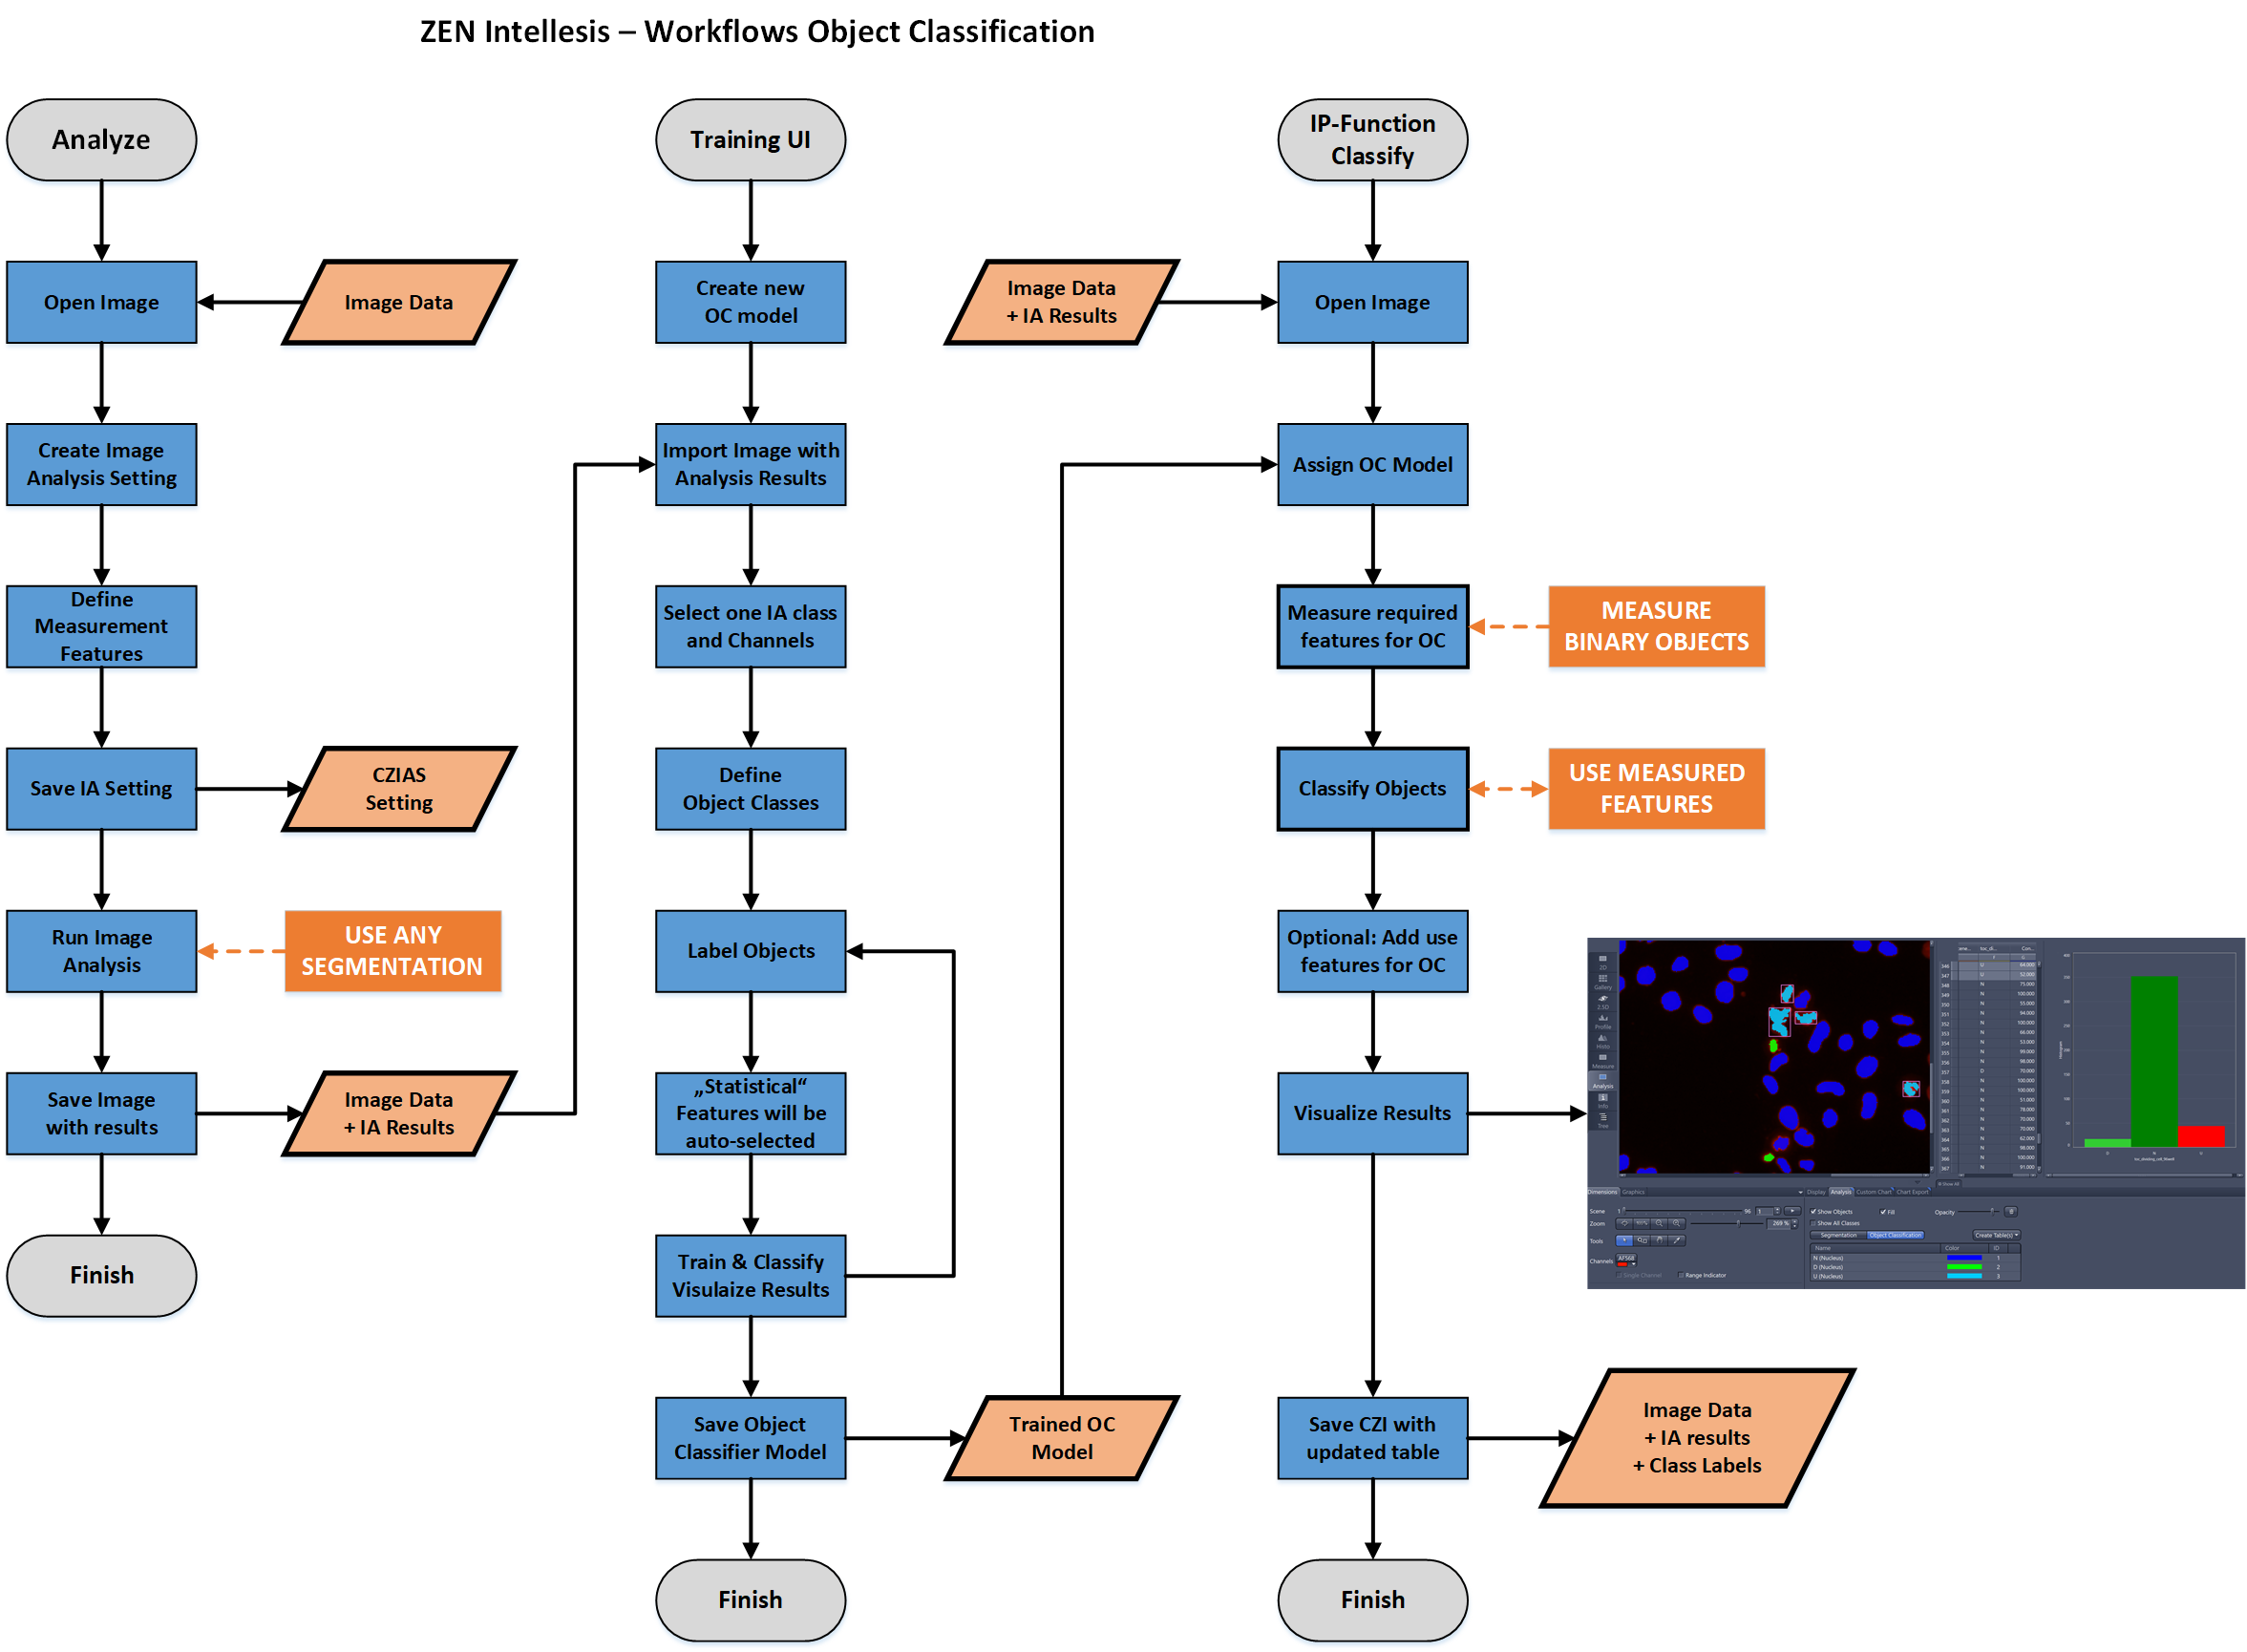
Workflow Overview for Intellesis Object Classification
The workflow to train and use an Intellesis object classification model consists of three main steps:
- Analyzing an image, see Image Analysis.
- Training an object classification model, see Creating and Training an Intellesis Object Classification Model.
- Using the trained model to classify objects in analyzed images, see Using an Intellesis Object Classification Model for Image Processing.
Creating and Training an Intellesis Object Classification Model
- You have a CZI image with image analysis results. For detailed information on analysis, see Image Analysis.
- You have licensed the AI Toolkit and activated it under Tools > Toolkit Manager.
- On the Analysis tab, in the Intellesis Object Classification tool, click
 and select New.
 - Enter a name for the new model and click
 . Alternatively, enter the name and press Enter.
 - A new setting with the name is created and automatically selected as Model.
- Click Start Training.
- The Training User Interface Intellesis Object Classification opens.
- In the Image Gallery on the right, click Import Images.
- A file browser opens.
- Select the image(s) you want to use for classification and click Open.
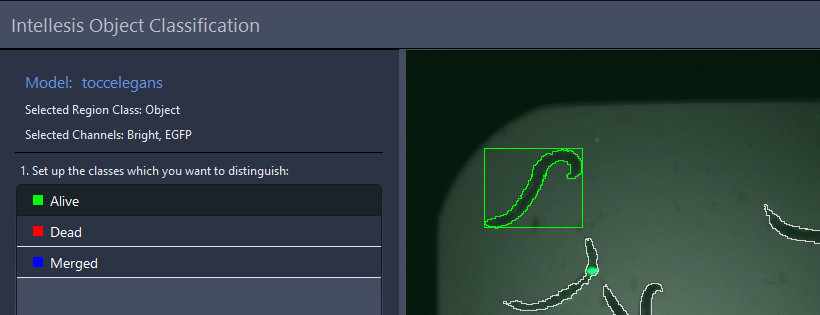
- If the image analysis contains more than one class and channel, the Select Region Class and Channel dialog opens.
- Select the Region Class and the channels you want to use for classification and click OK.
- The image(s) is/are imported into the trainings interface.
- In the Open Images tool on the right, click on the image you want to label.
- The image is displayed, and the table shows the data of the analysis result.
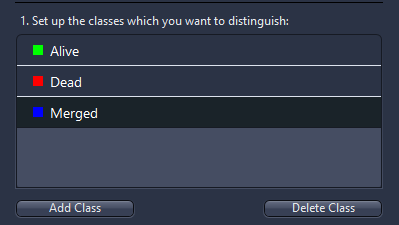
- On the left side, add the classes you need for your object classification by clicking Add Class.
- You have created the classes that you want to distinguish.
- To change the label color for a class, click on the color field of the list entry and select one from the window.
- To change the name of a class, right click on the entry, select Rename, enter a new name, and click . Alternatively, double click the name entry, enter a new one and click , or press Enter.
- In the Labeling Options tab, click
 .
. - You are now in labeling mode.
- In the classes list, select a class and click on an object that belongs to this class in the image or in the table.
- You have labeled the object and assigned it a class.
- Repeat the labeling for the objects of the different classes you created.
- Click Train & Classify.
- Your model is trained based on the labeling and a prediction is displayed.
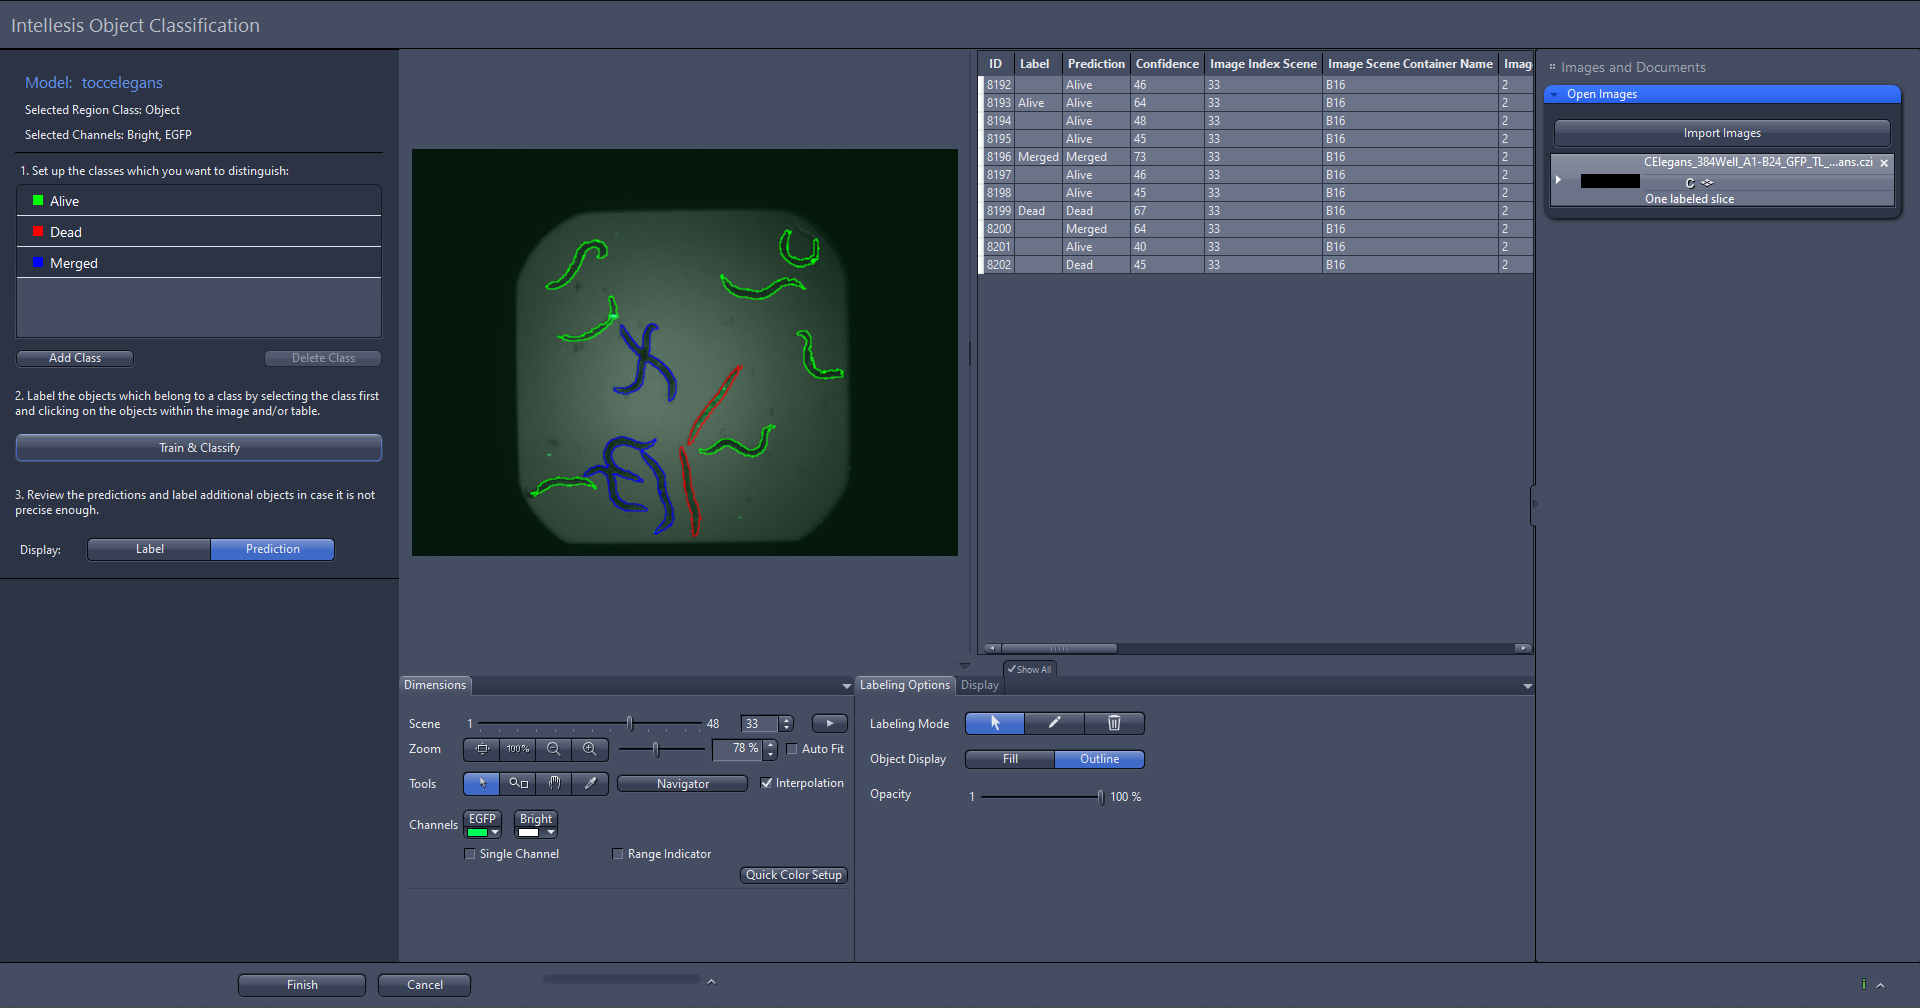
- If you are not satisfied with the result, you can label more objects, click Train & Classify again, and iteratively improve your results.
- When you are satisfied with the result, click Finish.
- All changes are saved, and the training interface is closed.
- You have successfully created and trained a model for object classification. You can now use it to classify objects in your analyzed images with the processing function Intellesis Object Classification, see Using an Intellesis Object Classification Model for Image Processing.
Importing an Intellesis Object Classification Model
- You have a trained object classification model available which you want to import.
- You are on the Analysis tab.
- In the Intellesis Object Classification tool, click
 and select Import.
 - A file browser opens.
- In the file browser, select the model file from the file system and click Open.
- The model is now available in the dropdown list.
- You have imported a model for object classification. If you want to use the model for image processing switch to the Processing tab. In the Intellesis Object Classification image processing function you can select the imported model and apply it to the desired images, see Using an Intellesis Object Classification Model for Image Processing.
Exporting an Intellesis Object Classification Model
NOTICE

Risk of Non-Functioning Models in New ZEN versions
In case of changes in Python libraries, trained models can stop working on a new version of ZEN and need to be retrained first. Retraining is only possible if the model contains the images, or the images are generally still available. To be able to retrain your model, consider the following solutions:
- Export your model with your images, see Exporting an Intellesis Object Classification Model with Images.
- Make a backup of the images used for training the model, e.g. on your (external) hard drive.
- You have created and selected a model for object classification.
- On the Analysis tab, in the Intellesis Object Classification tool, select the model you want to export in the dropdown.
- Click and select Export.
- A file browser opens.
- Select the file location and click Save.
- The model with the trained classification routine is exported. Such a model is meant to be used only for classifying objects in an analyzed image, but not for the training process.
Exporting an Intellesis Object Classification Model with Images
- You have selected a trained model with images.
- On the Analysis tab, in the Intellesis Object Classification tool, click and select Export With Images.
- The file explorer opens.
- Navigate to the folder where you want to store the training model and click Save.
- You have exported your model with the trained object classification routine as well as the images that were used for training. Such a model can be used for classifying objects in an analyzed image and can be retrained in the future.
Using an Intellesis Object Classification Model for Image Processing
- You have created and trained an object classification model, see Creating and Training an Intellesis Object Classification Model.
- You have opened the analyzed image(s) for which you want to use the classification model.
- On the Processing tab, select the function Intellesis Object Classification.
- Parameters are displayed.
- Make sure that in the Input tool the correct image is selected.
- The image is selected.
- In the Parameter tool, select the Model you want to use for object classification and click Apply.
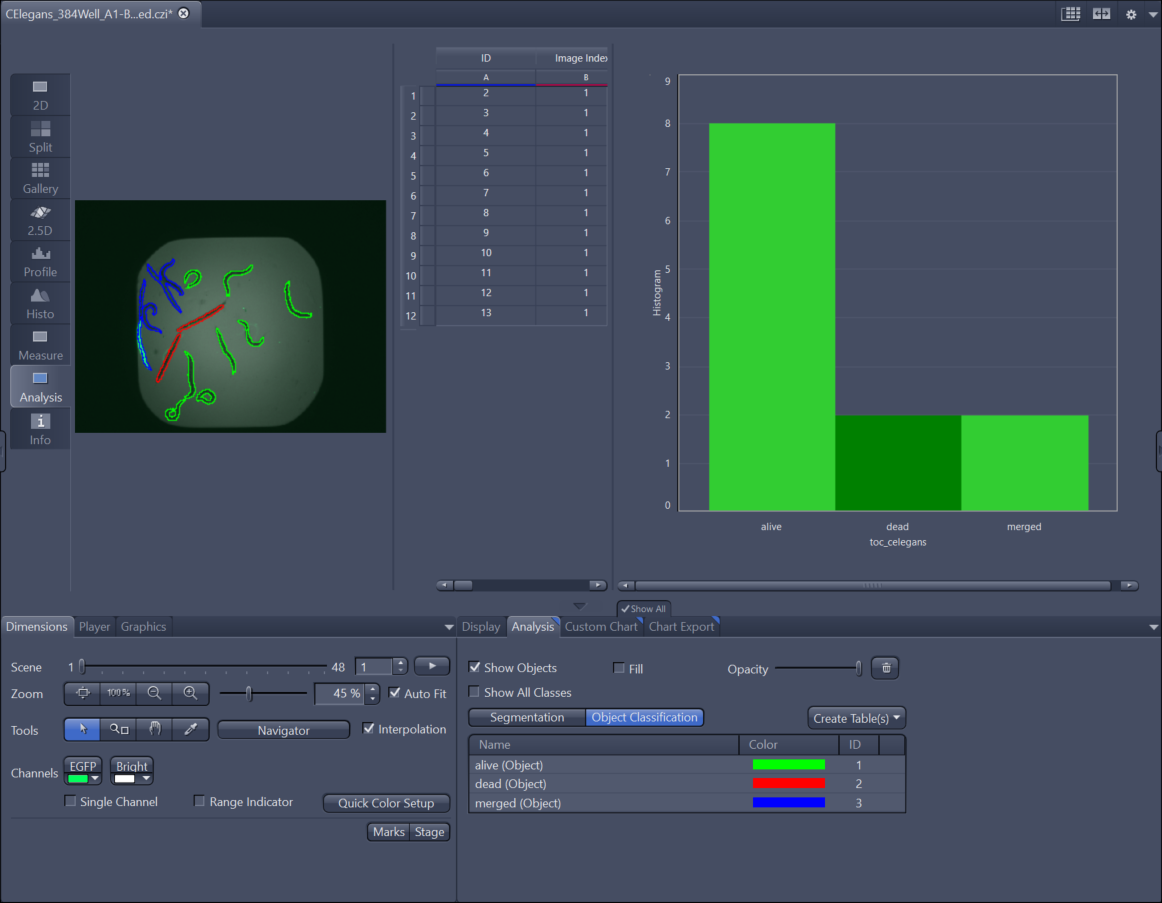
- The objects in your image are now classified based on the trained model. To view the result (table) you can switch to the Analysis View. There you can see all measurement values in the table and adapt the chart to display your object classification results with the Custom Chart tab as well as select your objects in the Analysis Tab.
Intellesis Object Classification Tool
|
Parameter |
Description |
|
|---|---|---|
|
Model |
Displays the selected model. If you have several models available, you can select the corresponding model from the dropdown list. |
|
|
|
||
|
– |
New |
Creates a new, empty model, see Creating and Training an Intellesis Object Classification Model |
|
– |
Rename |
Renames the currently selected model. |
|
– |
Clone |
Clones (duplicates) the currently selected model. |
|
– |
Import |
Imports a model to ZEN, see Importing an Intellesis Object Classification Model. |
|
– |
Export |
Exports the model to the file system, see Exporting an Intellesis Object Classification Model. |
|
– |
Export With Images |
Exports the model including all images to the file system, see Exporting an Intellesis Object Classification Model with Images. |
|
– |
Delete |
Deletes the currently selected model. |
|
Description |
Displays and sets a description for the selected model. |
|
|
Start Training |
Opens the user interface for training. |
|
ON THIS PAGE
- Intellesis Object Classification
- Licensing and Functionalities of Intellesis Object Classification
- Workflow Overview for Intellesis Object Classification
- Creating and Training an Intellesis Object Classification Model
- Importing an Intellesis Object Classification Model
- Exporting an Intellesis Object Classification Model
- Exporting an Intellesis Object Classification Model with Images
- Using an Intellesis Object Classification Model for Image Processing
- Intellesis Object Classification Tool