Performing Configurable Deconvolution
These instructions explain how to deconvolve a z-stack image correctly step by step.
In the described example, the best method Constrained Iterative and a theoretical PSF are used.
Preparation
To follow these instructions you will need a z-stack image of your sample. You have opened the software and no images are loaded.
Prerequisites
- You have licensed this function and activated it under Tools > Toolkit Manager.
- You are on the Processing tab.
- You have acquired or opened a fluorescence image on which you wish to perform deconvolution.
- All tools are in Show All mode.
Steps
- Step 1: Load input image
This section describes how to load an input image in Deconvolution (Configurable). - Step 2: Set parameters
This section describes how to set the parameters. - Step 3: Process image
This section describes how to process the image and compare it with the input image. - Step 4: Reuse deconvolution parameters
This section describes how to reuse the deconvolution parameters from an already processed image.
Step 1: Loading an Input Image for Deconvolution
In this step you will select the image to be processed and load it as an input image for deconvolution.
- On the Processing tab, select the Deconvolution (adjustable) method.
- In the Input tool, select the image that you want to deconvolve. If Set Input Automatically is activated, the currently active image has been loaded as input image automatically. Since this means, that the output image is then also automatically selected as input, it is recommended to deactivate this checkbox.
- Select the desired input image.
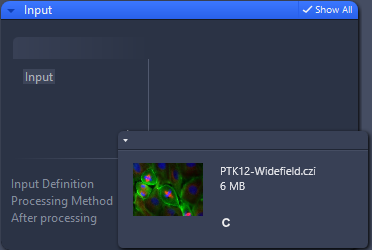
If a warning appears at this point, it is likely that parameters required for deconvolution are missing from the image. You can subsequently enter or change these values in the Parameters tool > PSF settings tab > Microscope parameters.
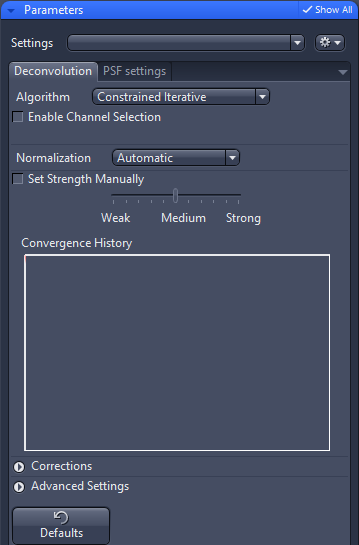
Step 2: Set Parameters for Deconvolution
In this step you select the desired algorithm and the associated method parameters.
- On the Processing tab, you have opened the Parameters tool in the Show All mode. You can usually leave these parameters alone as they are automatically set to give you a good result.
- On the Deconvolution tab, select the desired algorithm. In our example we use the Constrained Iterative algorithm, which is the most complex algorithm, but usually the best one to use.
- Additional parameters for the Constrained Iterative method are displayed on the tab.
Step 3: Performing Deconvolution
The processing of large y-stack images or long time series can take some time. During processing we recommend that you do not perform any other complex actions in ZEN or in other programs on the computer, to avoid increasing the processing time unnecessarily.
In this step you perform deconvolution. You can then compare the resulting image to the input image and details relating to the processing procedure are visible.
- Go to the Deconvolution tab
- Click Apply on the top of the Processing tab.
- The progress is displayed in the Convergence History graph, in which the gradual improvement is plotted against the number of iterations.
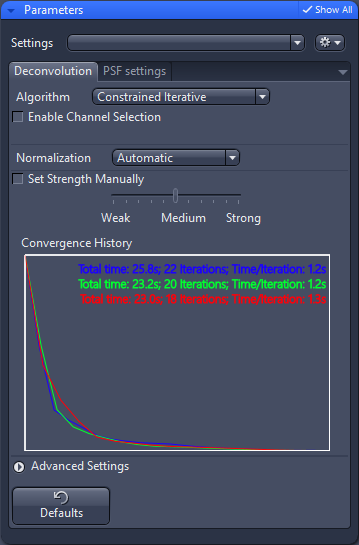
- Save the resulting image under a meaningful name.
- Click on the Splitter Mode button
 in the document bar. This creates a multi-image (split image).
 - The currently active image is loaded automatically into the multi-image. Now drag the input image from the document gallery in the Right Tool Area into the split document.
- On the Display tab, change and adjust the display as desired, e.g. Best Fit with 0.01 and for black and white value with a Gamma of 0.8.
- Both images are adjusted simultaneously.
- If on the Split Display tab Synchronize Dimensions is activated, you can now zoom synchronously into the images (mouse wheel) and, with the mouse wheel held down, move the image content as desired to focus on the regions of interest.
- To create an image of the desired view click on New Image from > Current View > Create.
- This creates a new output image document with both images shown side by side.
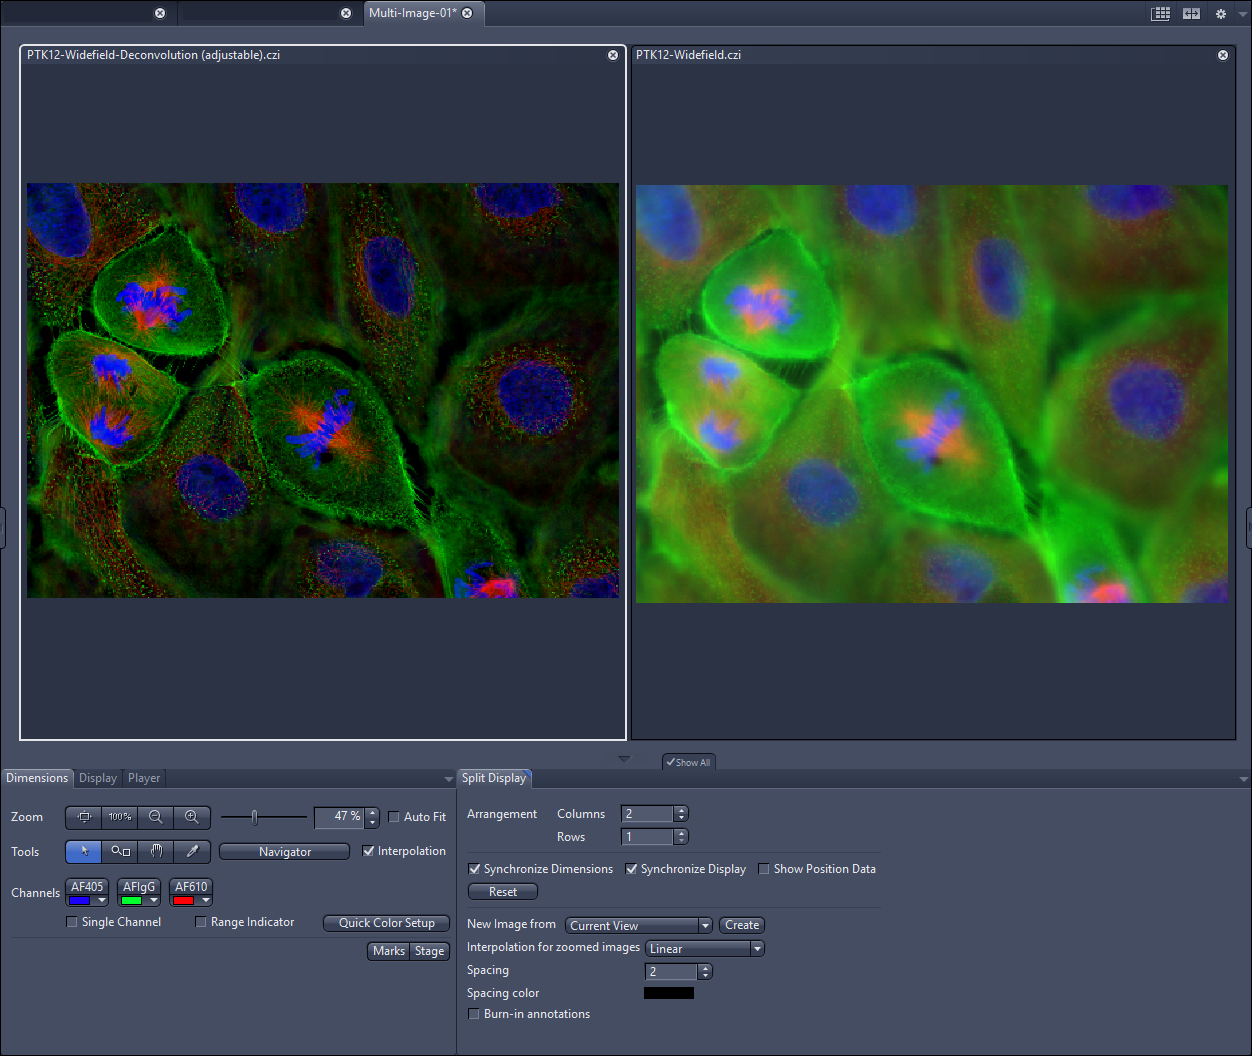
- You have successfully performed deconvolution, observed the processing procedure, and created an output image to compare the deconvolved with the input image.
Step 4: Info View and Re-Using Deconvolution Parameters from a Processed Image
The Info View contains a section Deconvolution Information, which shows a summary of the parameters used for deconvolution of the image. It also contains the Convergence History graph displaying the time it took to get this image processed.
If you like to use the same settings in order to process another image, the following steps show how to do this:
- Select the processed image from the previous steps.
- Select the Info View and scroll down to the Deconvolution Information group:
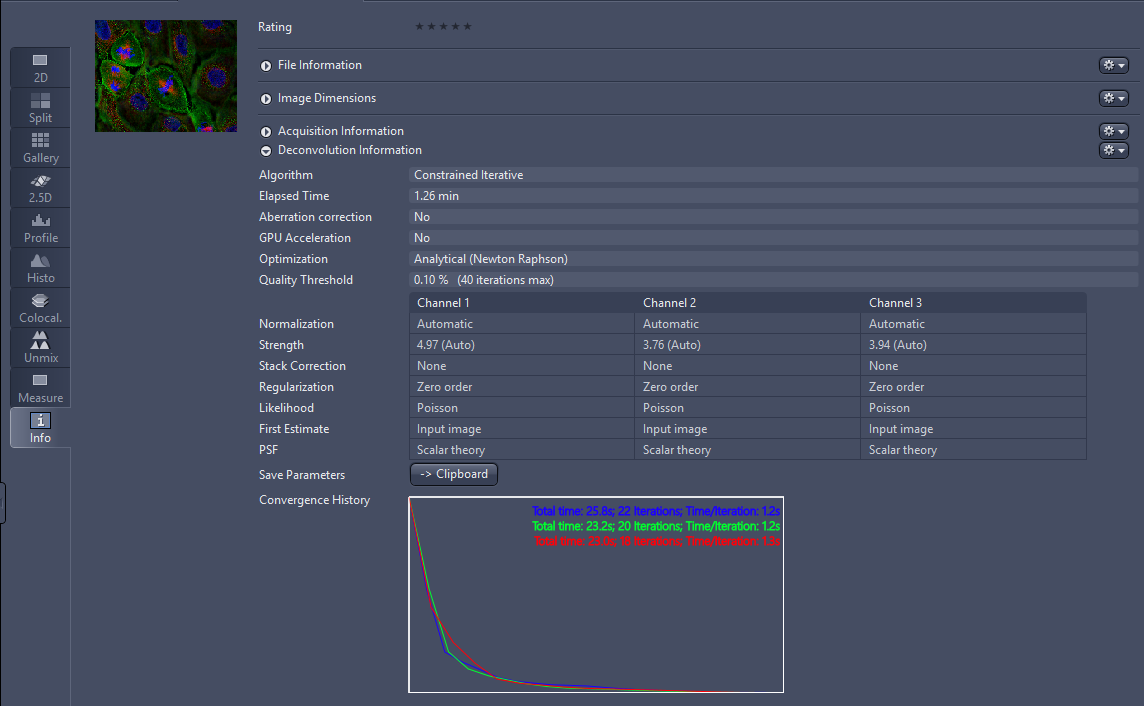
- Click Clipboard.
- All deconvolution parameters are copied to the clipboard.
- Open the new image you want to deconvolve and select it as input in the Deconvolution (adjustable) function. Right-click and select Paste to paste the parameters into Deconvolution.
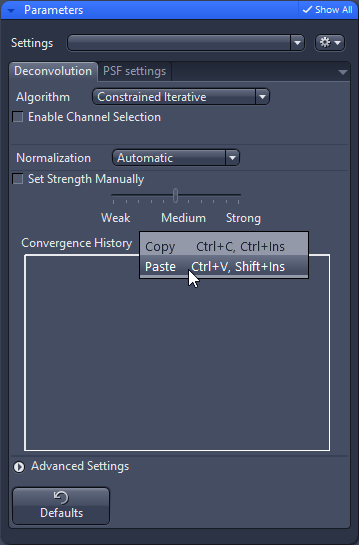
- Click Apply to run Deconvolution with the identical function parameters as used for the previous image.