Sharing a Folder for Direct Processing
This step by step guide gives instructions on how to create a shared folder for the Direct Processing functionality in ZEN.
You need an imaging system with its workstation (called acquisition computer) and for processing you need a high-end workstation (called processing computer) with a P6000 card (M/P4000 or M6000 works too) running the newest NVIDIA driver. Both computers need the software version ZEN 3.0 or higher.
Computer connection
The processing computer must be connected to the acquisition computer via ethernet connection. It works best to have both workstations equipped with a 10 GB ethernet card. A 1GB Ethernet is fine as well, just make sure to not create very large images and deactivate Follow Acquisition in ZEN when acquiring larger images. For details on how to connect your computer in a network, ask your local IT department. For some basic information, see also Connecting Computers via Cable.
IP Addresses
This is not strictly necessary, but knowing the IP Addresses is the safest way to troubleshoot networking issues, so we recommend to check this in any case. It is easiest to network the computers if both have the same login credentials, e.g. Username = ZEISS, password = zeiss. The computers can only network with each other if a password is set for both logins. For a description of how to look up the IP address of your PC, see Looking Up the IP Address of Your Computer.
Also note down the computer names. You can find those when you right click This PC in the explorer and select Properties.
Creating a Shared Folder on the Processing Computer
You have to make your processing PC discoverable in your network and create a shared folder.
- You are on the processing computer.
- Click on Windows start menu > Settings > Network & Internet > Status > Network and Sharing Center.
- The Network and Sharing Center opens.
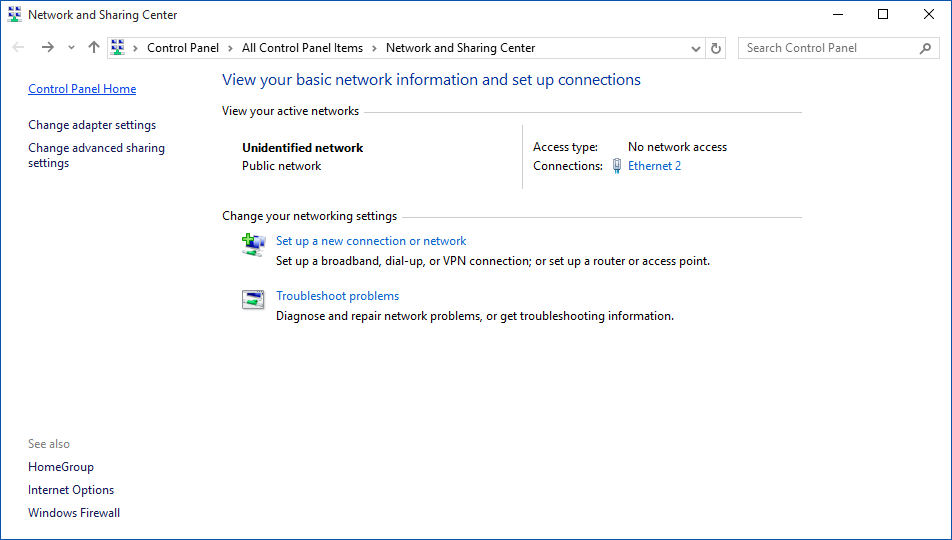
- Click Change advanced sharing settings.
- The Advanced sharing settings window opens.
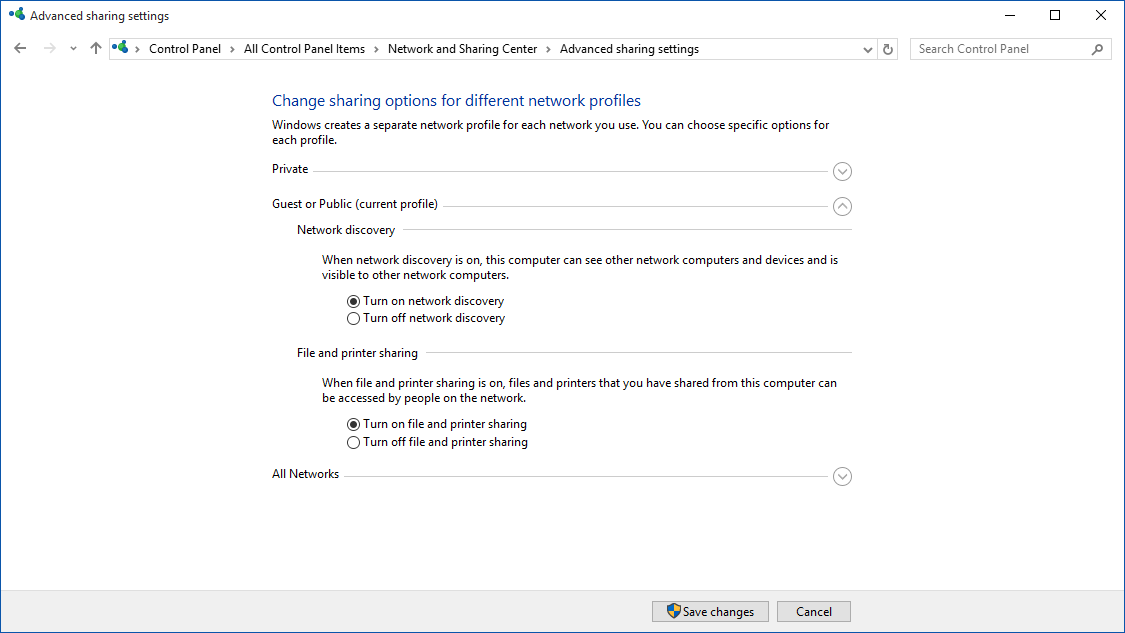
- Turn on network discovery for your network.
- Click Save changes.
- Open the Windows Explorer and create a folder where both data and communication between both ZENs should happen, e.g. “D:\direct processing”.
- Right click on the folder and select Properties.
- Go to the Sharing tab.
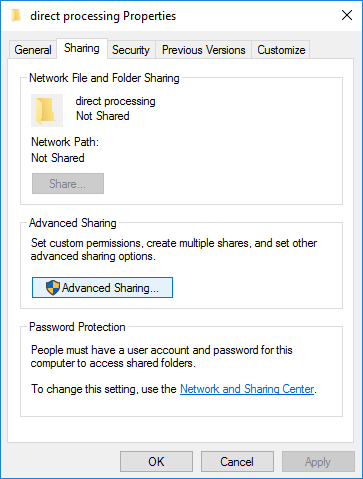
- Click Advanced Sharing.
- The Advanced Sharing dialog opens.
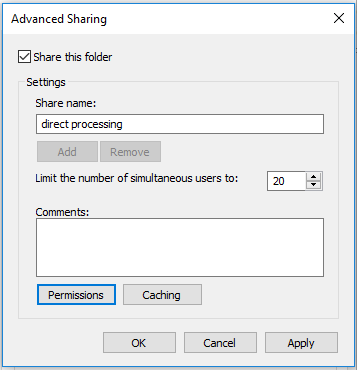
- Activate Share this folder.
- Click Permissions.
- The Permissions dialog opens.
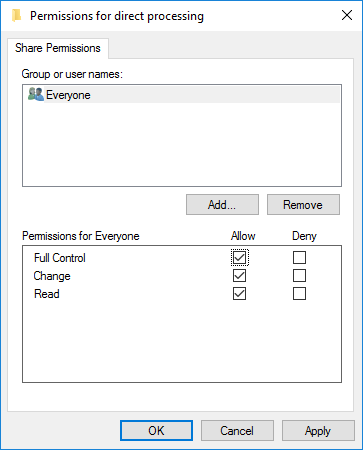
- To give access to specific groups or people, click Add.
- The Select Users, Computers, Service Accounts, or Groups dialog opens.
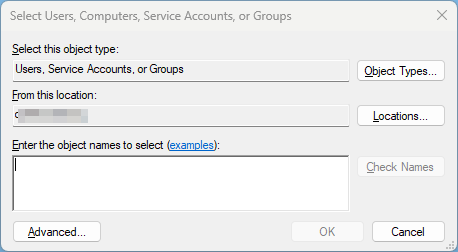
- If you want to change which accounts you can add, click Object Types to open a dialog to select different types.
- If you want to change the (network) location, click Locations to open a dialog to select the location.
- In the text field, enter the user or group name you want to give access to and click Check Names.
- If the name exists, it is verified. In case there is no (exact) match, or in case there are multiple matches, a dialog opens where you can refine your search or select the right user/group.
- Click OK.
- The Select Users, Computers, Service Accounts, or Groups dialog closes and the user/group is added to the list on the Permissions dialog.
- Select the user(s)/group(s) and activate the checkboxes for the permissions you want to give them to this folder.
- Click OK to confirm all changes in all dialogs.
- You have created a shared folder on the processing computer. You can now setup the access to the folder on the acquisition computer.
Accessing the Shared Folder from the Acquisition Computer
On the acquisition computer, you need to map the folder from the processing computer to a drive letter.
Note: You could also do this by directly accessing the folder via the IP address, however, it is better to use the Windows mapping function as this enables some caching mechanisms which make the connection more reliable.
- You are on the acquisition computer.
- In Windows Explorer, open the Network location.
- Select the processing computer. Here you might need the computer name you noted down before.
- Select the shared folder of the processing computer.
- On the top of the Windows explorer, click Easy access and select Map as drive from the dropdown menu.
- The Map Network Drive dialog opens.
- Select the respective Drive for the Folder.
- A login screen opens.
- Enter the credentials of the processing computer.

- Click OK.
- Click Finish.
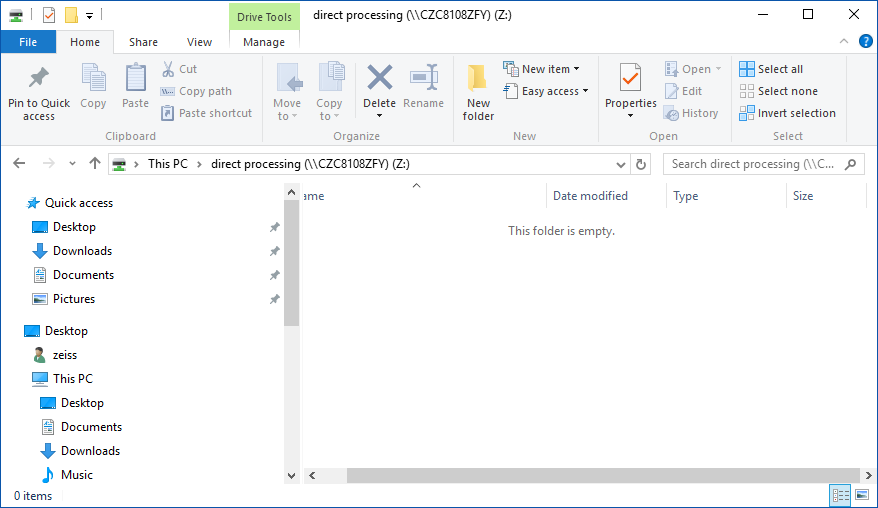
- The folder is mapped to your acquisition PC. The result will look something like this:
- You are now ready to setup the connection of the two computers in ZEN. Refer to the respective chapter in the software manual or the help in the software, which is accessible by pressing the F1 key.
Looking Up the IP Address of Your Computer
- In the Windows search, enter cmd.
- Select Command Prompt.
- The Command Prompt window opens.
- Type in ipconfig/all and press Enter.
- You can now see information for the network configuration of your computer. There you can look up the IP address of your computer. You have to make sure to select the correct Ethernet port, as ZEISS workstations usually have at least two. If only one is connected, this is the one which shows an IP address.
Connecting Computers via Cable
We recommend connecting the PCs in a network by using i.e. a rooter. In case a rooter cannot be used and two PCs are connected via a cable, consider the following remarks:
- Establish a network by cable.
- By default, a network/connection is established.
- As a test, check the IPs of the computers and ping each other.
- In case this fails, check the ethernet adapter and enable DHCP. Also check firewall notifications/settings.
- Ports used by ZEN are open by default, but could be blocked by various reasons (IT, Windows, firewall).
- If a port is blocked. try to set another port in the ZEN options for Direct Processing (see also the help for ZEN).
- You can also test more than one ethernet adapter by pinging the PCs.