Connecting Computers Without Discovery Proxy
On the Processing PC
- You are on the processing computer.
- Open Tools > Options > Direct Processing.
- Open the Setup Processing PC section and make sure that Announcement to Discovery Proxy is deactivated.
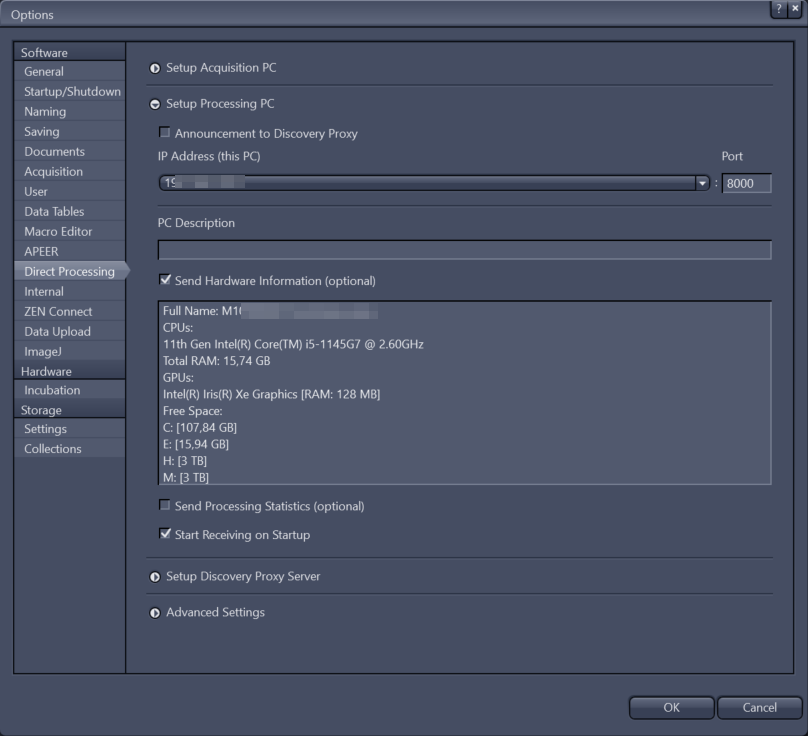
- If you have several network connections, under IP Address (this PC), select the IP address you want to use from the dropdown. For example if you want to use a direct connection with a 10 GB cable, you can select the corresponding IP here. Make sure to enable the same connection on the acquisition PC.
- Note down the name and/or the IP address and port of the processing PC. You can find the IP and port under IP Address (this PC) and the computer name if you activate Send Hardware Information. Alternatively, ask your IT department for information on how to find the IP address or name of the computer. Note: In some networks the computers might get assigned a new IP address over time (e.g. each day), so using the computer name for establishing communication would be advisable.
- If you want to display information about the processing computer on your acquisition computer, enter the information in the text box PC Description.
- If you want to have the hardware information, activate Send Hardware Information, and for displaying statistics about the average job time, activate Send Processing Statistics.
- Click OK to close the dialog.
- The Tools > Options dialog closes.
- On the Applications tab, in the Direct Processing tool, click Start Receiving. Note that this is usually already activated by default.
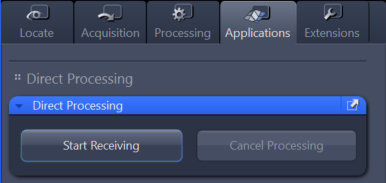
- Everything is now set up on the processing computer.
On the Acquisition PC
- You are on the acquisition computer.
- You know the IP address of the processing computer.
- Open Tools > Options > Direct Processing.
- Open the Setup Acquisition PC section and make sure that Find From Discovery Proxy is deactivated.

- If you have several network connections and want to force the use of a specific one (e.g. direct connection with a 10 GB cable), under IP Address (this PC), activate Select IP Address and select the respective address from the dropdown.
- Click OK to close the dialog.
- The Tools > Options dialog closes.
- On the Acquisition tab, activate Direct Processing.
- The Direct Processing tool is displayed. Make sure that Show All is activated to see all options.
- In the Direct Processing tool, click Remote PC.
- Additional parameters are displayed.
- Click Edit Connection.
- The Direct Processing PCs dialog opens.
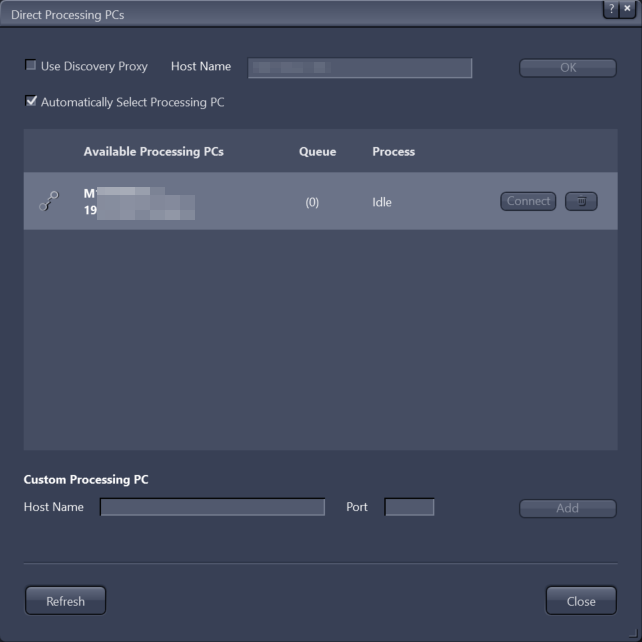
- In the Custom Processing PC text fields, enter the name or the IP address of the processing computer in the Host Name field and the Port of the processing computer.
- Click Add.
- The processing computer is now added to the list.
- Select your processing computer in the list and click Connect. Alternatively, activate Automatically Select Processing PC and the processing PC is automatically selected for each experiment based on the available PCs and their queue length (the PC with the shortest queue is selected).
- You are now connected to the processing computer.
- Click Close to exit the dialog.
- Both computers are now connected and Direct Processing is set up. You can now configure and run your experiment.