Alignment
The module Shuttle & Find allows the correlation of two images, see Shuttle & Find.
Additionally to that functionality, in a ZEN Connect project, you can manually align images in your workspace to correct their position or size with respect to the samples. To do so, you activate the alignment process and start aligning image data. Alternatively, you can use the ZEN Connect Alignment workbench for a detailed manual alignment, see Aligning Images with ZEN Connect Alignment Workbench.
See also
Activating the Alignment Process
The alignment process lets you align your current session with fiducial marks or previous images. You can align image data manually.
- A ZEN Connect project is loaded.
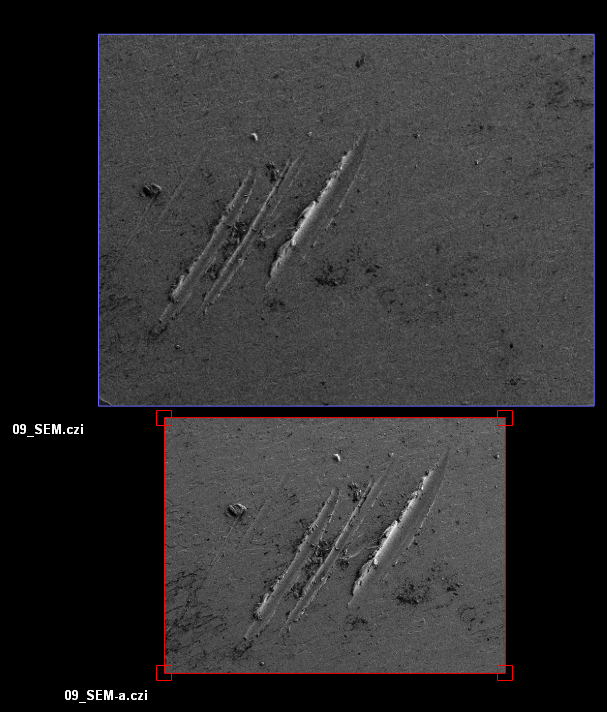
- In the Layer view, or in the Project view, select the image you want to align. Alternatively, you can select a session node to select a couple of images or click Select Region
 and select the image you want to align.
 - The image is marked with a square in each frame corner. As long as the alignment process is not activated, this is indicated with a little lock next to the cursor.
- On the selected image, right-click Align Data. Alternatively, in the Project/Layers tool, in the Layers view or in the Project view, right-click and select Align Data.
- You have activated the alignment process for one or more images. The Alignment toolbar is displayed below the Image view. You can start aligning image data. If you start an alignment on a session node, the set alignment is used for all current and future images of the session. You can use this if you change your sample between different systems and want to align their coordinate systems to each other.
Aligning Image Data
In the alignment process, you have various options to align image data. Note that you can change the alignment mode during the alignment process. The alignment edits you have made are preserved, but you have to restart the pinning process if you have inserted any pins before changing the mode.
Note that the alignment process can be executed multiple times. Each time you run the alignment process, the end result of the last alignment is used as the starting point for the new alignment. If the initial image was far out of alignment at the start, it is easiest to do the alignment process once roughly, and then do the alignment process a second time with more precision. The second alignment will use the first alignment as a starting point, and will allow you to establish a more precise alignment quickly.
- You have loaded a ZEN Connect project and activated the alignment process.
- In the Alignment toolbar, select one of the following alignment modes, and select the region you want to align.
Translate Only
- Click and drag with the mouse to translate the image you are aligning with respect to everything else.
- You can zoom in and out with the mouse wheel, or press and hold the Ctrl key to pan while you are in the process of aligning the image.
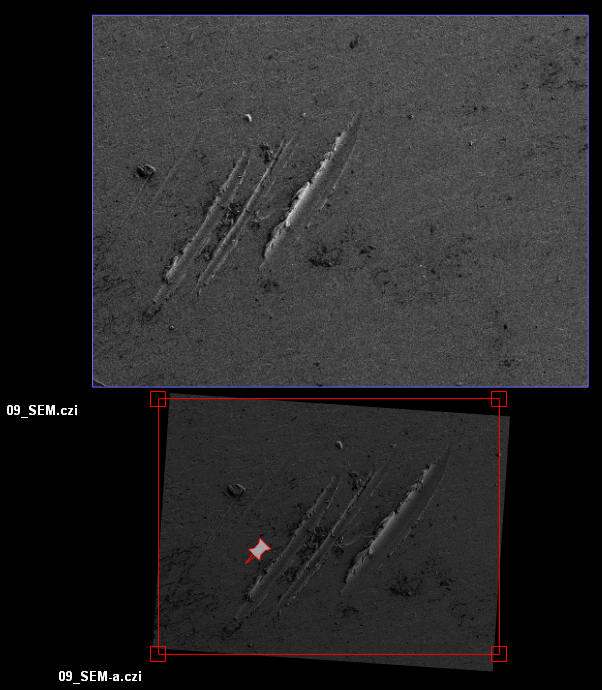
Translate and Rotate Only
- Right-click at the location you have lined up to insert the first pin, a red and grey pin icon. The pin locks the image to the reference at this location. Press DEL to remove the last pin you inserted.
- After you insert the first pin, your input will rotate the item around the first pin, when dragging it with the mouse.
Translate, Rotate and Scale Only
- If one of the images is smaller than the other, you can scale it. Right-click to insert a pin.
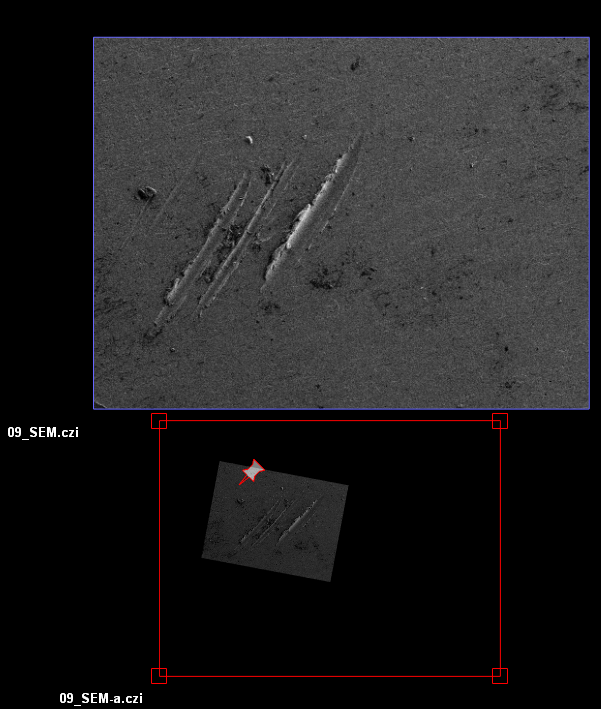
- Drag with the mouse to scale and rotate the image.
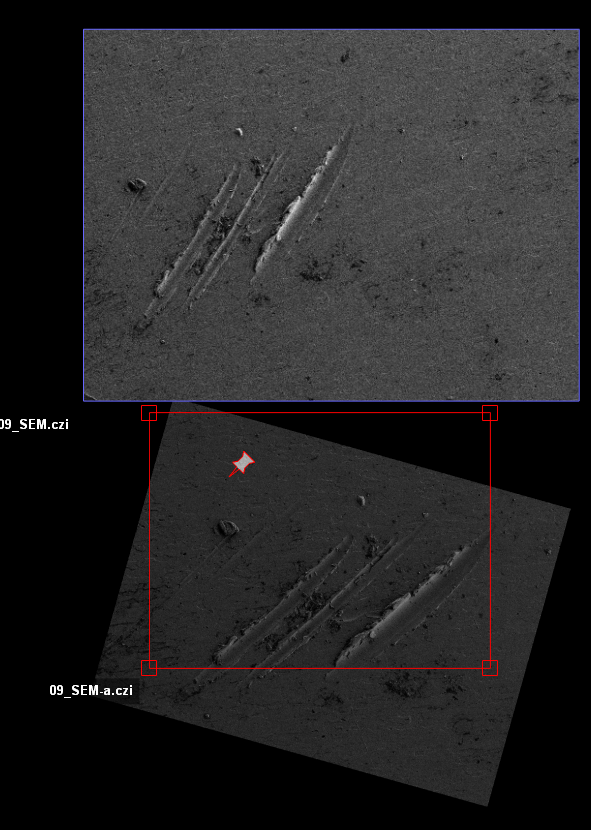
Translate, Rotate, Scale and Shear
- Right-click to insert a second pin, and drag with the mouse to shear the image.
- After you insert the second pin, your input will also stretch and shear the item.

Image data from microscopes should not need to be stretched or sheared to perform alignment. If you need to provide much input after inserting the second pin, this might be an indication of other problems, such as equipment calibration issues.
Alignment Handles
- If you select Alignment Handles, you can use handles to rotate, translate, and scale the image.

Flipping the image horizontally and vertically
You can flip your image, to mirror it.
- To flip the image horizontally, click
 .
. - To flip the image vertically, click
 .
.
Reset alignment
- To reset the alignment you performed, click
 .
. - The alignment is reverted as it was when you started aligning. The Alignment mode ist still activated.
Cancel alignment
- To cancel the alignment you performed, click
 .
. - The current alignment is cancelled and reverted to the alignment in place before you started the Alignment Mode. The alignment mode is not activated any longer.
Finish alignment
- Click Apply to finish the alignment mode and to apply the alignment information.
Aligning Non Image Data
- You have opened a ZEN Connect project with non image data.
- In the ZEN Connect tool or in the image view, right-click the non image data and select Align Point Position. Alternatively, in the ZEN Connect tool, select the non image data and click on the Align button.
- You enter the alignment mode and the marker color changes to blue.
- In the image area, click at the position where you want to place the none image data.
- Click on Apply.
- You have aligned your non image data.
Aligning Images with ZEN Connect Alignment Workbench
- You have opened a ZEN Connect project in the ZEN Connect Alignment workbench.
- You have added the necessary alignment tools to the workbench.
- In the image area or in the tree of the ZEN Connect Alignment tool, select the image you want to align.
- To translate the selected image, in the Translate tool, set the distance in x and y direction. Alternatively, translate the image via drag and drop in the image area.
- The translation is immediately displayed in the image area.
- To scale the image, in the Scale tool, set the scaling factor in x and y. Alternatively, use the handles displayed around the image for scaling.
- The scaling is adjusted according to the input.
- To rotate the image, in the Rotate tool, select the Rotation Center and then enter an Angle. The current rotation center is represented in the image by a pin. Alternatively, set the pin manually via drag and drop in the image and rotate the image with the handle.
- The selected image is rotated.
- To flip/mirror the image horizontally, in the Flip/Mirror tool, click .
- To flip/mirror the image vertically, in the Flip/Mirror tool, click .
- If you want to shear your image, in the Shear tool, activate Enable.
- Additional shearing pins are displayed in the image. The two pins that form the "baseline" for shearing are connected by a line.
- Use the two pins to position the baseline and then move the pinpoint to shear the image.
- The result is displayed instantly in the image area.
- Click Apply to save all alignment changes.
- You have aligned the selected image in the ZEN Connect project.