ZEISS Knowledge Base
Help
ZEISS Knowledge Base

Handling of Images and Data

Zooming to Extent

  1. You have loaded a ZEN Connect project.
  1. In the button bar below the Image View, click the Zoom to Extent icon.
    Alternatively, click on the Context menu button and select Zoom to extent.
  1. In the Image View, the sample holder is centered. All images in the ZEN Connect project are displayed.

Panning & Zooming

  1. In the button bar below the Image View, click the Pan & Zoom icon.
  2. With your mouse you can pan and zoom in and out in the Image View.

Shortcut for panning

  1. Press the mouse wheel and move the image. Alternatively, press the Alt key and left click the image.
  1. You can use panning without having to click the Pan & Zoom icon.

Selecting Region

You select a region to later apply the Alignment Mode to the image contained in this region.

  1. You have loaded a ZEN Connect project.
  1. In the button bar below the Image View, click the Select Region icon. Alternatively, press the CTR key, and click the desired image in the Project View.
  2. The image in the selected region is activated.
  1. In the ZEN Connect tool, both in the Project view and in the Layers view, the image within the selected region is highlighted.

Toggling the Display of Region Caption and Frame

For a better overview, you can toggle the display of the image name and of the frame of images in the Image view of your ZEN Connect project .

  1. You have loaded a ZEN Connect project.
  1. To toggle the region caption, in the button bar below the Image View, click the A button.
  1. The region caption of the images is displayed or hidden.

Selecting and Clearing Carrier/Holder

The sample is usually mounted on a carrier or directly on a sample holder. Select the appropriate sample holder for your configuration when you configure your project.

We offer specific sample holders and carriers with certain markers, e.g., "L"-markers or others. These CorrMic sample holders are necessary for a Shuttle & Find workflow. Note: If you change the holder/carrier after a S&F calibration, the S&F calibration needs to be redone.

  1. You have loaded a ZEN Connect project.
  1. In the button bar below the Image View, click the Select Carrier/Holder button.
  2. Select a template you want to add to your ZEN Connect project, and click OK.
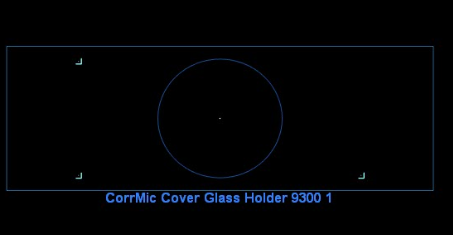
  3. The frame of the selected template is displayed in the Image View of your ZEN Connect project.
  4. To deselect the carrier/holder, click the Select Carrier/Holder drop down list and select Clear/Carrier Holder.

For information on correlative sample holders, see Correlative Sample Holders.

Grabbing an Image

You can create an image from the loaded ZEN Connect project.

  1. You have loaded a ZEN Connect project.
  1. In the button bar below the Image View, select the Grab Image button.
  2. A new tab opens. In the Image View, the grabbed image is displayed.
  3. Right-click and save the image to your computer.
  1. You have saved the image. It is not part of your ZEN Connect project.

Using Regions of Interest in Zen Connect

ZEN Connect offers the functionality to draw and delete regions of interest (ROI) in a project. The regions are shown in the project and listed in the Regions Tool and they are saved and loaded together with the project.

Deleting a Region of Interest in ZEN Connect

  1. You have loaded a ZEN Connect project with regions of interest.
  1. In the Regions tool, select your region in the list and click on the button.
    Alternatively, right-click on your region of interest and select Delete.
  1. The selected region is deleted.

Renaming a Region of Interest in ZEN Connect

  1. You have loaded a ZEN Connect project with regions of interest.
  1. In the Regions tool, select your region in the list and click on the button.
  2. Enter a name for the selected region and press Enter.
  1. The region is renamed according to your input.

Zooming to a Region of Interest in ZEN Connect

  1. You have loaded a ZEN Connect project with regions of interest.
  1. In the Image View or the list of the Regions tool, right-click on the region of interest and select Zoom To.
  1. The view zooms to the selected region.

Moving the Stage to a Region of Interest in ZEN Connect

  1. You have loaded a ZEN Connect project with regions of interest.
  1. In the Regions tool, double click on an entry of a region. Alternatively, select an entry and click , or right click the entry and select Move to.
  1. The stage moves to the center of the respective region.

Adding Measurements to a ZEN Connect Project

  1. You have opened a ZEN Connect project.
  1. In the Measurement Tab, click on the button for the respective measurement tool.
  2. In the image view, click to set the points for the measurement. For a distance measurement, set two points, for an angle three and for an area measurement create a polygon that covers the desired area.
  3. In case of area measurements, the last click has to be at the first point to "close" the polygon. Alternatively, click with the right mouse button to finish the polygonal area.
  4. The respective measurement is displayed in the view as well as the table of the Measurement tab.
  1. You have added a measurement to your ZEN Connect project.
Impressum
Carl-Zeiss-Strasse 22
73447 Oberkochen
Germany
Legal