Macro Environment
Macros are part of the Open Application Development (OAD) framework and enhance the software with the following features:
- Control every aspect of the user interface, such as automating repetitive tasks or routine tasks composed of several steps
- Interact with external software, such as ImageJ/Fiji
Basic Functionality
Note that all ZEN core versions (ZEN starter excluded) come with a basic macro functionality which allows to play existing macros within the software (Free Mode or OAD Macro tool).
Advanced Functionality
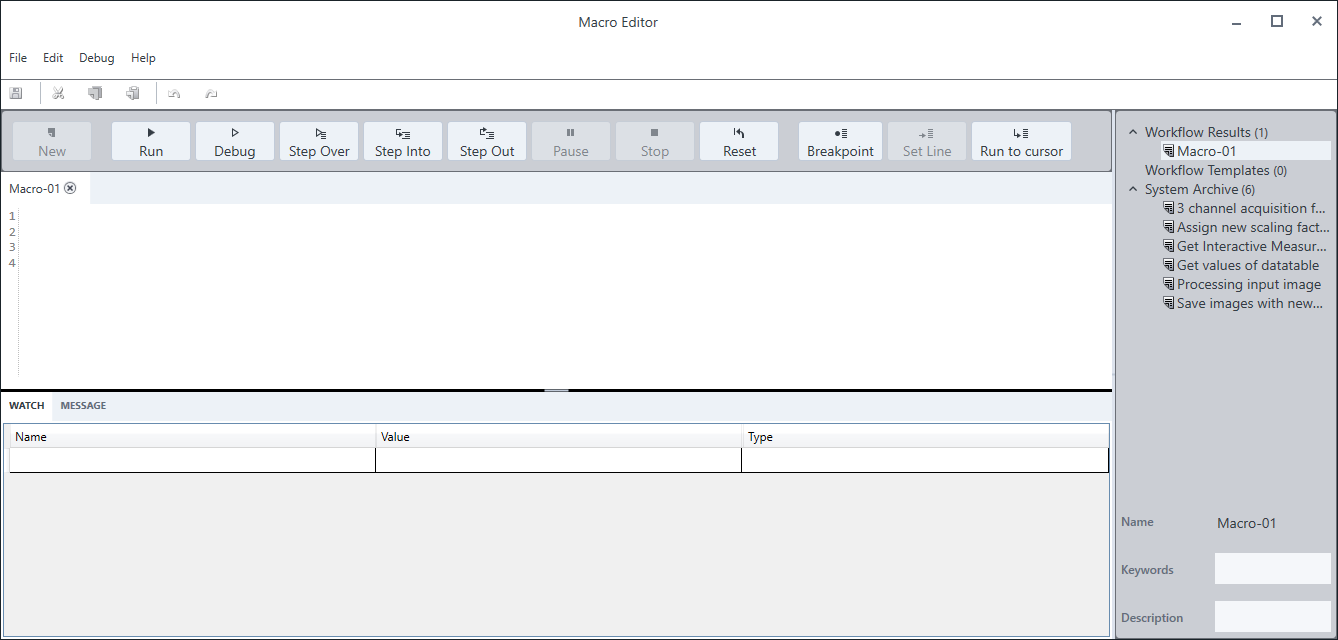
The Macro Environment module (licence required) enables you to load, preview, and run macros that are available on your system. It also contains the Macro Editor, which enables you to edit, run, or debug macros according to your needs or to write macros from scratch. The modular software interface of the software means that you can write macros but not record them automatically.
Python is used as the programming language for macros. The programming interface is implemented in the Macro Object Model. To open the Macro Object Model documentation, start the Macro Editor and navigate to Help > Macro Object Model…
See also
Creating a Macro
- You have opened the OAD Macros workbench with the OAD Macro tool.
- Click Macro Editor.
- The Macro Editor dialog opens.
- Right click Workflow Templates in the macro list on the right and select Add Macro. Alternatively, click New in the button bar, or click the File menu and select New Macro.
- A new macro is created and given a standard name composed of the string "Macro-" plus an ascending number.
- Rename the macro and give it a meaningful name via right click on the new macro, or via the File menu.
- Write your macro and save it.
- The first lines of a macro are displayed in the Preview section of the OAD Macro tool. Therefore, it is recommended to begin the macro with a comment of the macro's main features.
- Close the editor.
See also
Adding a Macro in Job Mode
As a supervisor, in Job Mode, you insert OAD Macros workbenches and tools. In the Macro Editor you edit the macros. In order to use macros, e.g. from the system archive, you copy the code into the respective macro of the Workflow Results section.
- Add the OAD Macros workbench to the job template.
- In the OAD Macro tool > Selection section > Workflow Results, the macro is listed. If there are multiple macros in a job, they will all be listed in this section, where the first entry belongs to the first macro tool, the second belongs to the second macro tool in the job, and so on. The naming convention for the first macro is Macro-01 and then continues to count up for each workbench you add to the job template. You cannot rename or delete it.
In the System Archive section, existing macros are listed. - To use the macro, click Macro Editor.
- The Macro Editor opens.
- For each OAD Macro workbench you added to the job, a tab is displayed and is now tightly linked. The macros belonging to the job are listed in the workflow results section of the Macro Editor.
On the right side the same macros as in the OAD Macros tool are displayed. - On each Macro<n> tab, add code into the macro of the Workflow Results section. You can either type in the program code directly or copy it from one of the available macros. To do so, on the right side, click on the desired macro, e.g., Get values of datatable.
- A tab opens containing the macro code.
- Copy the complete code and paste it to the Macro<n> tab, and save it.
- The macro contains the code.
- You cannot close the Macro tab.
- When the job is run, the first macro will be executed with the first workbench, the second macro will be executed for the next.
Copying a Macro in Job Mode
As a supervisor, in Job Mode, you insert OAD Macros workbenches and tools. In order to use macros, e.g. from the system archive, you copy the code into the respective macro of the Workflow Results section.
- Add the OAD Macros workbench to the job template.
- In the OAD Macro tool > Selection section > Workflow Results, the macro is listed. If there are multiple macros in a job, they will all be listed in this section, where the first entry belongs to the first macro tool, the second belongs to the second macro tool in the job, and so on. The naming convention for the first macro is Macro-01 and then continues to count up for each workbench you add to the job template. You cannot rename or delete it.
In the System Archive and Workflow Templates section, existing macros are listed. - Select the existing macro that you want to copy, and click Copy to Task.
- A warning dialog opens informing you that you will overwrite the existing task macro with the selected macro.
- Click Yes.
- A dialog opens that allows you to overwrite the name of the task macro with the name of the selected macro.
- Click Yes.
- The code of the selected macro is added to the task macro and the name of the task macro is renamed according to the macro whose code has been copied.
Managing Macros
- You have opened the OAD Macros workbench with the OAD Macro tool.
- Click Macro Editor.
- The macro editor dialog opens.
- Right click the macro in the list on the right.
- A context menu is displayed.
- Select the action you want to perform for the respective macro, e.g. Delete or Rename.
- Alternatively, you can also use the File menu to manage the currently selected/open macro.
See also
Running a Macro
- You are in Free Mode or Job Mode and have opened the OAD Macros workbench with the OAD Macro tool.
- Select the macro in the Selection section.
- If you want to load a macro you have available in a file, you need to add it to the software first, see Importing and Exporting a Template.
- Click Apply. Alternatively, open the Macro Editor and click Run.
- The macro is executed.
- If the macro does not end automatically or does not work properly, you can enforce termination by clicking Stop.
See also
Debugging a Macro
Macros are debugged from within the Macro Editor.
- The macro to be debugged is opened in the Macro Editor.
- Right-click a variable name in the macro source code and select Add Watch.
- The variable is added to the Watch tab.
After entering all variables and functions to be monitored, you can debug the macro using one of following actions:
|
Action |
Description |
|---|---|
|
Run |
Runs the macro without debugging. |
|
Debug |
Runs the entire macro in debug mode. Execution of the macro halts at previously defined breakpoints. |
|
Step Over |
Runs the macro line by line. If the current line contains a function call, the function is executed. The debugger continues in the next line of the macro. |
|
Step Into |
Runs the macro line by line. If the current line contains a function call, the debugger jumps into the function. The function is then executed line by line. After the function has finished, the debugger jumps back into the macro to the next line after the function call. |
|
Stop |
Halts the debugger at the current line. |
|
Reset |
Deletes any macro or debugger memory entries. Use reset to ensure a clean debug run after having debugged before, e.g. if you made corrections to the code and wish to debug anew. |
|
Breakpoint |
Marks the current line as a breakpoint. If you wish to use simple debugging instead of the line-by-line debugging methods, execution halts at a breakpoint. This enables you to monitor your previously defined variables and functions at pre-defined positions. Debugging this way is usually faster than using the line-by-line debugging methods, but requires knowledge about where to look for possible bugs. |
|
Set Line |
Runs and debugs the current line, i.e. the line of the current cursor position. |