Collaborative sessions in arivis Pro VR
This article explains the principles and tools used in arivis Pro VR to set up collaboration sessions that can be shared by multiple users.
Principles of Collaborative VR
VR volume rendering in image analysis provides a powerful and intuitive way to experience full volumetric rendering of image data. The depth perception and interaction possibilities of VR make it much easier to comprehend the relation between shape and function and to see how the spatial relationships between objects can affect our samples. However, communicating this increased understanding can be challenging when interlocutors don’t have access to the same tools. ZEISS arivis Pro VR offers a collaborative mode enabling multiple users to share the same virtual space thereby facilitating communication and collaboration when visualising 3D image data.
Collaborative sessions in arivis Pro VR work through a combination of tools and methods, the concepts of which may benefit from clarification.
Volume rendering for each user (locally)
This has several implications:
- Collaborative VR requires that each user have their own workstation and arivis Pro VR license. It is possible to join a collaborative VR session without a headset although clearly the level of interactivity will be limited.
- It is not possible for two users to join a session from the same workstation. This is largely precluded by the technical requirements of PC VR support. Indeed, at the time of writing no VR vendor supports simultaneous VR rendering for multiple headsets on a single workstation.
- Enabling local rendering means that the data for each session is downloaded locally for each user and therefore:
- Users need to ensure they have enough available local storage space to download the datasets for the sessions they wish to participate in.
- Some time will be required to download the dataset locally before attending a session and the loading time will be dependent on the available download bandwidth and speed, and the size of the dataset.
- The actual data exchange between the users during a session includes:
- Volume position, scale and rotation within the VR space.
- Volume rendering options such as rendering mode, opacity curves and channel visibility.
- Information about the position of the various users’ locations and controllers positions for the purpose of rendering an avatar of these users within the virtual space.
- Object filter settings, like selected object tags, clipping settings and active detail view ROIs.
- Collaboration tool actions like the interactive pointer or the highlight sticker.
This approach ensures optimal performance by minimizing the data streaming requirements while limiting lowest common denominator issues (if one user has lower rendering quality due to GPU performance this does not affect the other users).
User roles and licensing
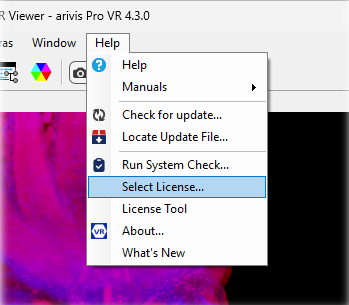
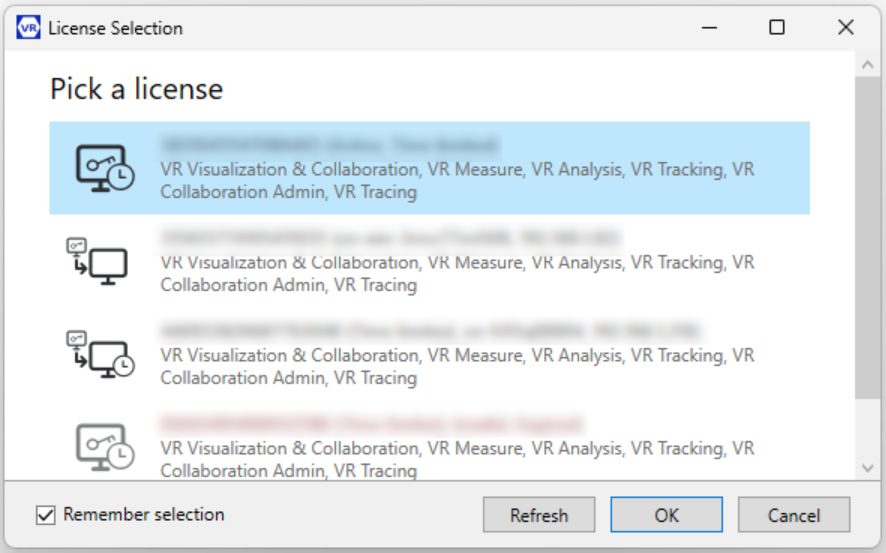
As with most modules of arivis software the collaborative module is license protected. The licensing dictates which arivis installations have the rights to create or edit collaborative session templates. While every basic VR license is sufficient to join a running session or start a new session from an existing template, the VR Collaboration Admin license is required to create or edit session templates. We can find out what modules are available and select the appropriate license accordingly by going to Help > Select License...:
Additionally, access to the collaborative server used to manage the sessions and users is managed through individual user accounts. User management, including creation of users and modifying of the login credentials is done through the collaboration server. Collaboration servers are managed by ZEISS arivis support. Contact ZEISS arivis support if you need to create or modify user accounts.
These are the main points of consideration concerning licensing and user access and roles:
- A user account is required to access the collaborative panel and join a session.
- Each session has its own participants list. Only users with existing accounts can be invited to participate in a session.
- Any user who logs in to the collaboration panel on a computer with a VR Collaborative Admin license can create or edit session templates.
- Any user added to the participants list can start or join a session.
- The user who starts the session becomes the session owner and starts with the Presenter role.
- Only one user can be presenter in a session at a time though the users can request the presenter role at any time and the presenter can cede this role over to any user who requests it.
- The session owner can always reclaim the presenter role at any time from the session control panel.
- Only the presenter can change the visualization parameters (rotation, scale & position of the volume, position of clipping planes etc).
With this in mind, let’s look at the various aspect of Collaborative VR.
Logging into the VR Collaboration panel
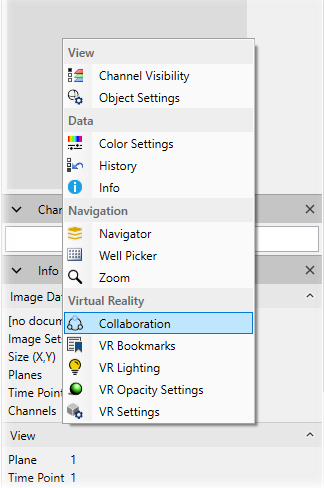
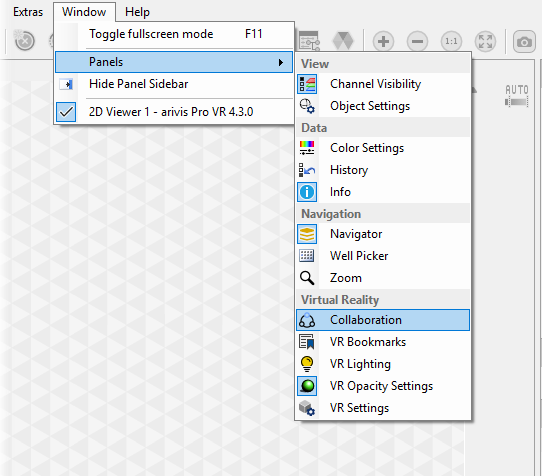
Whether joining or creating a collaborative session, first we need to log in to the Collaboration server. This is done through the Collaboration panel. Like other panels we can access it by right-clicking in the panels or through the Window menu.
This will open the Collaboration Panel at the login stage:
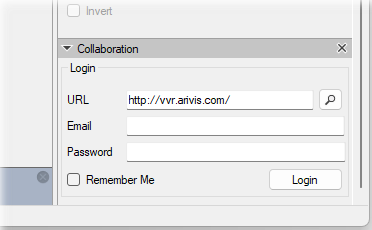
After entering login credentials and clicking Login we can see all the active sessions that the user created or was invited to.
Note that, as mentioned in the introduction, user accounts are created on the collaboration server itself. This cannot be done within the arivis Pro VR application. Please contact your local ZEISS arivis support team if you need an account.
Starting a session
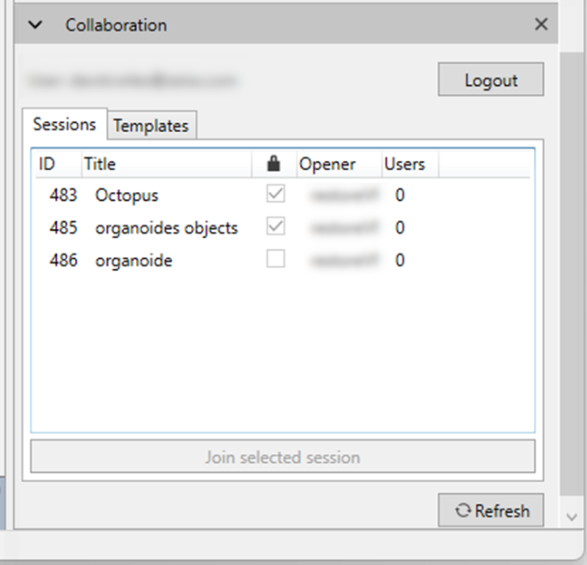
When we log in to the collaborative panel we can see 2 tabs:
- Sessions
- Templates
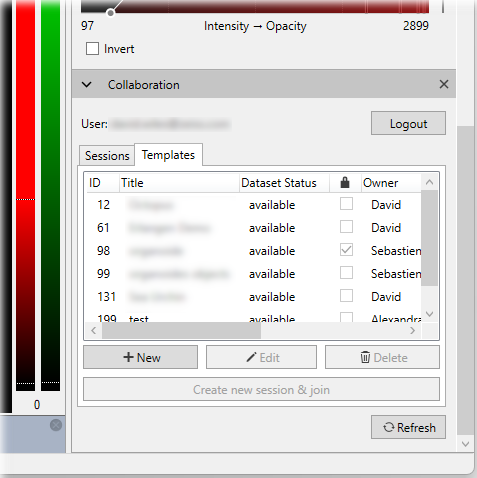
- To start a session, go to the Templates tab.
- Click on any available template then click on Create new session & join.
- The session will start and we can put on our headset and start collaborating with participants.
Note that, as mentioned in the introduction, any user can start a session but the user who starts the session automatically becomes the session owner and starts as presenter (see below for the various tools available in a collaborative session).
Joining a session
Once a session is started it will appear in the Sessions tab for any user in the participants list.
- To join a session, simply double click on the session you want to join or select the session and click Join selected session.
- Then we can put our headset on and start collaborating with other attendees.
Editing a session
If any parameters of a session need to be modified for whatever reason, you can do so at any time before the start of the session.
- To do so, start by selecting the session you want to edit in the Collaboration panel and then click Edit (pencil icon).
- Edit any of the session parameters as above.
- The session parameters will then updated on each participant's machine the next time they log on to the Collaboration panel on their system.
Note that changing the session dataset parameters will mean that the dataset will need to be downloaded again by the participants when they log in. Avoid making changes at the last minute to ensure there is enough time for participants to download the data prior to joining the session.
Leaving a session
- To leave a session, remove the headset and click Leave Session in the Collaboration panel.
Creating a new template
To start a collaborative session, we must first create a template.
- Click + New to open the Template configuration window.
- The Edit a template for collaborative sessions window will open.
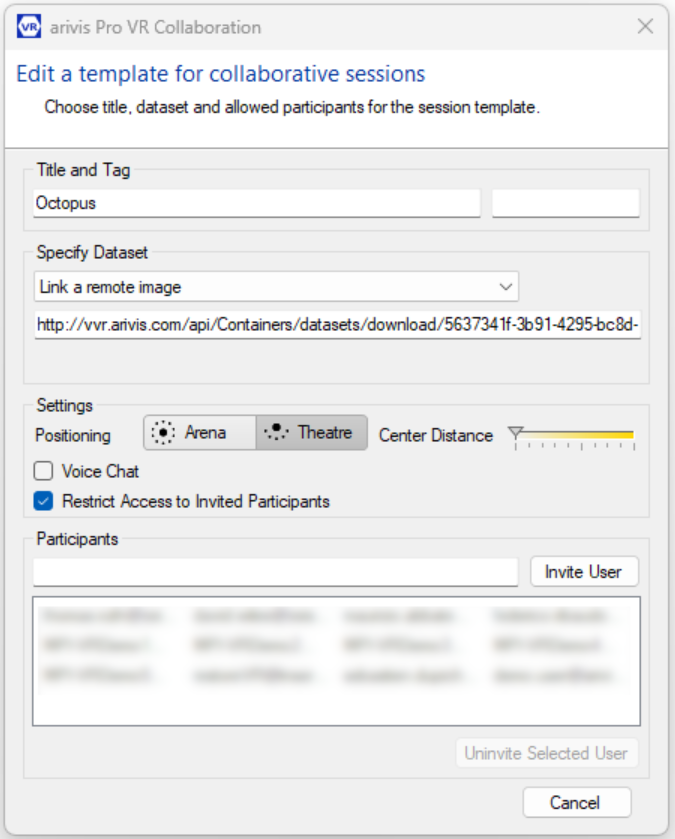
- In the Edit a template for collaborative sessions window, we have to define:
- Title of the session
- The dataset to be used and how it is shared
- Session settings
- Participants
Session settings
A few additional options are available when configuring templates. Specifically, we can set up the parameters of the initial position of attendees as they join and set up voice chat options.
The positioning can use either an Arena style where users join the session in a circle or a Theatre mode where collaborators join side by side.
In Arena mode, after the first user enters the session, the second will join on the opposite side of the volume pedestal from the first. As more users join, they are automatically assigned to gaps halfway between those already present.
In Theatre mode, users join around a semi-circle in front of the volume pedestal.
|
|
|
|
Arena |
Theatre |


In either case, the Centre Distance sets how far away from the pedestal users will be when they join. Remember that users are always free to move around the virtual space as they would in any normal VR session, so this is only the starting point. But conversely, it is generally a good idea to make sure the users are close enough to the pedestal to interact comfortably with the data. A distance of 50cm to 1m is usually a good starting point.
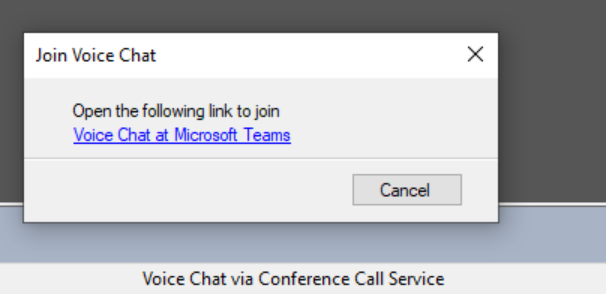
Next, you must set the audio options. As with most collaboration scenarios in real life, the ability to communicate verbally is key to successful collaborations. Collaborative sessions in arivis Pro VR can be configured to use a Mumble server, or simply use whatever audio/video conferencing system you have available to run in parallel to the VR session. Details on how to configure Mumble are available in the Help files. If you prefer to use a remote conferencing service (e.g. MS Teams, GoToMeeting, Webex), configure your session there first then simply copy and paste the joining link in VR session settings. When users join the session, a message will pop up with the link provided for the user to follow and connect to the conferencing service.
Once in the call, you can return to the VR session with the audio session running in parallel.
Adding participants
The final step in configuring a collaborative session is the selection of participants.
Anyone can be invited to join a collaborative session as long as they have:
- A computer capable of running the software
- arivis Pro VR installed on their computer with an active license
- Been set up as a user on the collaboration server (Contact support to have an account created)
- A compatible VR headset (optional)
Note that it is possible to join a VR collaborative session if you do not have a VR headset, though the experience will be inherently limited.
- To add a user to the session, simply type their username in the first box in the Participants section then click Invite User. If the user account exists, the invitation will be sent once the session creation is complete and it will appear automatically when they login to the Collaboration panel.
- Add more users one-by-one as above.
- If you then want to remove a user you can do so by selecting them in the invited user field and then click Uninvite Selected User.
- Finally, click Save when all participants have been added, and all other details of the session have been confirmed.
Participating in a collaborative session
While in a session users have multiple options, depending on their current roles within the session.
The session Owner is the user who created the session. They join the session as Presenter.
The Presenter can navigate through the volume, change clipping planes and visualisations settings (rendering modes, level of detail rendering), and use the pointer and highlight tools to draw attention to any part of the volume. Everything the presenter does is shared automatically with all the attendees.
All other users join the session as Attendees. Attendees have no control over the volume. Their avatars (headset and controllers) are visible to all, and if using voice chat can be heard by all attendees, including the presenter. Attendees can also adjust their own personal visualisation settings based on their computer performance (e.g. increasing/reducing the rendering step size, changing between lab, floor or no environment), but otherwise have no power to affect what others see. Attendees can move freely within the VR space within the boundaries of their own local physical environment or use locomotion for more flexibility. Session participants can fly around by pressing the thumbstick on their right controller forward or backwards. To rotate themself in 30° steps, they can swipe the thumbstick to the left or right.
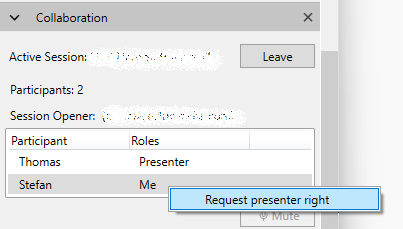
At any point an attendee can request Presenter privileges by clicking the A button of the right controller in VR. Non-VR participants can send their request by opening the context menu at their name in the Participant list of the Collaboration panel. When they do the current presenter is prompter to either accept or decline the request. If the request is accepted, they then have all the tools of the presenter. Note that the session Owner can reclaim presenter privileges at any time through the Collaboration panel in the arivis Pro VR desktop window. In VR this is possible with the Manage tool of the Collaboration tool set.
Attendees who join without a headset can also join the audio and navigate freely within the VR space using the normal mouse-based navigation tools and they appear as a headset to other attendees, but without controllers. All participants can send each other text messages via the chat section of the Collaboration panel. Participants in VR will see new messages as an automatically disappearing popup window in VR.