Applications
Running a public application
Learn how to run your first application.
Applications are in-platform components that provide access to pre-built workflows and modules. Public applications are created by our experts and aim to automate the entire analysis job for users, making it accessible to those who lack coding experience. You can also create an application from scratch or request an application according to their analysis needs.
Here's a step-by-step guide to running an application:
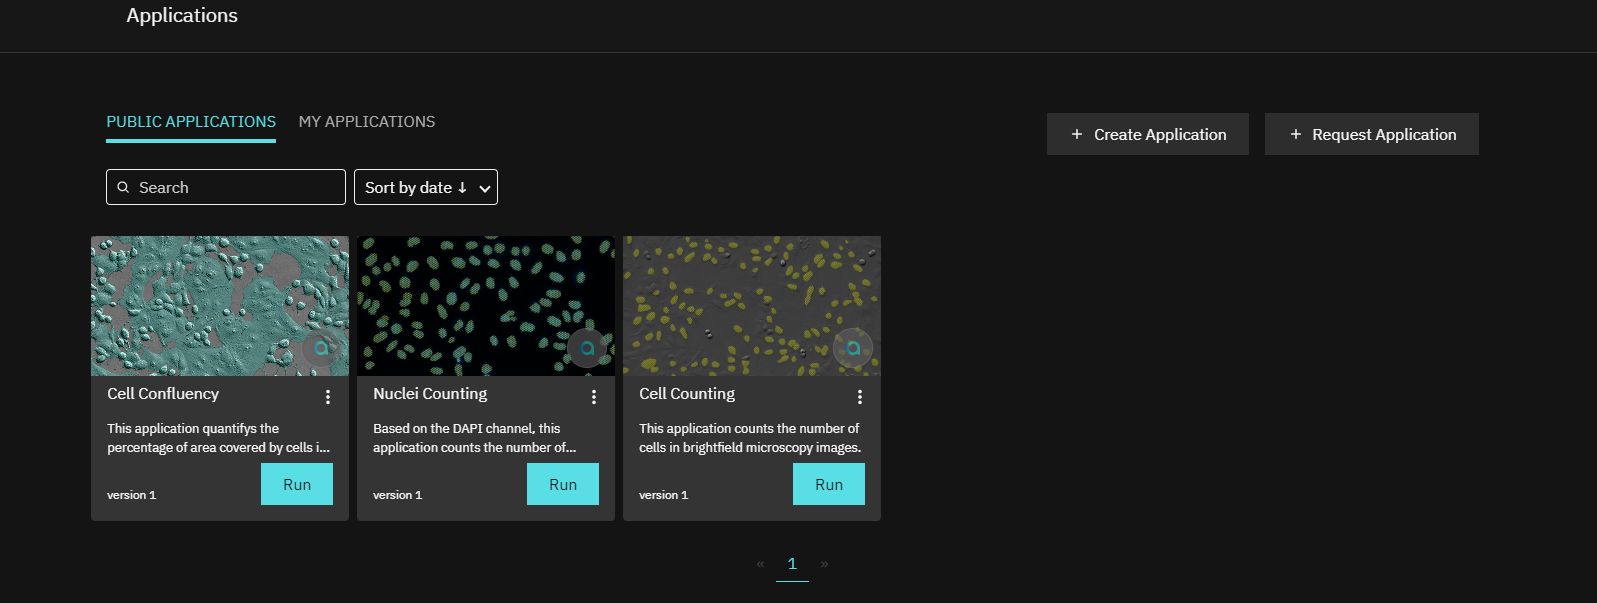
- Log in to the platform and go to the menu. Click on the Applications section.
- You will see two sections: My Applications and Public Applications.
- If you have previously created applications, they will be located in My Applications.
- If you want to use an application that has been shared publicly by our team, you can find it in Public Applications.
- To use a public application, click on the image of the application you are interested in. This will take you to a page with detailed information about the application.
- Once you have reviewed the information and are ready to run the application, click on the Run button. This will start a new run of the application.
- Give the run a name that is descriptive of what you are doing with the application. For example, if you are analyzing data from a specific project, you could name the run after that project.
- Select the image data that you want to use for the run. You can either upload your own image data from your computer or select image data that you have used before on the platform.
- Click on the Run button to start the application. The platform will now begin running the application using the image data that you selected.
- Once the application has finished running, view the results under the Results section on the same Applications page. There is no need to go to another tab. Simply scroll down to the Results section to view the output generated by the application.
- If you want to view the logs for a specific run, click on that run's result in the Results section and then click on the View Result Details button, and finally the View Logs button. This will display the logs for that particular run. On the same page, if you click on the Share button, you'll see your options to share your results.
- If you want to inspect the results for segmentation purposes, you can do so by going into a specific result from the Results section and clicking on the Inspect Segmentation button on the opened page. This will bring up an interactive visualization of the results, allowing you to explore predictions in more detail. You can use the tools provided in the visualization to zoom in and inspect individual segments.
That's it! You have successfully run your first application.
Have questions? We're here to help.
Have a question about running a public application? Contact our support team.
Creating your own application
Here's a step-by-step guide to create your first ever application.
- Go to the Applications section in the menu.
- On the right-hand side of the screen, you will see two buttons. Click the Create Application button.
- In the dialog box that opens, give a name to your application in the Name your application field.
- Choose a model from your previously trained models to base your application on. You can do this by clicking the Select a machine learning model from your training field and choosing a model from the list of available models.
- Once you have selected a model, its properties will appear on the screen so that you could review it.
- Select an object measurement to define the application. You can choose from object counting, area percentage, object geometry, or a workflow you have built in the platform before. If you have a specific object measurement request, you can send a request by clicking on Send Request.
- After defining the object measurement, click the Create Application button to create the application.
- Once your application has been created, you can find it in the My Applications section of the Applications page. From there, you can run the application and view its results.
Have questions? We're here to help.
Have a question about creating your own application? Contact our support team.
Requesting an application
Couldn't find what you are looking for? Reach out to our experts to request custom applications designed for your task.
- Go to the Applications section in the menu.
- On the right-hand side of the screen, you will see two buttons. Click the Request Application button.
- In the request form that opens, provide as much detail as possible about the application you need. Describe the parameters, type of objects, and type of segmentations you need.
- You can also upload a supplementary image from your data as an attachment to help our team understand your requirements better.
- Once you have completed the request form, click the Send Request button.
- Our team will review your request and get in touch with you as soon as possible to discuss your requirements and the feasibility of developing the application you need.
Have questions? We're here to help.
Have a question about requesting an application? Contact our support team.